
Google Workspace, formerly known as G Suite, is Google’s cloud computing platform that offers productivity and work collaboration tools. If you’ve not been living under a rock, you might know at least a few of the products — Google Slides, Docs, Sheets, Calendar, and others. For proper DMARC setup, you need to first configure SPF and DKIM.
SPF Records allow receiving servers to check whether an email with the specified source domain was actually sent from a server authorized by the owner of this domain. The DKIM adds a digital signature to each message. This allows the receiving server to check if the message has been falsified or changed in transmission.
We’ll be discussing how to authenticate SPF and DKIM on your Google Workspace and how to setup DMARC.
How to setup SPF record
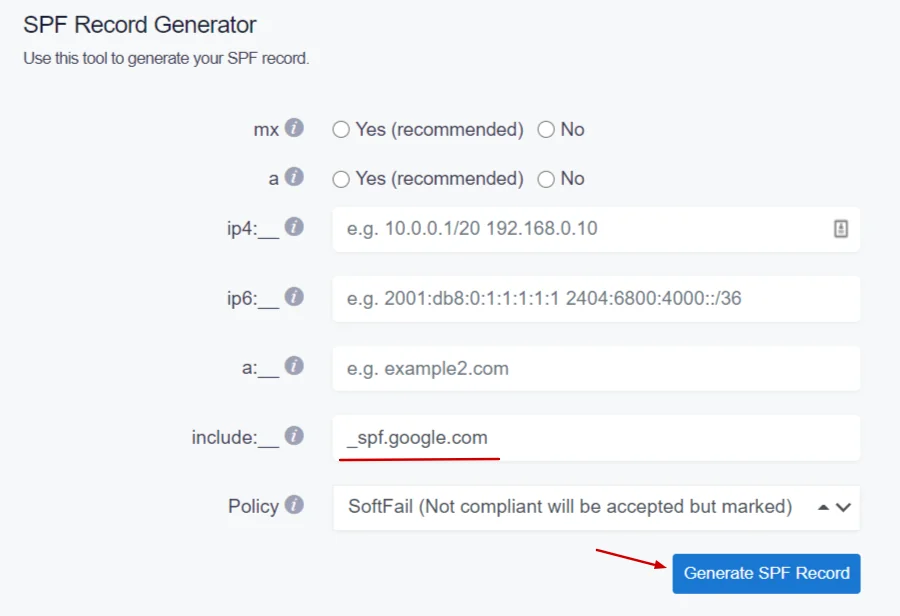
In order to authorize Google to send emails on your domain’s behalf, you will need to create or update your SPF record, which includes the following mechanism:
include:_spf.google.com
You can achieve this easily with our SPF Record Generator tool; here are the steps:
- Generate a new SPF Record by authorizing Google
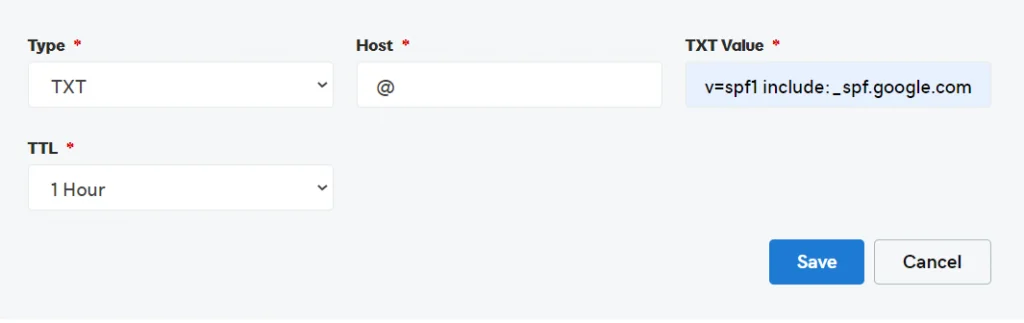
2. Copy the newly generated SPF Record
3. Update your DNS TXT Record for SPF at your DNS provider (We will show examples with GoDaddy and Cloudflare)
Ex. GoDaddy
Ex. Cloudflare
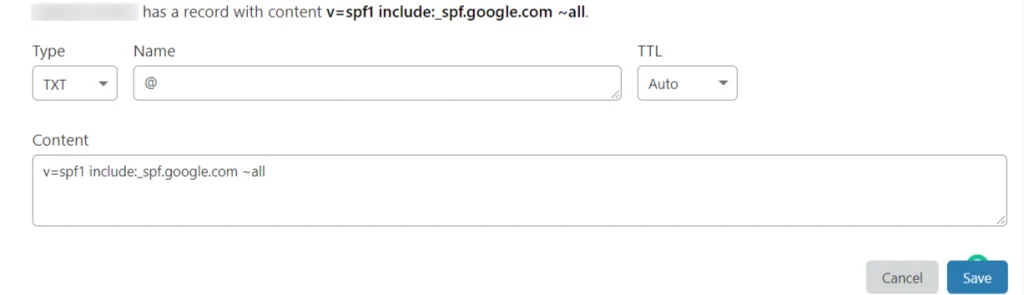
Click Save.
Important Note: Make sure you don’t create multiple SPF TXT records on one domain. If you do, SPF will return a PermError.
If you’re using multiple IPs, ESPs, and third-party services for your various email strategies, you should include them in a single SPF Record.
E.g v=spf1 ip4:17.67.137.221 include:_spf.google.com include:thirdpartyservice.com ~all
Configuring DKIM for GSuite
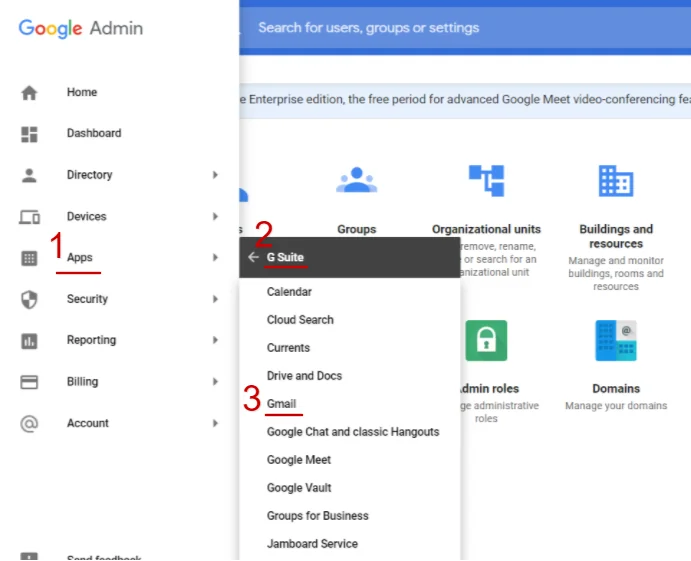
1. In the Google Admin Console (at admin.google.com)
2. Open Apps> G Suite> Gmail
3. Click ‘Authenticate Email’.
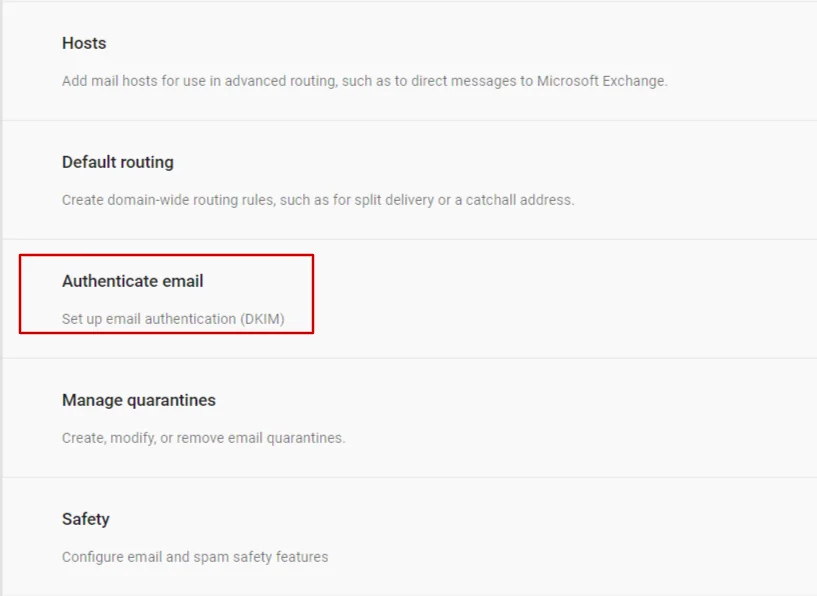
4. By default, your main domain is selected. Click on the primary domain name or select another domain where DKIM will be used.
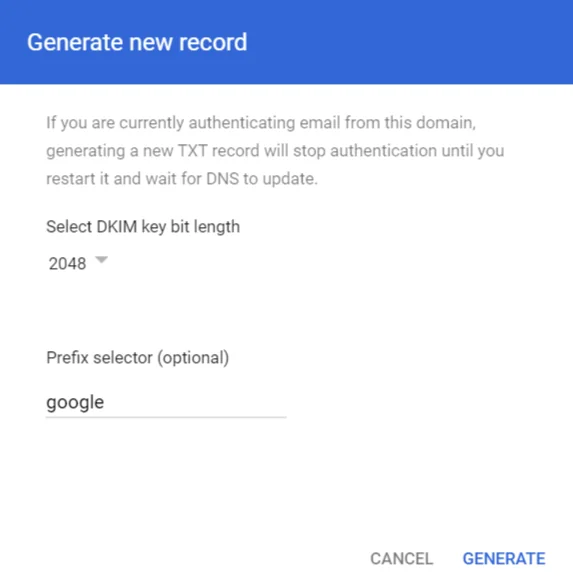
5. Click “Generate New Record”. GSuite DKIM Public Key will be generated for your domain – copy these values.
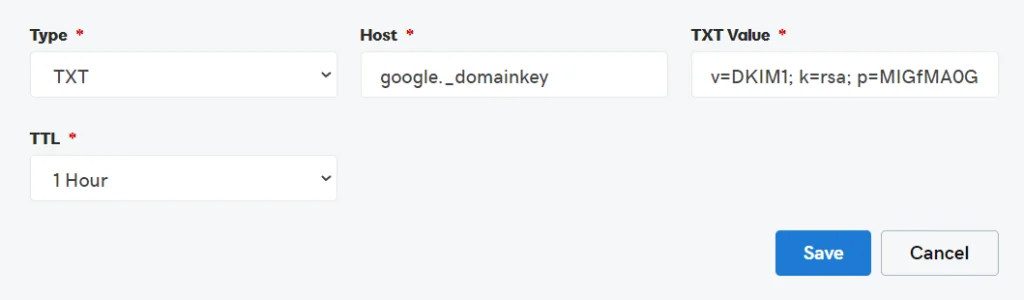
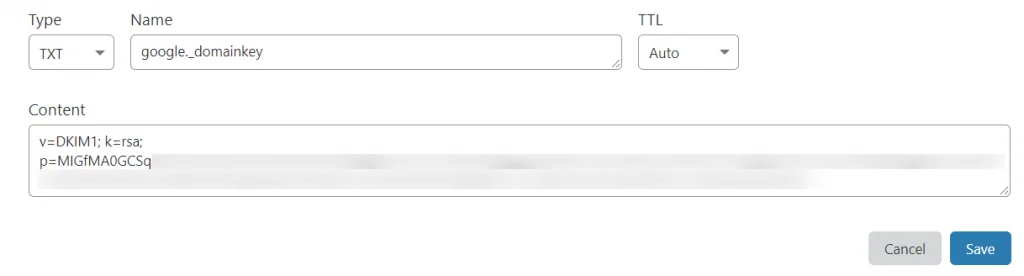
6. Publish the provided TXT Record into your DNS
[selector]._domainkey.yourdomain.com – in this case, google._domainkey.yourdomain.com.
Ex. Godaddy
Ex. Cloudflare
7. Go to the administrator console and click the ‘Start Authentication’, and you’re all set!
DMARC Setup for Google Workspace
Now that you’re done with SPF and DKIM configurations, let’s learn how to setup DMARC for your Google Workplace.
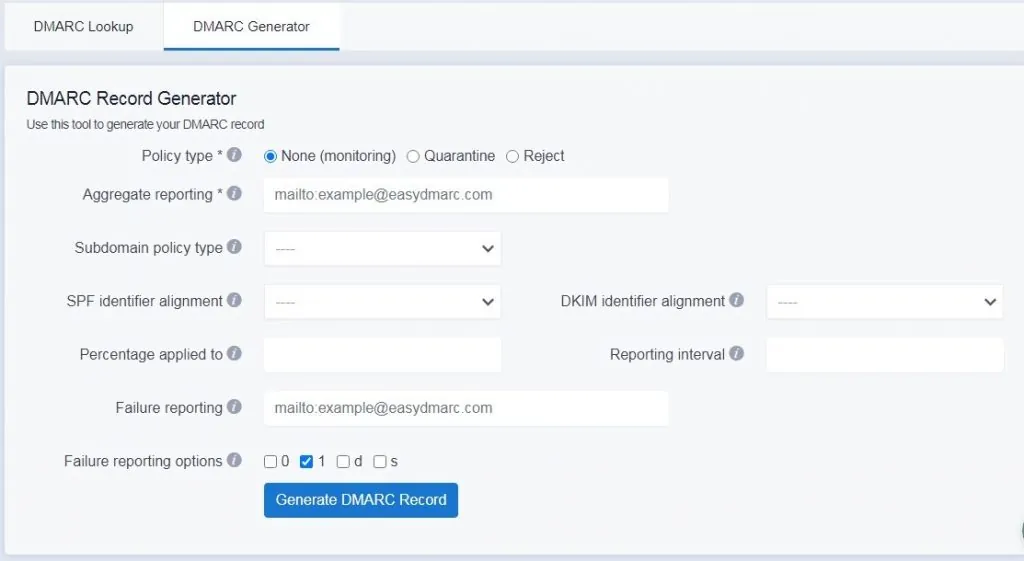
To setup DMARC, first, generate the record for your domain — go to EasyDMARC’s DMARC record generator page and create it.
Publish the generated txt record in your DNS. You will start receiving DMARC XML reports within 48 hours.
EasyDMARC will analyze your DMARC reports and give you suggestions, alerts, and configuration instructions. We also have a comprehensive guide on how to implement DMARC on EasyDMARC.
Your email system is now secure!