


This instructional article will demonstrate the Hostinger Email configuration process of the Sender Policy Framework (SPF) and DomainKeys Identified Mail (DKIM) signatures to ensure Hostinger email passes the DMARC alignment check, eliminate spam from your email, and increase security.
The process of configuring SPF
In order to authenticate the Hostinger Email on SPF, please follow these steps:
- Login and head to your DNS Zone provider.
- Create a new TXT record
- Input the DNS name as @ or your domain name
- Input the DNS value as v=spf1 include:_spf.mail.hostinger.com ~all
- Save the record
- Wait up to 72 hours to allow your DNS to process the changes.
The screenshot below will show you an example of the SPF record. We’ll be using CloudFlare for this example.

Important Note: Each domain must have only one SPF TXT record. If you have multiple SPF records, SPF will return a PermError.
If you are using multiple IPs, ESPs, and third-party services for your various email strategies, you should include them in a single SPF record.
E.g v=spf1 ip4:18.57.156.221 include:_spf.mail.hostinger.com include:thirdpartyservice.com ~all
The process of configuring DKIM
In order to authenticate the Hostinger Email on DKIM, please follow these steps:
- Login to your hPanel (Hostinger Portal)
- Press the “Manage” button beside the desired email account.

- Choose “Manage” from the right-hand “Domain settings” windows.


To set up DKIM, you have two methods to choose from:
- using CNAME records or
- using a TXT record.
To configure via CNAME records:
a. Head to the “Increase Email Deliverability” section, and you’ll see the expected records displayed.
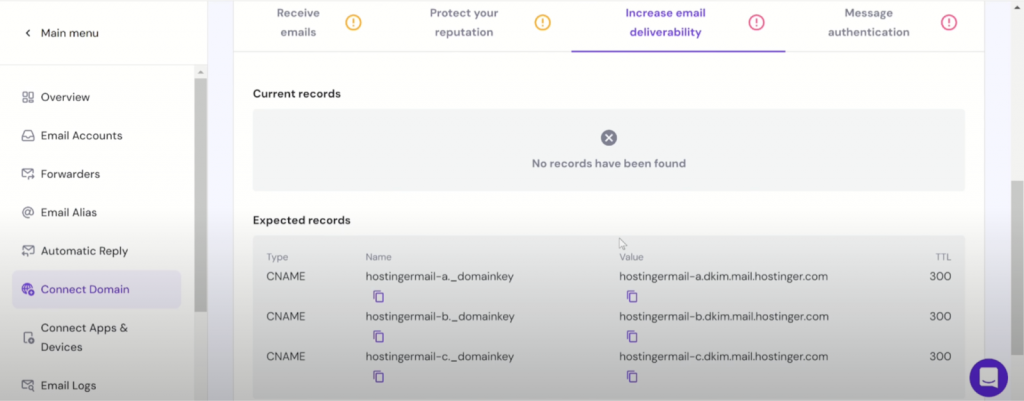
b. Copy the name and value of your CNAME records
c. Head to your DNS zone and create a new CNAME record
d. Input the details of your CNAME record
Screenshot below will show you an example of the CNAME record. We’ll be using CloudFlare for this example.

Note: Proxy Status must be turned off if you are using a CDN, such as Cloudflare.
e. Save the record.
f. Please repeat steps B through E for the remaining two records.
g. Make sure that
To configure via TXT record
a. In the Emails page, navigate to the “Custom DKIM” section.
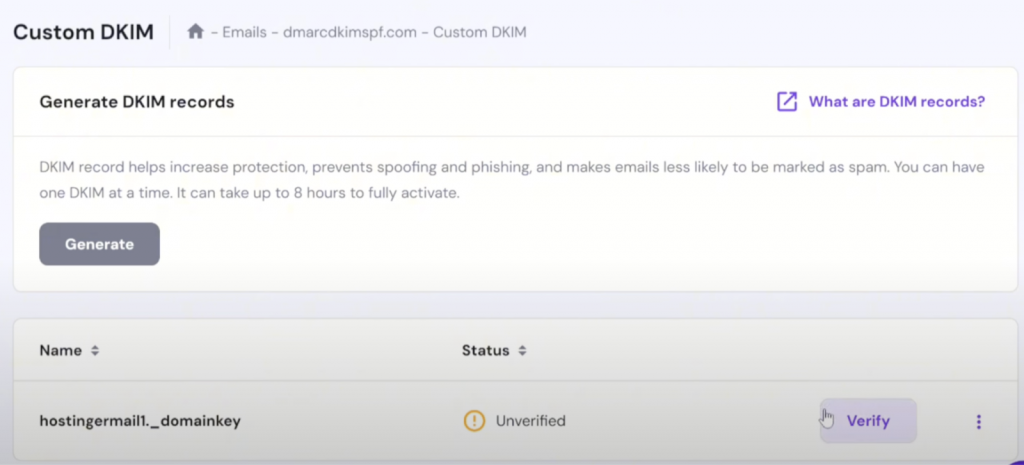
Important Note: You can also use the “Generate” option to generate your own custom DKIM record, but if this button is grayed out as above, you’d need to upgrade your Hostinger Email plan to enable this feature. However, you don’t need it as long as you use the normal TXT version.
b. At the bottom of the page, click on “Verify”
c. Copy the name and value of the TXT record
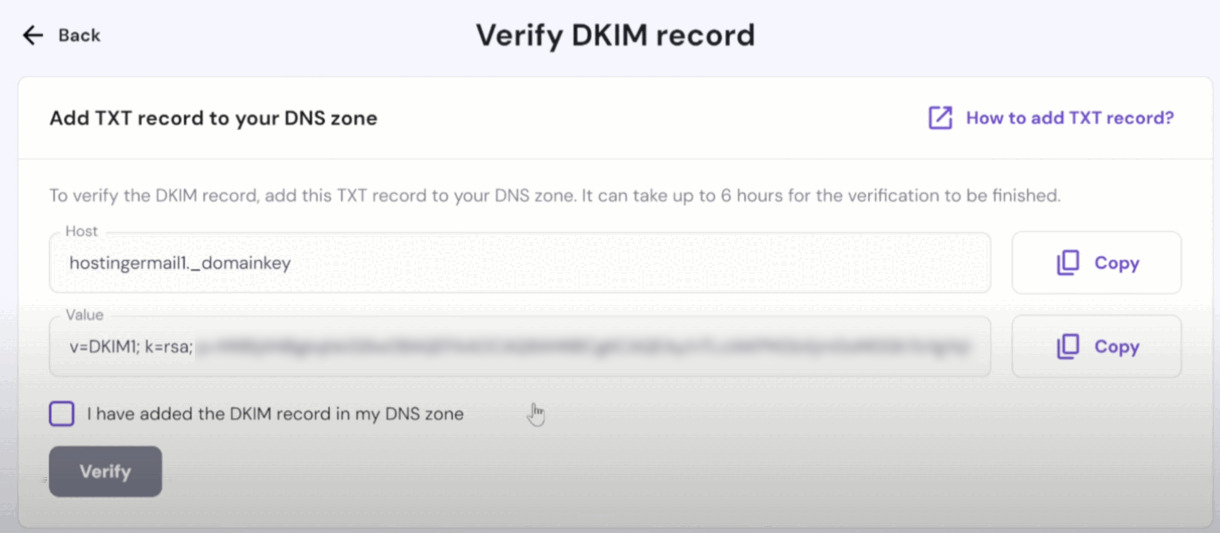
d. Head to your DNS zone and create a new TXT record
e. Input the details of your TXT record
The screenshot below will show you an example of the TXT record. We’ll be using CloudFlare for this example.

f. Save the record
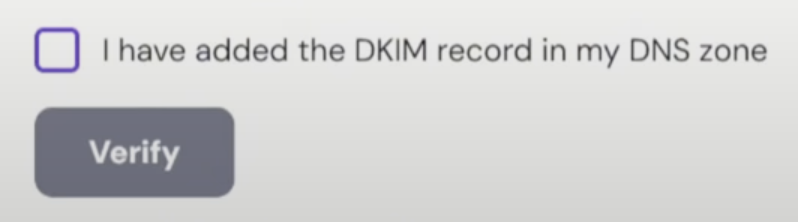
g. In the Verify DKIM record section, tick the “I have added the DKIM record in my DNS zone”.
h. Click on “Verfiy”
Important Note: If your domain is pointing to Hostinger by nameservers, to configure SPF and DKIM, you can simply click on Connect automatically in the Connect Domain page in your Hostinger profile.
Congratulations! You now successfully authenticated your outgoing mail stream from Hostinger Email with SPF and DKIM.
Important note: If the provider recommends publishing also a DMARC record, there’s no need to do so if you already have a DMARC record in place, as each domain can only have one DMARC record.