


ChargeBee is an all-in-one subscription billing solution designed to handle all the complexity of recurring billing.
ChargeBee doesn’t support SPF as well as DKIM, therefore you need to configure it via SMTP.
When setting up your SMTP you need to ensure the DMARCs Return-Path matches the domain in your From address. If not, the SPF and DKIM configuration would fail the DMARC alignment test.
In this case, You can set up a DKIM record and check with this source about setting up the custom Return-Path.
SMTP Configuration
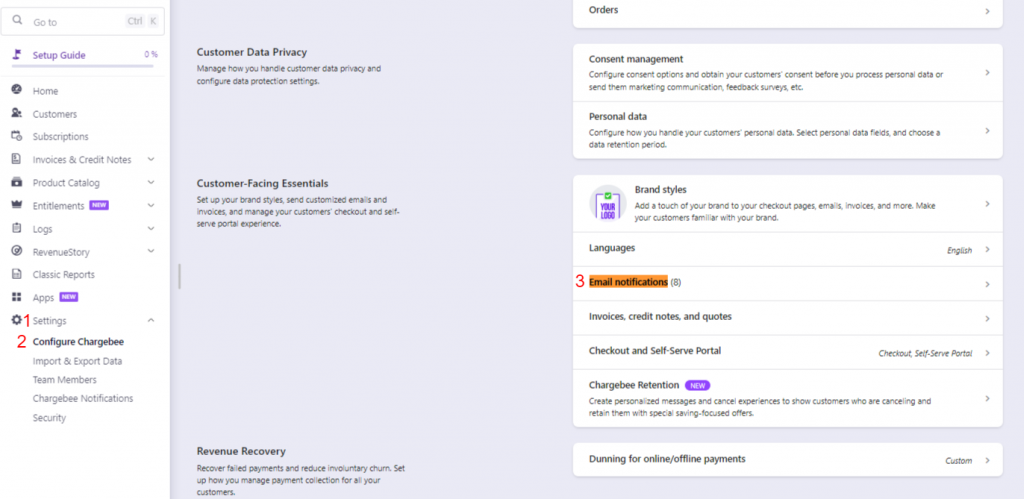
1- Head to your Chargebee Settings.
2- And then select Configure Chargebee.
3- Then head to the Email Notifications part.
Once you have done the previous steps, you will notice configure your own SMTP server or use Chargebee’s default SMTP option. Try to select Change SMTP settings as the screenshot below.
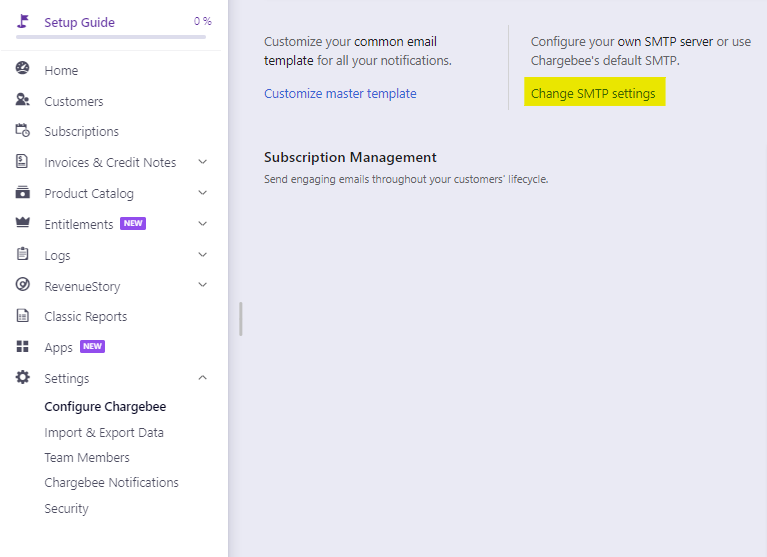
Note: As long as you’re not using your own SMTP provider then automatically you’re using Chargebee’s SMTP server as they also will recommend you to use your own SMTP provider.
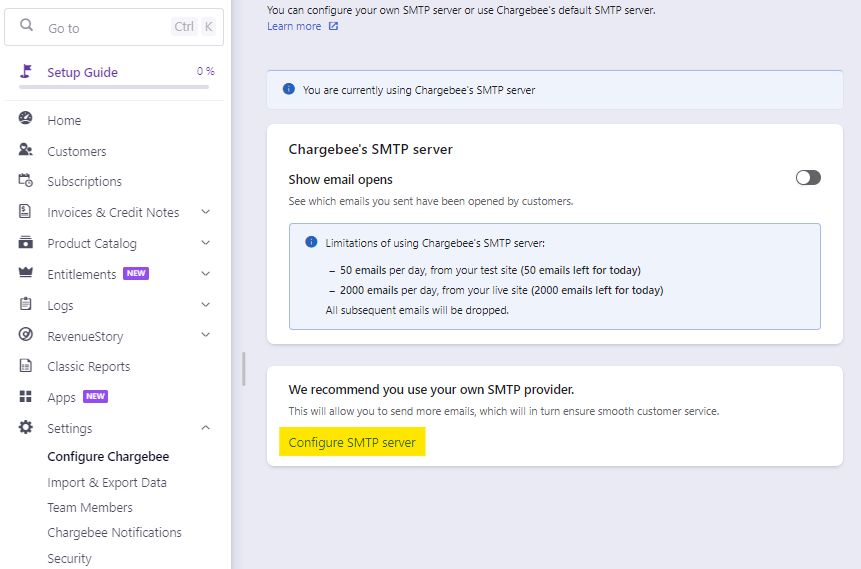
When you choose to use your own SMTP server, you can use your SMTP service provider’s hostname, username and password, encryption type, and port number.
Note: Primary reasons that you would use your own SMTP server.
1- You can manage your own SPF & DKIM records, as well as handle email bounces by yourself.
2- And the main point is DMARC policies will not affect your email delivery.
Below will explain the steps on how to configure the SMTP for Zoho Mail.
SMTP Configuration settings for Zoho Mail – SSL
Outgoing Server Settings: (Organization users with a domain-based email address, [email protected]):
Outgoing Server Name: smtppro.zoho.com
Port: 465 with SSL or
Port: 587 with TLS
Require Authentication: Yes
SMTP Configuration settings for Zoho Mail – TLS
Outgoing Server Name: smtp.zoho.com
Port: 587
Security Type: TLS
Require Authentication: Yes. The email address should match the email address/ email aliases of the account, for which the authentication details are provided.
You may require an Application-specific Password to set up the account on other devices if you’ve enabled Two-Factor Authentication.
1- Login to Zoho Mail
2- Go to Settings
3- Navigate to Mail Accounts and click the respective email address from the left listing.
4- Under the SMTP section, uncheck the ‘Save copy of sent emails’ to not save the emails sent using the smtp.zoho.com configuration in the Sent folder.

When configuring SMTP/ Outgoing Server, you need to provide the entire email address and the correct password for authentication that you have registered in Zoho Mail as the screenshot below.
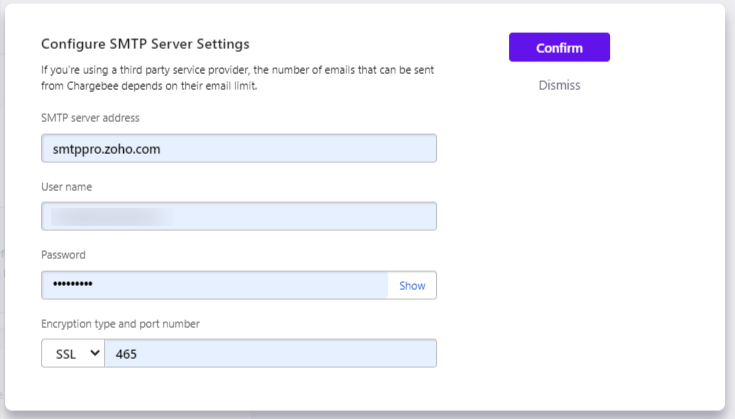
After that try to confirm and you’re done with the SMTP configuration process.
Also, the SMTP setup is dependent on the ESP that you use within your organization. If you are hosted on Google or Microsoft365, set up SMTP for them by checking these articles:
1. Google Workspace
2. Microsoft 365