


FunnelMaker is a cloud-based customer relationship management (CRM) solution designed for businesses of all sizes. The solution offers a user dashboard and helps in automatic sales tracking, email tracking, and opportunity management.
Determine your sending domains: SPF and DKIM should be set up for each part you use to send emails from FunnelMaker. You can find a list of your sending domains on the Email Domain Management page in your FunnelMaker account but in this article, we’ll go over how to configure and set up FunnelMaker Authentication with DomainKeys Identified Mail (DKIM), we won’t be going over the SPF set up as of now Funnelmaker does not support SPF alignment at all.
The process of configuring DKIM
Note: FunnelMaker offers two options to configure DKIM (CNAME or TXT). This allows you to try the other option if one of them doesn’t work.
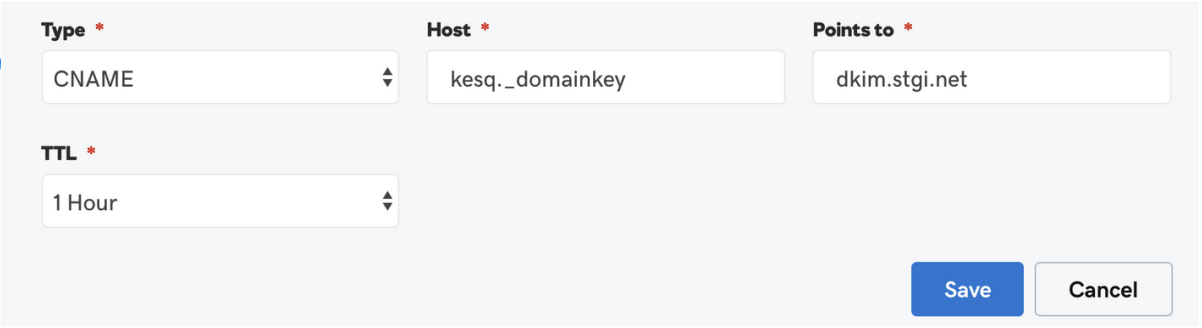
Option 1 > Create a new DKIM Record with CNAME
For the DKIM, add a new record as follows:
- In the Type field, add: CNAME
- In Host field, add: kesq._domainkey
- In Text field (Points to), add: dkim.stgi.net
- Save the record.
Note: If the CNAME is saved successfully, please proceed to the next page.
Option 2 > Create a new DKIM Record with TXT
If you receive an error notification or the CNAME record does not work for
your DKIM record, here is an alternative record to use. The following TXT
record is an older version, but still connects your domain accordingly:
In the Type field, add: TXT
In Host field, add: kesq._domainkey
In TXT Value, add the record below: v=DKIM1; k=rsa; p=MIIBIjANBgkqhkiG9w0BAQEFAAOCAQ8AMIIBCgKCAQEAxgiBJzQPyItkH6uzTN+hQzW0/VER4FAImcGB5RwkQo4/9U+w4o+Z7v1pyxq5G+BHG7uDLpu+v65i+bhtZnL8QIO5umFHyepE8SUG6pNp6qjILkCLkz6DhJ0qSsb55ksryOOj+Mcwt89+D5fcHUMlyXJumySJAhL8dXjqlzuPCMIyFG8Dd6yKjVvbZ3KI1qMiiWXOZPQxuFg3eCMJ8Ciycs1EbrlvgOvAc+ynhQqND9ebWSpA04zRfEb9MRmKkxpEduvjDev4eApxFBadVgsh6Gxrm+x0yXOVQNn3s6GsNVP4QY92xd94i6uspSkS36Hc134s9mpsSyu31ESRc7ROiwIDAQAB;

CONFIRM THE CONNECTION
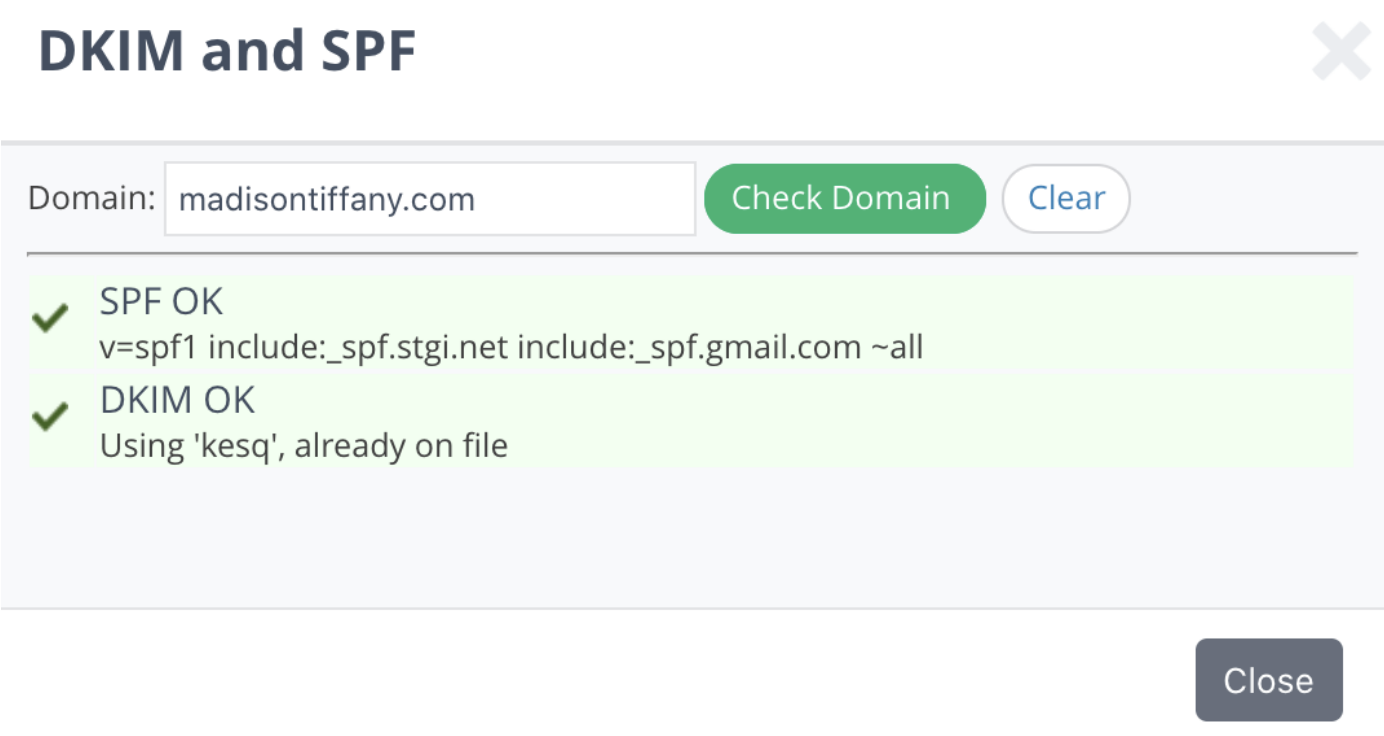
Now that your records are added into your DNS, you can easily verify your domain’s records inside your CRM Account.
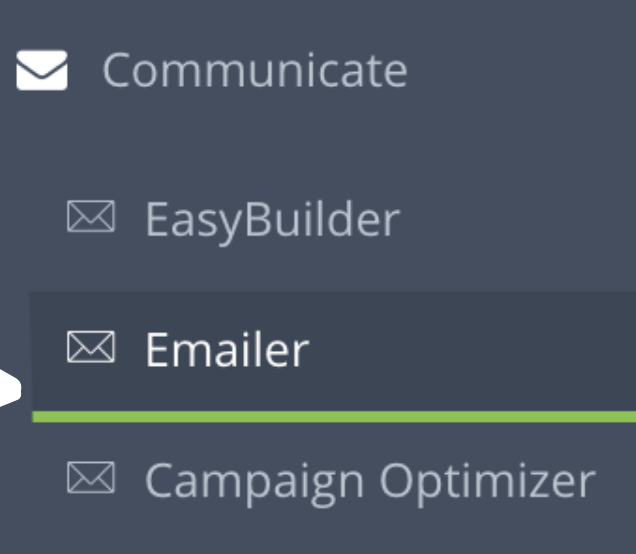
Start by hovering over the “Communicate” drop down, then select “Emailer”
To the right of your email address area, click on the “DKIM/SPF” button and add your domain name (anything after the @ symbol)

The records may take up to 30 minutes to propagate. If it’s your first time adding these records to your DNS server, you may need to click “Add to File” to complete the integration. Also, remember that each DNS server only allows one SPF record.
Important note: If the provider recommends publishing also a DMARC record, there’s no need to do so if you already have a DMARC record in place, as each domain can only have one DMARC record.