
Collecting email addresses through WordPress is easy. Making sure those addresses are real and usable is a different challenge. A form can accept an address that is misspelled, disposable, risky, or unable to receive email. If these addresses keep entering your database, your contact list can become harder to manage and less useful.
EasyDMARC Email Verification gives WordPress users a way to check email addresses during form submission. It connects your WordPress forms to the EasyDMARC verification service and returns a result that you can use to decide whether a submission should be accepted or blocked.
The plugin supports nine popular WordPress integrations, so you can use the same email verification setup across different forms on your site. In this article, we’ll walk through the setup process, show you where to configure the verification rules, and explain how to test the plugin before you start using it.
What You’ll Need Before You Start
Before you set up EasyDMARC Email Verification, make sure you have the following:
- A WordPress website
- Admin access to your WordPress dashboard
- An EasyDMARC account
- The EasyDMARC Email Verification plugin
- Verification credits in your EasyDMARC account
Once these are ready, you can install the plugin and configure email verification for your WordPress forms.
How to Install and Set Up EasyDMARC Email Verification in WordPress
Before you can start verifying email addresses, you need to install and activate the EasyDMARC Email Verification plugin. Once it is active, you can connect your EasyDMARC account and choose how email verification should work on your WordPress forms.
Step 1: Install the EasyDMARC Email Verification Plugin
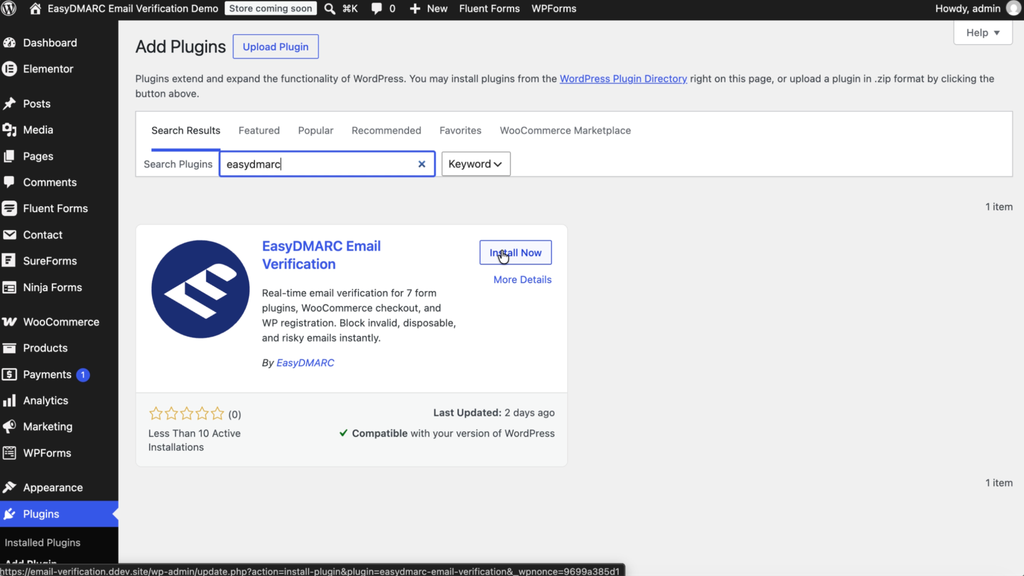
Log in to your WordPress dashboard and go to Plugins → Add New Plugin. Search for EasyDMARC Email Verification.
Find the plugin in the search results and click Install Now. After the installation is complete, click Activate.
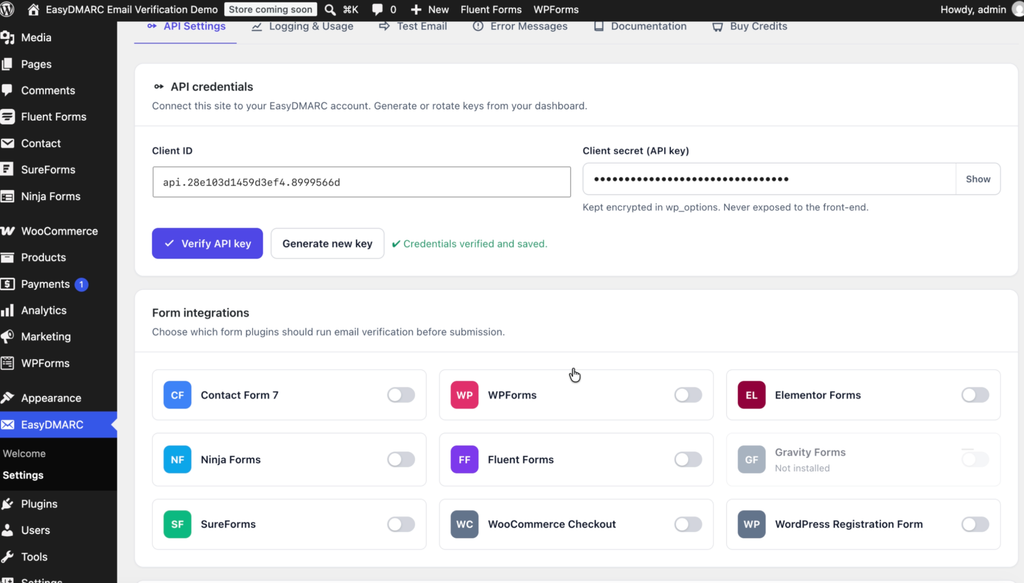
Once the plugin is activated, EasyDMARC will appear in the left-hand menu of your WordPress dashboard. Click it to open the plugin settings.
Step 2: Connect Your EasyDMARC Account
Head to your EasyDMARC account and switch to EasySender. Go to Settings → API. This is where your API keys live. Generade new API keys and copy credentials.
Enter the API credentials from your EasyDMARC account, then click Verify API key. Once the credentials are verified, you can use the plugin to check email addresses through the EasyDMARC API.
Step 3: Choose Which Email Results to Allow
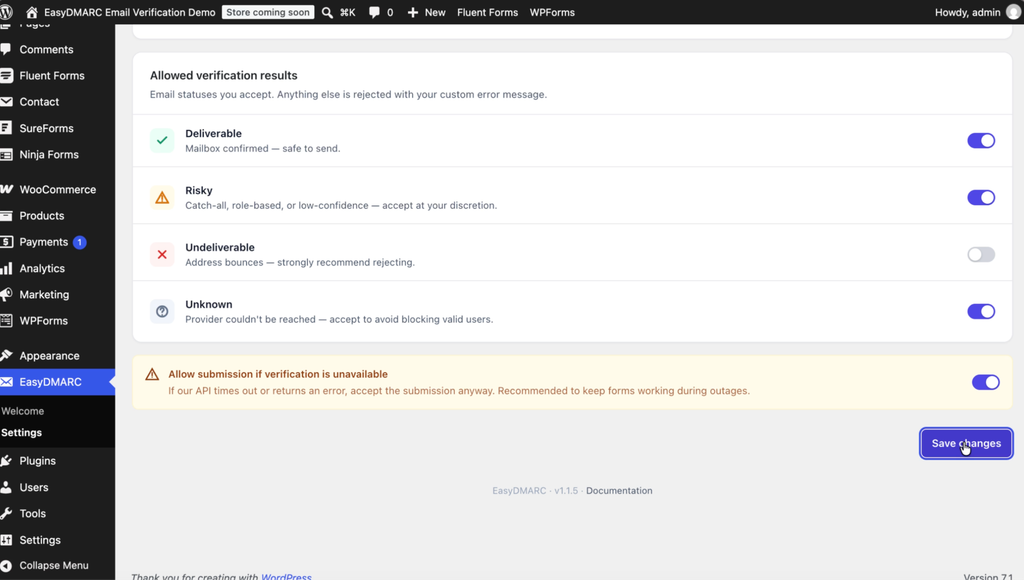
Next, look for Allowed verification results. This setting lets you decide which types of email addresses can be submitted through your forms.
You can set separate rules for four results:
- Deliverable: The mailbox is confirmed and safe to send to.
- Risky: The address may be valid but has some risk of bouncing.
- Undeliverable: The address is expected to bounce.
- Unknown: The provider could not be reached to confirm the address.
At a minimum, it is recommended to block Undeliverable addresses. You can also block Risky addresses if you want stricter checks. Keeping Unknown addresses allowed can help prevent valid users from being blocked.
Step 4: Choose What Happens When the API Is Unavailable
Below the verification results, you will find Allow submission if verification is unavailable. Turn this option on if you want form submissions to continue when the EasyDMARC API cannot be reached. This can help keep your forms working during a temporary API or connection issue.
After choosing your settings, click Save changes.

Step 5: Enable Email Verification for Your WordPress Forms
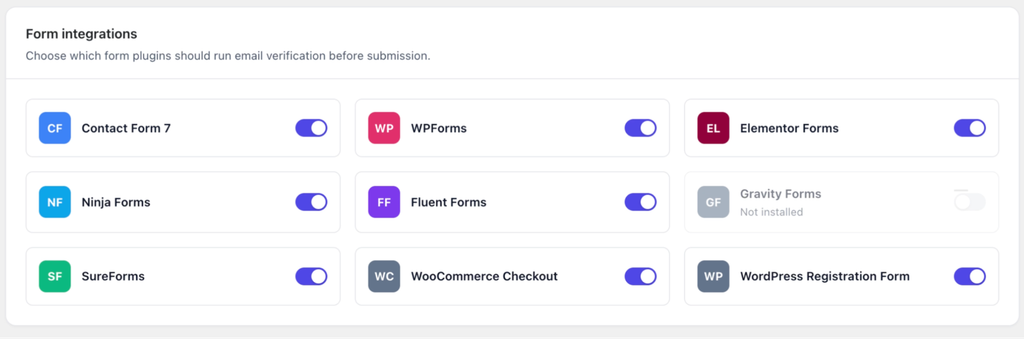
Now scroll up to the Form integrations section. This is where you choose which WordPress forms should use email verification.
EasyDMARC supports nine integrations:
- Contact Form 7
- WPForms
- Elementor Forms
- Ninja Forms
- Fluent Forms
- SureForms
- Gravity Forms
- WooCommerce Checkout
- WordPress Registration Form
Turn on the integrations you use on your website. This lets the plugin check email addresses when visitors submit those forms. You don’t need a separate email verification plugin for each supported form builder.
How to Test Email Verification
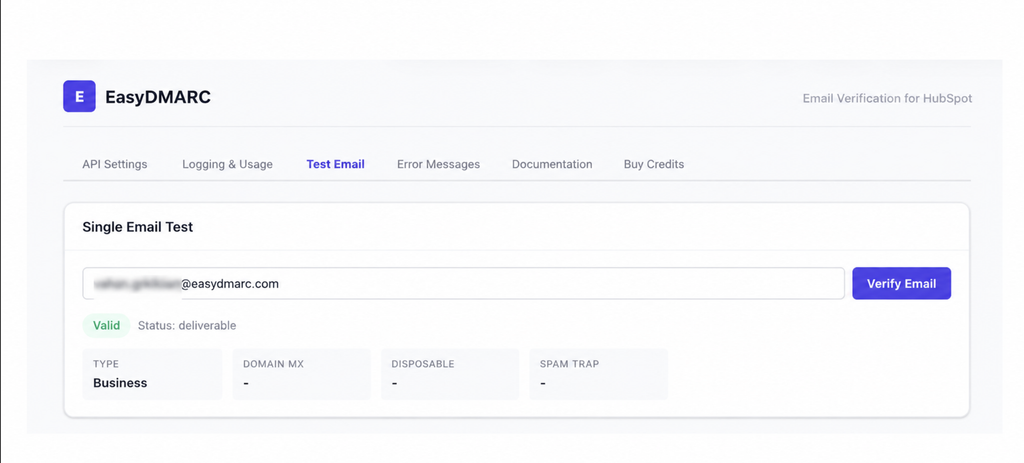
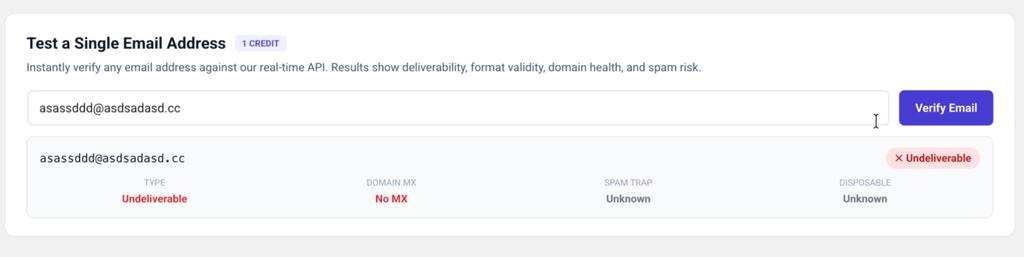
Before you use the plugin on your live forms, you can test an email address from your WordPress dashboard. Open the Test Email tab and enter an email address. EasyDMARC will check it and show the result. You can also view the full API response to see more details about the result.
This is useful for checking individual addresses before deciding which verification results to block. For example, you can test an address and see whether it is Deliverable, Risky, Undeliverable, or Unknown. The results also include details such as domain MX status and spam trap information. This helps you understand why an address received a particular result.
How to Verify Email Addresses in Bulk
If you have a large list of email addresses, you can check them all at once. EasyDMARC lets you upload a CSV file with up to 500,000 email addresses. The plugin checks the addresses in batches and shows the results in a chart. You can filter the results and export the addresses you need as a new CSV file.
This is useful when you want to clean an existing contact list before importing it into another system. You can review the different verification statuses instead of treating every address the same way. The filtered export also makes it easier to create a list of addresses that need further review or removal. This lets you handle large email lists without checking each address manually.

How to Manage Your Verification Credits
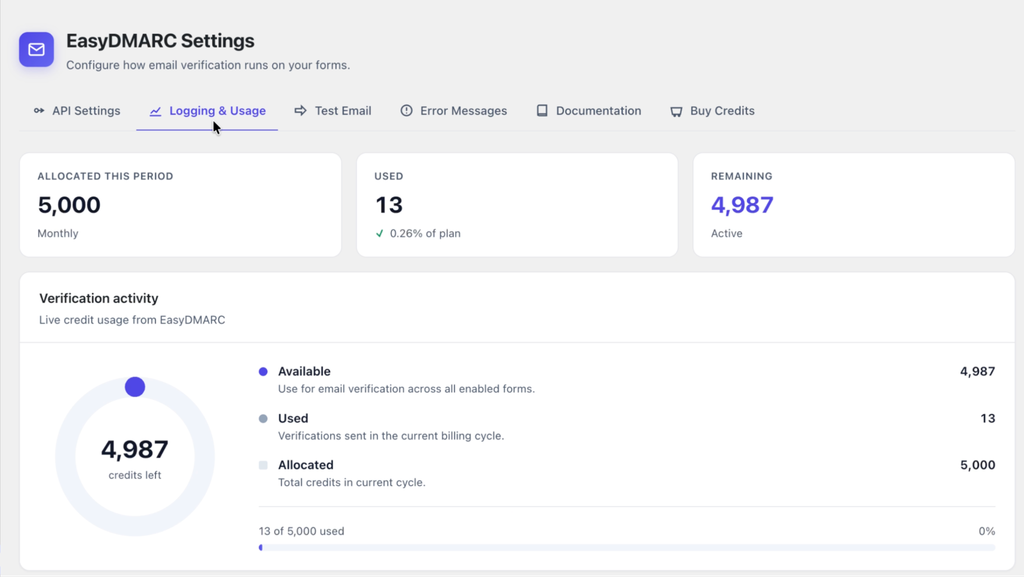
You can check your verification credits from the WordPress dashboard. The credit dashboard shows how many credits you have, how many you have used, and how many are left.
You can use this dashboard to keep track of your verification usage as you test addresses or verify larger lists. If your balance is running low, you can add more credits before starting another bulk verification. Go to the Buy Credits tab to choose a plan without leaving WordPress. A free EasyDMARC account also includes verification credits to help you get started.
Best Settings for WordPress Email Verification
For most websites, start by blocking Undeliverable email addresses because these addresses are expected to bounce. You can also block Risky addresses if you want stricter checks. However, it is better to allow Unknown addresses. These emails may still be valid, and blocking them could stop real users from submitting your forms.
Why Use EasyDMARC Email Verification for WordPress?
EasyDMARC makes it easier to check the email addresses that enter your WordPress forms. You can use one plugin with nine popular WordPress integrations, check emails in real time, and decide which results to allow or block.
You can also test email addresses before going live, check large lists in bulk, manage your credits from WordPress, and allow form submissions to continue if the EasyDMARC API is unavailable. This gives you a simple way to keep invalid email addresses out of your WordPress data while keeping control over how your forms handle different email results.
Frequently Asked Questions
Does this work without a paid plan?
Yes. You can use the plugin with a free EasyDMARC account. The free account gives you a limited number of verification credits to get started. If you need to verify more email addresses, you can get more credits from the Buy Credits tab inside WordPress.
Will it break my forms if the API goes down?
No. Your forms can still accept submissions if the EasyDMARC API is not available. Turn on Allow submission if the verification service is unavailable in the plugin settings. When the API cannot be reached, the email verification step is skipped, and the form submission goes through normally.
Does it slow down form submissions?
No. The verification API call usually takes less than 200ms. The check happens on your WordPress server when someone submits a form. Nothing needs to load in the visitor’s browser, so it does not slow down your pages or affect front-end performance.
Are email addresses stored or logged?
No. The plugin does not save email addresses. If WordPress debug logging is turned on, the plugin also hides email addresses before writing anything to the debug log. The email address is sent to the EasyDMARC API only when it needs to be checked.
Does it work with caching plugins?
Yes. The plugin works with caching plugins because email verification happens on the server when a form is submitted. It does not depend on the page being loaded again, so page caching does not stop the verification check from running.
Which statuses should I block?
At a minimum, block Undeliverable addresses because these emails are expected to bounce. You can also block Risky addresses if you want to use stricter rules for your forms. We recommend allowing Unknown addresses because they may still be valid, and blocking them could stop real users from submitting your forms.

 We’re glad you joined EasyDMARC newsletter! Get ready for valuable email security knowledge every week.
 You’re already subscribed to EasyDMARC newsletter. Continue learning more about email security with us