WeFact serves as an invoicing solution for entrepreneurs, facilitating tasks such as generating quotes, and invoices, processing payments, and so on. To get started, it’s essential to authenticate your domain by configuring SPF and DKIM for WeFact.
Your initial action is to obtain the SPF and DKIM records provided by WeFact.
Here’s how:
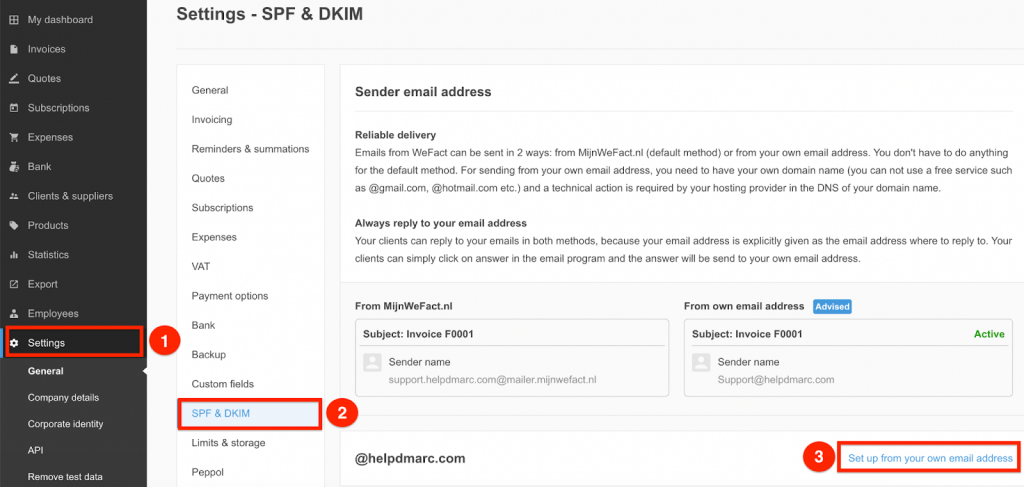
1 – Navigate to the “Settings” section in the left-hand menu.
2 – Access the “SPF & DKIM” option.
3 – Click on “Set up from your own email address” located at the bottom right corner.
Refer to the screenshot below for visual guidance:
In this step, you should obtain the guidelines for SPF and DKIM provided by WeFact.
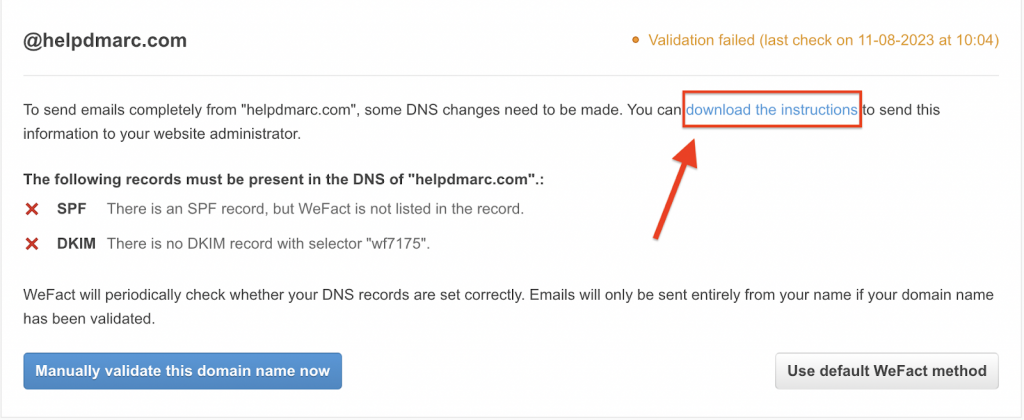
Inside the downloaded file, you’ll discover the SPF “include” (include:_spf.mijnwefact.nl) that must be added into your SPF record, along with the DKIM public key that needs to be published in your domain’s DNS.
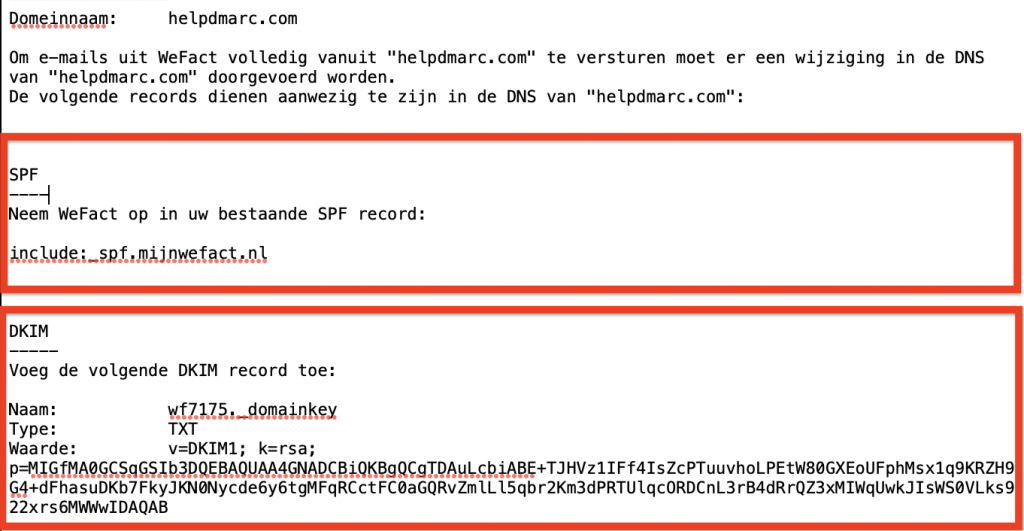
How to Add the Provided SPF and DKIM Records in Your DNS
SPF record
If you already have an existing SPF record then you just need to add WeFact’s SPF “include” within your current record, as demonstrated in the example below:
v=spf1 include:_spf.google.com include:_spf.mijnwefact.nl ~all
For those who lack a published SPF record for their domain, the process involves creating a new SPF record containing the provided “include” from WeFact:
v=spf1 include:_spf.mijnwefact.nl ~all
If you don’t have an existing SPF record, adhere to the steps outlined below to publish an SPF record for WeFact:
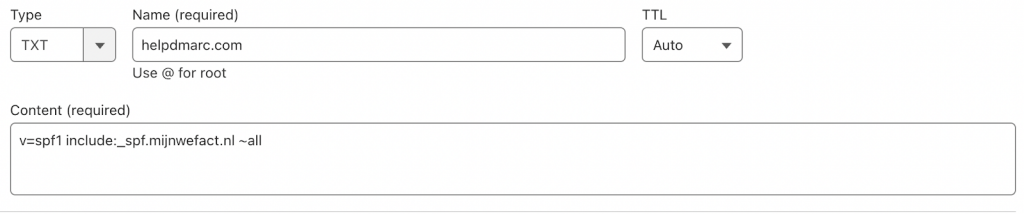
Step 1: Head to your DNS, create a new DNS record, and set the type to TXT.
Step 2: The TXT Name/Host field entry varies depending on your DNS host. Some require the full domain name, such as “helpdmarc.com“, while others need only “@” as they automatically include your domain name.
Step 3: In the Value/Content field, input “v=spf1 include:_spf.mijnwefact.nl ~all“
An example for DNS host Cloudflare is shown below:
DKIM record
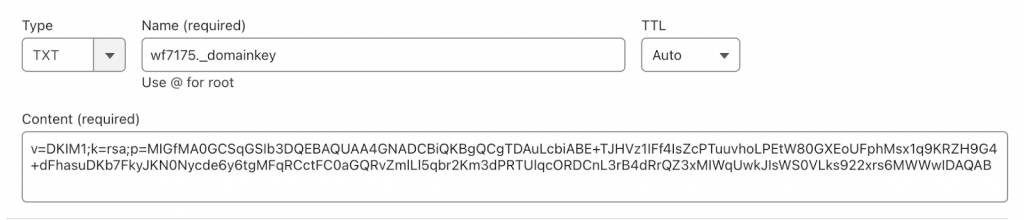
Step 1: Head to your DNS, create a new DNS record, and set the type to TXT.
Step 2: Copy the default selector and paste into the corresponding field in your DNS. For the TXT name/host field, what you enter depends on your DNS host. Some require you to enter the full wf7175._domainkey.helpdmarc.com, others only need the wf7175._domainkey part, as they automatically append your domain name in the end.
Step 3: In the Value/Content field, copy and paste the provided DKIM public key.
“v=DKIM1;k=rsa;p=MIGfMA0GCSqGSIb3DQEBAQUAA4GNADCBiQKBgQCgTDAuLcbiABE+TJHVz1IFf4IsZcPTuuvhoLPEtW80GXEoUFphMsx1q9KRZH9G4+dFhasuDKb7FkyJKN0Nycde6y6tgMFqRCctFC0aGQRvZmlLl5qbr2Km3dPRTUlqcORDCnL3rB4dRrQZ3xMIWqUwkJIsWS0VLks922xrs6MWWwIDAQAB”
Once the record is published, a DKIM tester can help you verify that the selector and public key are set up correctly in your DNS.
An example for DNS host Cloudflare is shown below:
After successfully publishing the records, return to your WeFact account and select “Manually validate this domain name now.”
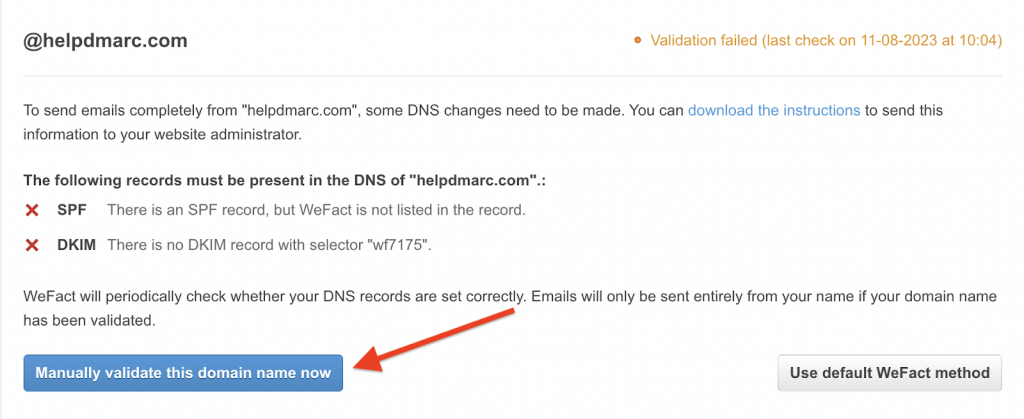
If all steps have been correctly executed, your domain status will be displayed as “Active.”

Important note: If the provider recommends publishing also a DMARC record, there’s no need to do so if you already have a DMARC record in place, as each domain can only have one DMARC record.
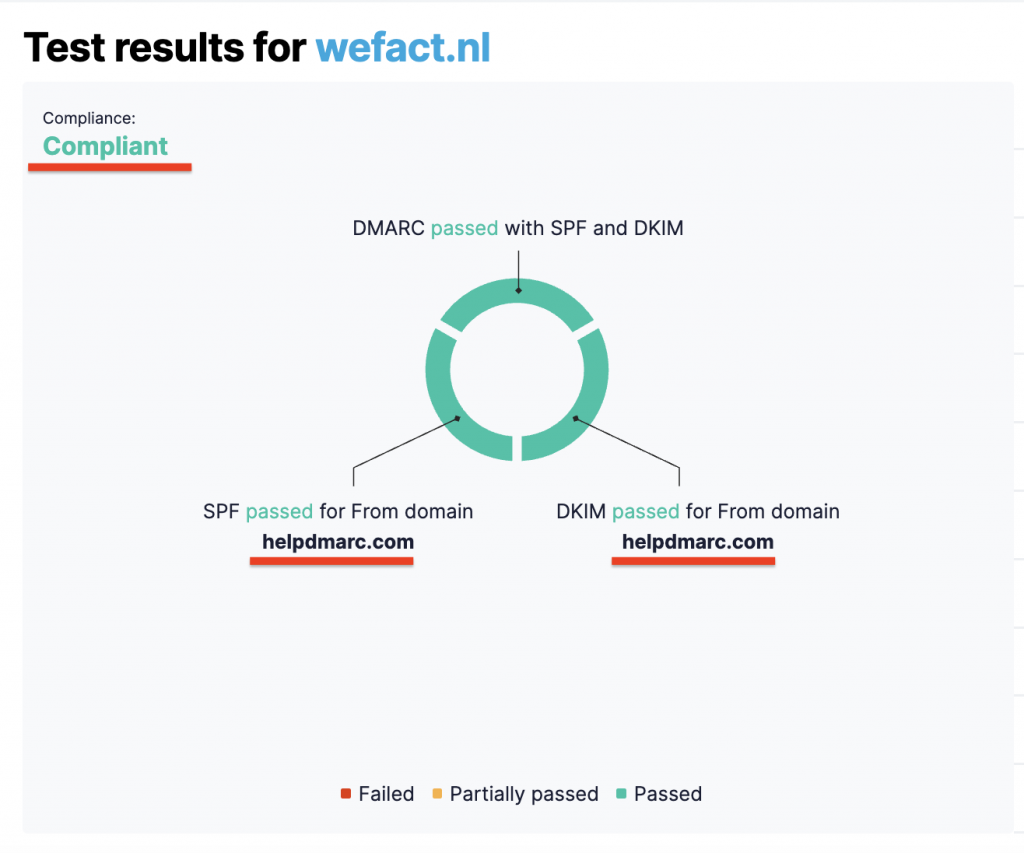
You can verify this through our Email Investigation tool.(See the screenshot below)