


This instructional article will demonstrate the Amazon SES configuration process of Sender Policy Framework (SPF), DomainKeys Identified Mail (DKIM) Signatures to ensure Amazon SES passes the DMARC alignment check and eliminates spam from your domain, and increase security.
The SPF record identifies the mail servers and domains that are allowed to send email on behalf of your domain. The DKIM record, on the other hand, is a specially formatted DNS TXT record that stores the public key the receiving mail server will use to verify a message’s signature. These email authentication methods will be used to prove to ISPs and mail services that senders are truly authorized to send email from a particular domain and are a way of verifying your email-sending server is sending emails through your domain.
First, let’s observe the current settings in our AmazonSES portal and evaluate the steps needed to be taken in order to achieve SPF & DKIM Authentication.
Please head to Configuration > Verified identities
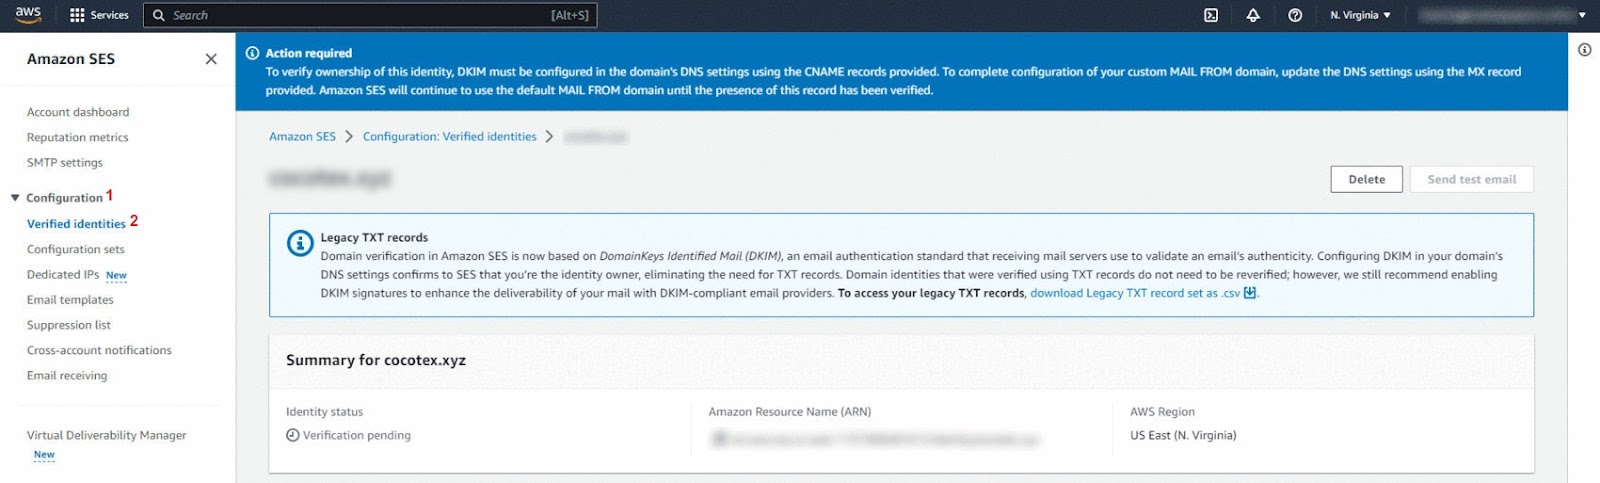
In this section, our current settings are:
- DKIM Signing: n/a or Off – This states that a customized DKIM Signature is not in place for AmazonsSES. This will invalidate and mark DKIM as a Fail.
- MAIL FROM Domain: amazonses.com – This states that the Return-Path domain being used is amazonses.com and not our customized domain. This will invalidate and mark SPF as a Fail.
Generate DKIM Settings
Please head to Authentication on the Verified Identities page
AmazonSES will provide 3 CNAME Records for DKIM Settings. The next step is to implement these CNAME Records in our DNS Zone (In our case, Cloudflare).
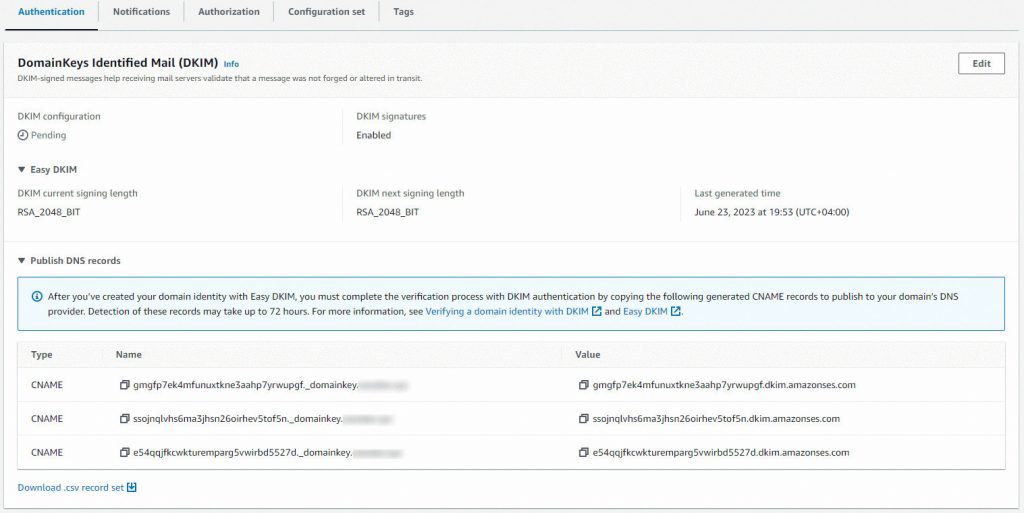
1st Record:
Type: CNAME
Name: gmgfp7ek4mfunuxtkne3aahp7yrwupgf._domainkey.yourdomain.com
Value: gmgfp7ek4mfunuxtkne3aahp7yrwupgf.dkim.amazonses.com

Important Note: Proxy Status should be set as “DNS Only”.
2nd Record:
Type: CNAME
Name: ssojnqlvhs6ma3jhsn26oirhev5tof5n._domainkey.yourdomain.com
Value: ssojnqlvhs6ma3jhsn26oirhev5tof5n.dkim.amazonses.com

Important Note: Proxy Status should be set as “DNS Only”.
3rd Record:
Type: CNAME
Name: e54qqjfkcwkturemparg5vwirbd5527d._domainkey.yourdomain.com
Value: e54qqjfkcwkturemparg5vwirbd5527d.dkim.amazonses.com

Important Note: Proxy Status should be set as “DNS Only”.
After adding all the CNAME Records, make sure to Refresh your AWS portal. If everything is set up correctly, the green “Successful” banners will show up in DKIM configuration. However, detection of these records may take up to 72 hours.

Setting MAIL FROM Domain
Setting a customized MAIL FROM Domain will let you achieve SPF Alignment and Pass results. From your Verified Identities page, you need to head to “Set MAIL FROM Domain”, click on “Edit” and choose any given subdomain name for the setup process. For example, it would seem as “subdomain.doamin.com”.
Important Note: In case you have already enabled Custom Mail From Domain, you can follow the next process.


Amazon SES will provide you with one TXT record and one MX record which you need to add it to your DNS zone.
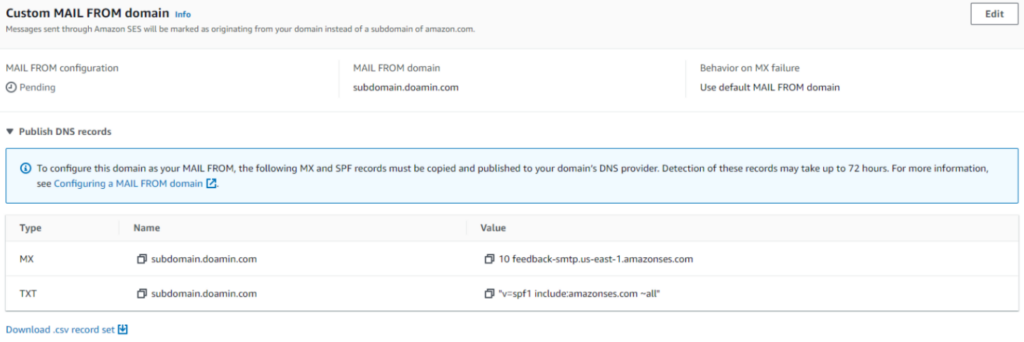
After adding all the required TXT & MX Records, make sure to Refresh your AWS portal. If everything is set up correctly, the green “Successful” banner will show up.

Make sure to achieve this step with every single email address you have in your AmazonSES portal. Congrats, this is how the AmazonSES SPF and DKIM setup is done!
Using AWS in Different Regions
If you are using multiple AWS Regions, you have to perform the SPF & DKIM Authentication setup process for each Region. For example, if you use US East (N. Virginia) and US East (Ohio) Regions for AmazonSES, then you have to set Authentication on each region independently.
Important note: If the provider recommends publishing also a DMARC record, there’s no need to do so if you already have a DMARC record in place, as each domain can only have one DMARC record.