Key Takeaways
- A DMARC policy defines how email servers handle unauthenticated emails from your domain, helping prevent phishing and spoofing attacks.
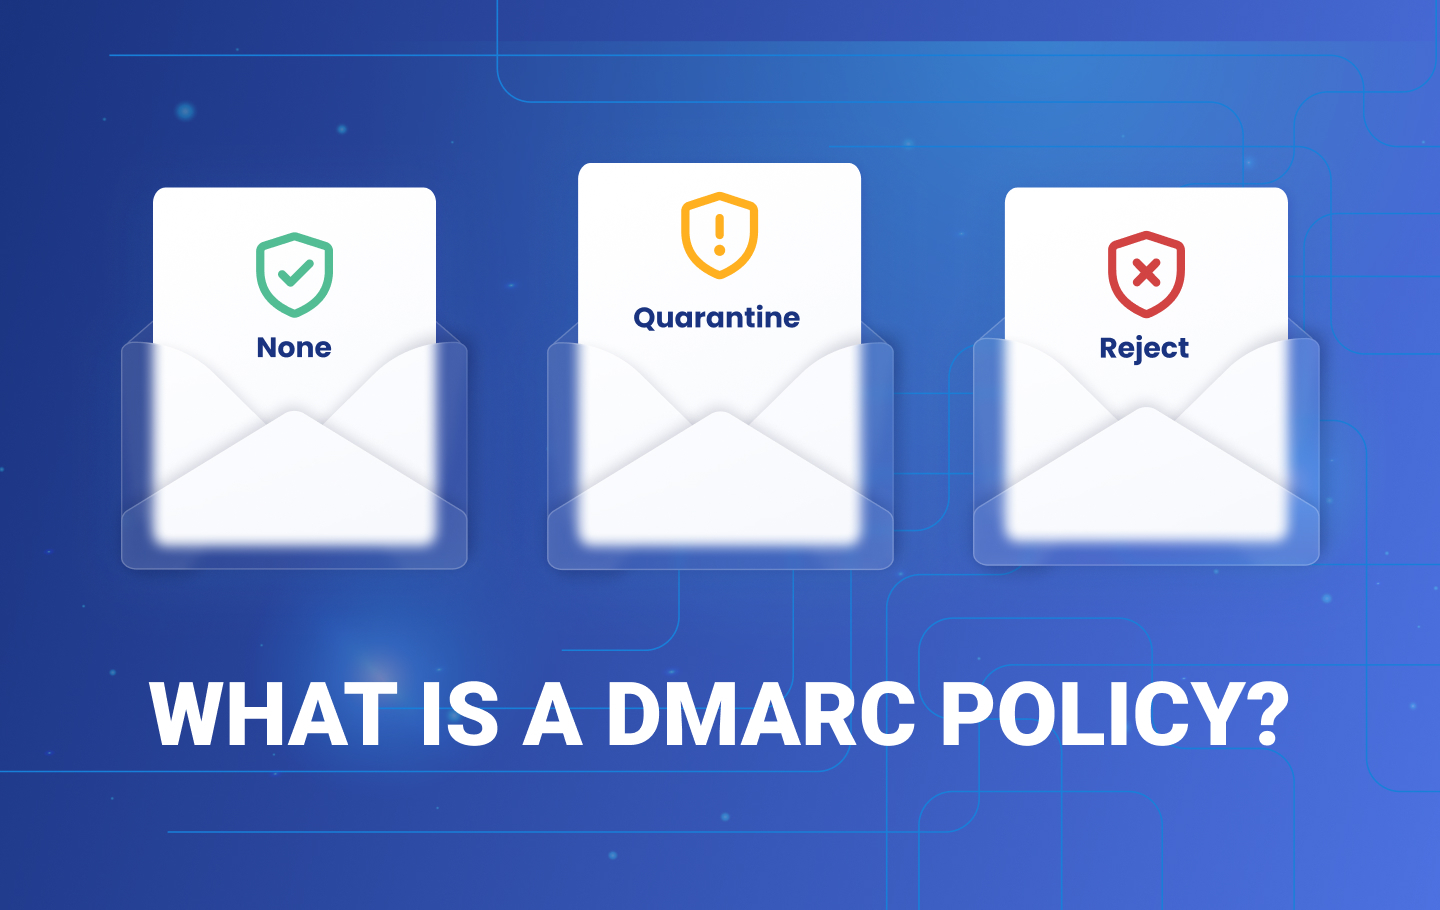
- There are three DMARC policy options: “None” (monitoring), “Quarantine” (sends suspicious emails to spam), and “Reject” (blocks unauthenticated messages).
- Starting with a monitoring policy (p=none) allows businesses to analyze email traffic before gradually enforcing stricter policies.
- A step-by-step approach – moving from monitoring to quarantine, then to reject – ensures smooth DMARC implementation without disrupting legitimate emails.
- DMARC implementation requires ongoing monitoring and adjustment to maintain security and ensure all legitimate email sources are authenticated.
A DMARC policy is a set of DMARC rules that tells email servers what to do with unauthenticated emails from your domain name. It lets senders indicate that their email messages are SPF and DKIM compliant, which is important because over 91% of cyberattacks start with an email. For this reason, it’s vital to integrate email security best practices into your cybersecurity plan to avoid business email compromise and phishing. One of the best ways to protect your email address against cyber threats is to implement and advance your domain’s Domain-based Message Authentication (DMARC) policy for email authentication.
We’ll explore what a DMARC enforcement policy does, the three DMARC policy options, their importance and configuration, and best practices.
What Does a DMARC Policy Do?
A DMARC policy has a protocol implementation that tells the email server what to do with a message after checking for SPF and DKIM authentication, like whether to accept, quarantine, or reject it. To implement a DMARC policy, you need to include it in your DMARC record, a set of instructions specifying your domain’s email authentication rules. This record is published as a Domain Name System (DNS) record, a publicly accessible entry that informs mail servers how to handle messages from your domain.To verify your DMARC records, make sure to try our DMARC record check tool.
DMARC doesn’t directly address whether a mail is spam or otherwise fraudulent. Instead, it requires that a message pass DomainKeys Identified Mail(DKIM) or Sender Policy Framework (SPF) validation and alignment. SPF verifies that the email comes from an IP address allowed by the domain’s DNS record, while DKIM ensures the message hasn’t been tampered with. If the mail fails these checks, the DMARC rules in a policy determines how the receiving server should handle the message.
Why Do You Need a DMARC Policy?
Setting up a DMARC policy positively impacts deliverability for legitimate senders. With DMARC implementation, you can tell receivers how to handle messages that fail authentication and protect your domain from spoofing and other phishing attacks.This includes outright denial of the message, or putting the message in DMARC quarantine.
DMARC also leverages other security standards to provide an additional layer of security: DMARC reporting. Through monitoring, you can get in-depth knowledge about who is sending mails on your domain’s behalf with aggregate reports and forensic reports containing information about a sending server’s IP addresses.
What Are the Different DMARC Policy Options?
There are three DMARC policy options that you can implement – monitoring, quarantine, or reject.
1. Monitoring Policy (p=none)
This entry-level policy involves entering the DMARC record into DNS. The policy marker in the record syntax is p. When set to “none” (p=none), DMARC will just monitor your sending sources without taking action.
However, even with p=none, DMARC sends reports on how your email domain is used and whether messages pass or fail authentication checks. You can specify to which email addresses or web endpoints these reports should be sent by providing Uniform Resource Identifiers (URIs), in this case, a RUF tag or a RUA tag. A RUF tag specifies where to send forensic reports, which provide detailed data about individual emails that fail DMARC checks. A RUA tag specifies where to send aggregate reports, which provide summarized data about all mails sent using the domain, including pass/fail rates for DMARC, SPF, and DKIM.
At this stage, unauthorized emails still find their way to the recipient’s inbox folder, but you can use the data to analyze who is sending messages on your domain’s behalf.
A monitoring policy is mainly recommended for an organization starting with DMARC implementation. When you have a good source analysis and data, you can move to the next level: Quarantine.
2. DMARC Quarantine Policy (p=quarantine)
A DMARC quarantine policy sets the p tag to p=quarantine, instructing the receiving server to forward messages that failed the authentication DMARC checks to the recipient’s spam folder. Mails that pass the DMARC authentication checks are delivered to the receiver’s inbox.
You can gradually harden your DMARC rules and policy, increasing how strict it is by progressively blocking more messages that fail authentication by using the percentage tag (pct) and setting it to a specific value that can pass into the inbox. The pct tag in DMARC sets the percentage of emails that fail authentication and will be affected by the policy. For example, setting pct=50 means only 50% of failing mails are quarantined or rejected. Gradually increasing this number (e.g. from 50 to 75 to 100) allows more unauthenticated messages to be handled, enabling a smooth transition to stricter enforcement.
3. Reject Policy (p=reject)
A reject policy is the third level, where you set your p to reject. With this configuration, you tell mail receivers not to deliver messages that fail the authentication checks.
P=reject will ensure that email messages that pass the checks will be delivered to the receiver’s inbox, while all fraudulent emails will bypass it. This is the best option for organizations that want to mitigate the impact of email spoofing.
How to Configure Your DMARC Policy?
To properly configure your DMARC policy, you must understand best practices, including staged rollouts common for DMARC adoption in Australia. Many organizations jump straight to ‘reject’, and they end up preventing all (both legitimate and not) messages from getting to the recipient’s inbox.
With the reject policy, the mail receiver will block every message that doesn’t pass the authentication checks. So, it is essential to have proper monitoring to whitelist or authenticate outgoing email sources. Otherwise, the policy will reject all your important email messages as well.
Start with Monitoring
EasyDMARC’s experts recommend starting with “p=none” to monitor your domain and gain insight from reports into who is sending messages on your domain’s behalf.
With these reports, you can identify legitimate email sources that receivers shouldn’t reject during authentication.
Don’t Skip Quarantine
Once you have configured your legitimate email sources, you can now escalate your DMARC policy to quarantine. As mentioned above, all the unauthenticated messages get sent to the spam folder, while the authenticated ones land in the recipient’s inbox.
Move to Reject as a Final Step
Now that you have marked all your legitimate email sources, you can set your DMARC policy to reject. The DMARC reject policy will block all unauthenticated email messages from reaching the receiver’s inbox. Note that even after p=reject has been reached, it is still crucial to continuously monitor your DMARC reports.
Which DMARC Policy Should You Implement?
You should implement a DMARC policy of p=reject for the best protection against email security threats, but this can’t be done overnight. Enforcing a DMARC reject policy immediately is not advisable because you experience a phishing attack. Depending on your infrastructure, DMARC implementation can take one to twelve months. EasyDMARC helps you reach p=reject 57 days faster than our competitors.
Contact EasyDMARC’s Support Team to help you through your DMARC implementation and enforcement implementation. We’ll ensure that your organization reaches the DMARC reject policy without stress.
Contact us today for assistance.


