CleverReach is email marketing software for managing email campaigns and contacts. In this article we’ll guide you through the process of configuring SPF and DKIM for CleverReach.
CleverReach DKIM Record Configuration
Setting up DKIM for CleverReach involves the following steps:
– Click on your profile name at the top right corner of the dashboard.
– Navigate to “My Account”
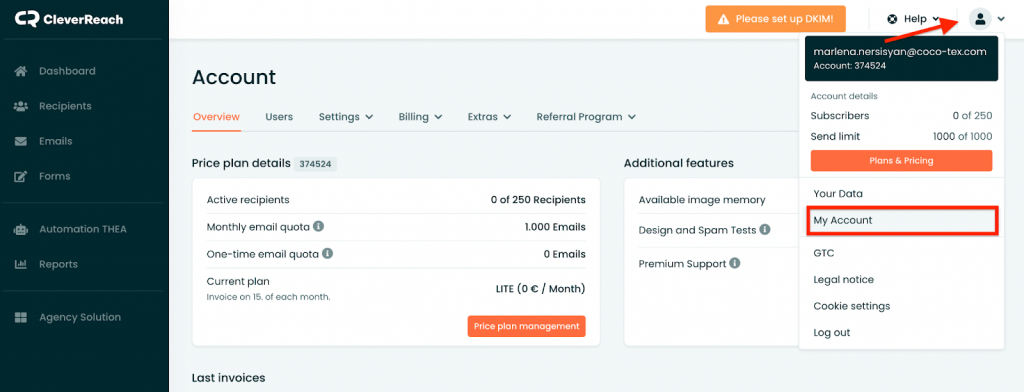
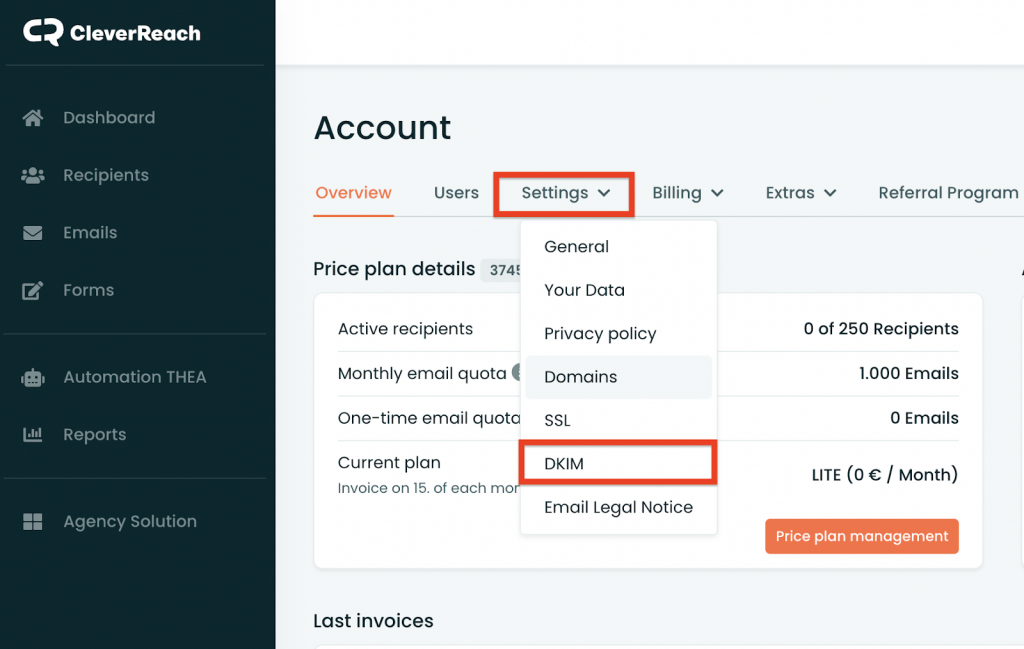
– click on “Settings.”
– Select “DKIM.”
In the DKIM page, add your domain if you haven’t done so already.
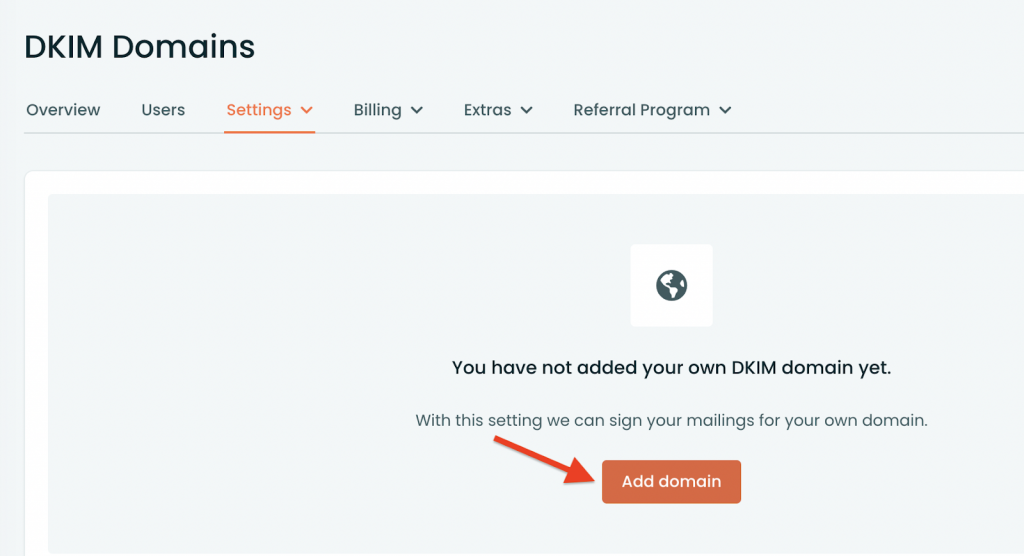
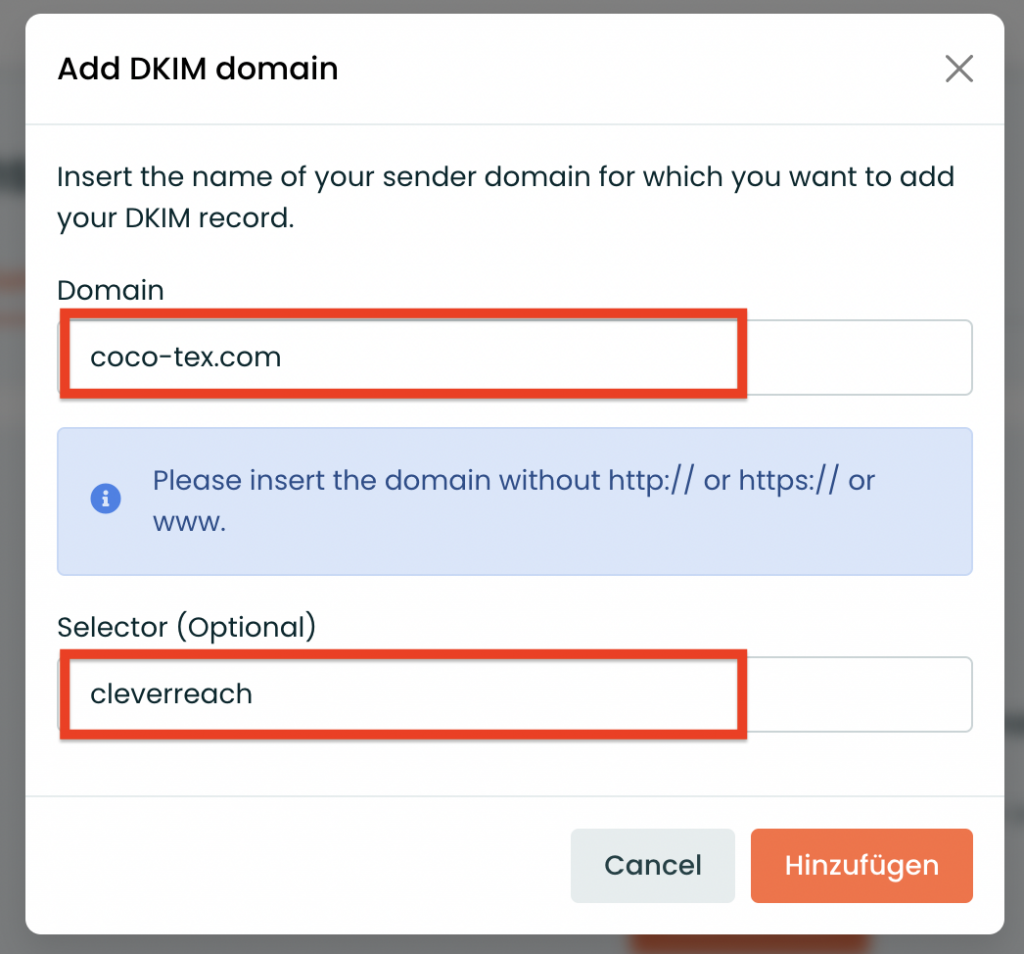
In the DKIM page, add your domain if you haven’t done so already. Clicking on “Add Domain” will open a popup where you need to enter your domain name and a unique DKIM selector.
After adding the domain, CleverReach will generate a DKIM public key. To view the key, click on the three dots next to the domain and select “Show DNS Setting.”
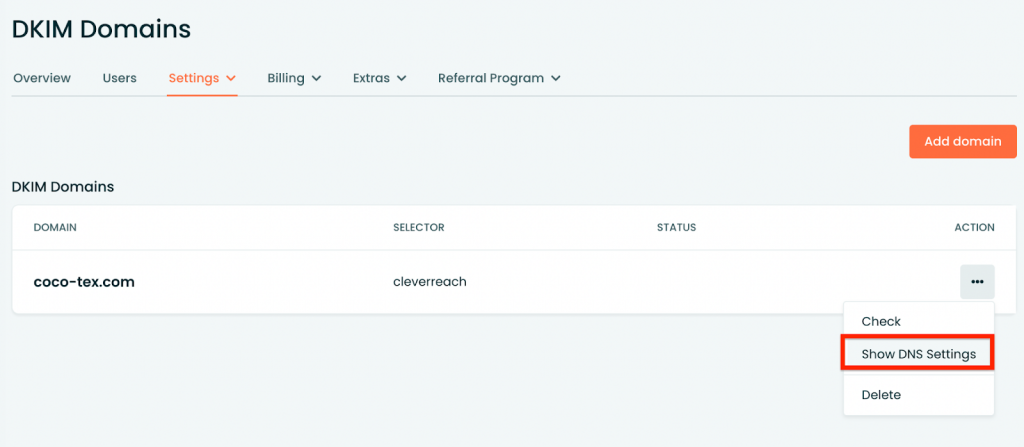
DKIM public key. See the screenshot below.
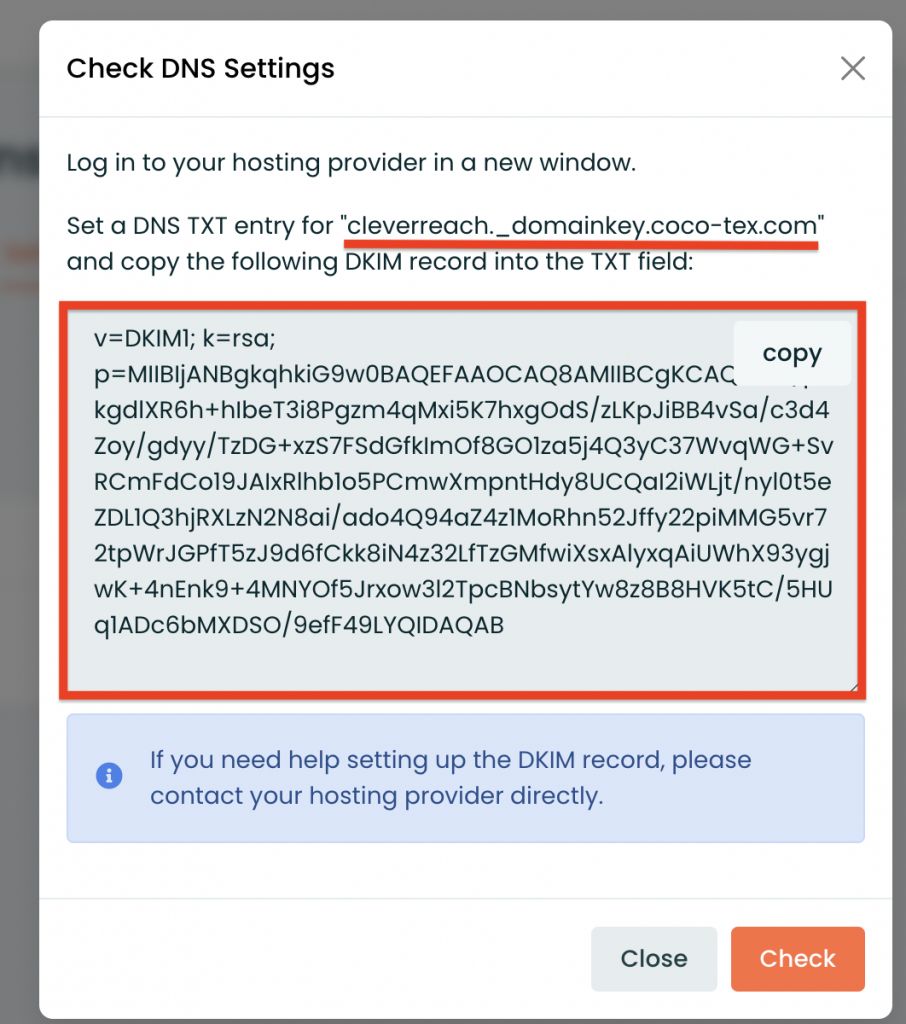
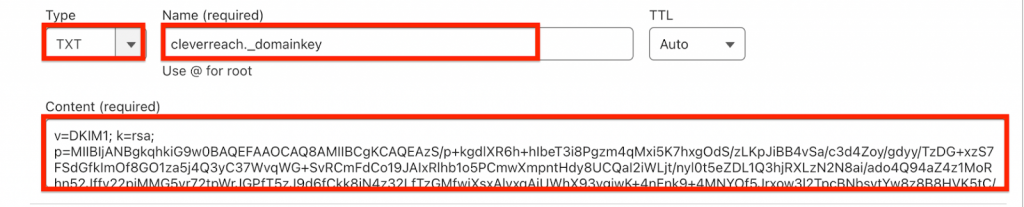
Copy the DKIM public key provided and publish it in your DNS, as shown in the screenshot.
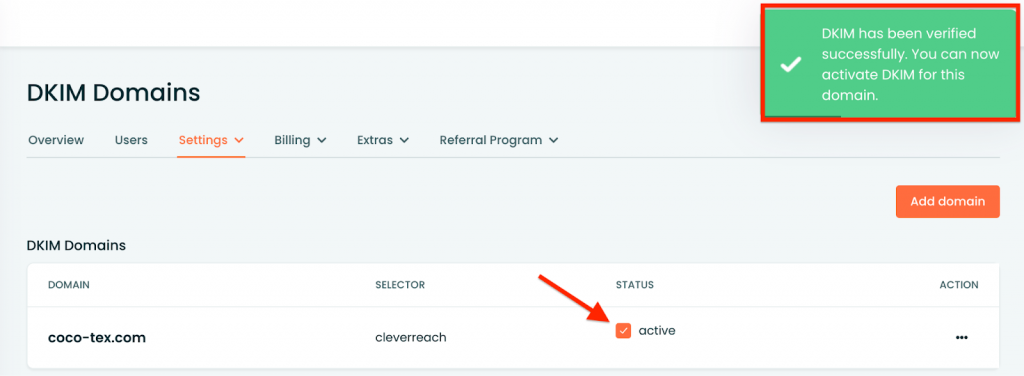
Once the record is published, return to your CleverReach account, click on “Check” to verify the record. If the record is correctly published, a green notification will appear, stating, “DKIM has been verified. You can now activate DKIM for this domain.” To complete the DKIM setup, check/enable the status to “active.”
CleverReach SPF Record Configuration
CleverReach is a subdomain-capable source, requiring the SPF record to be published on the subdomain level. There’s no need to include “include:spf.crsend.com” in the root domain’s SPF record, as it will result in alignment failure.
Setting up SPF for CleverReach involves the following steps:
– Navigate to “Settings”
– Click on “Domains” and then “Add domain”
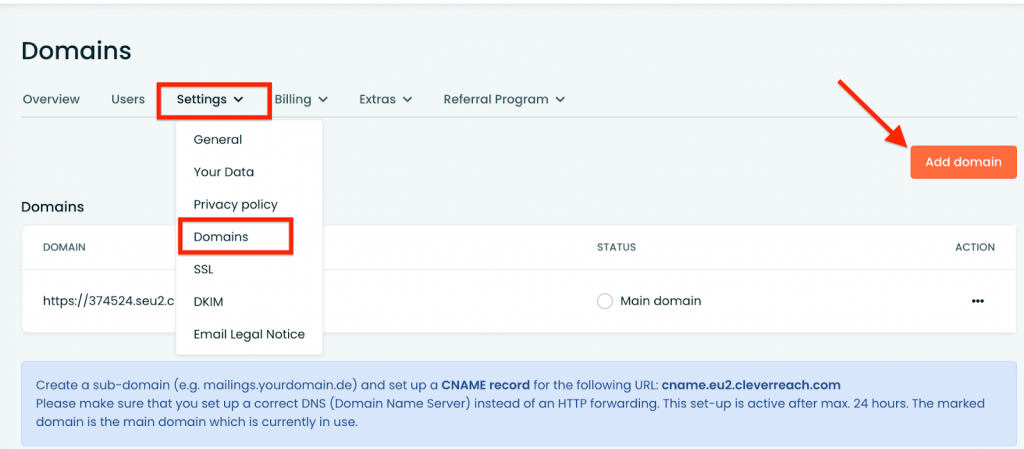
Clicking on “Add Domain” will open a popup where you need to create a subdomain and publish a CNAME SPF record on that subdomain.
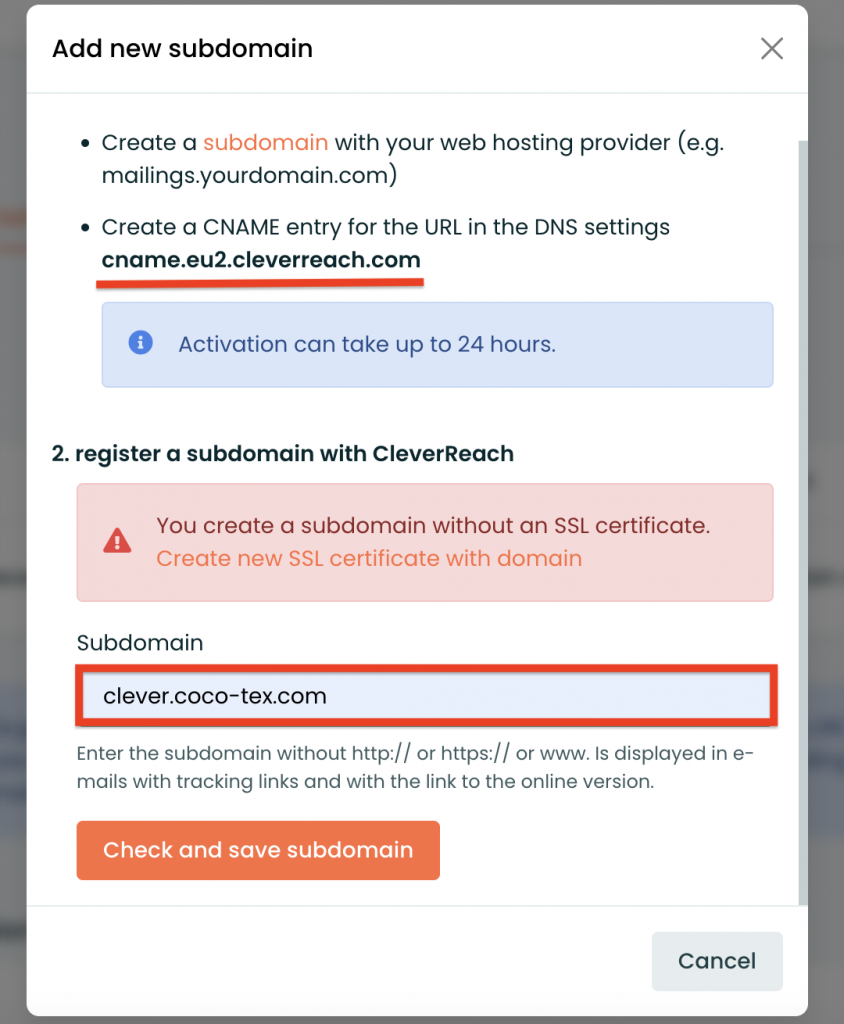
Prior to verifying the subdomain, ensure that you have published the CNAME SPF record on that subdomain within your DNS zone. Please refer to the screenshot below for an example of a published record. If you are using Cloudflare, make sure to deactivate the proxy status.
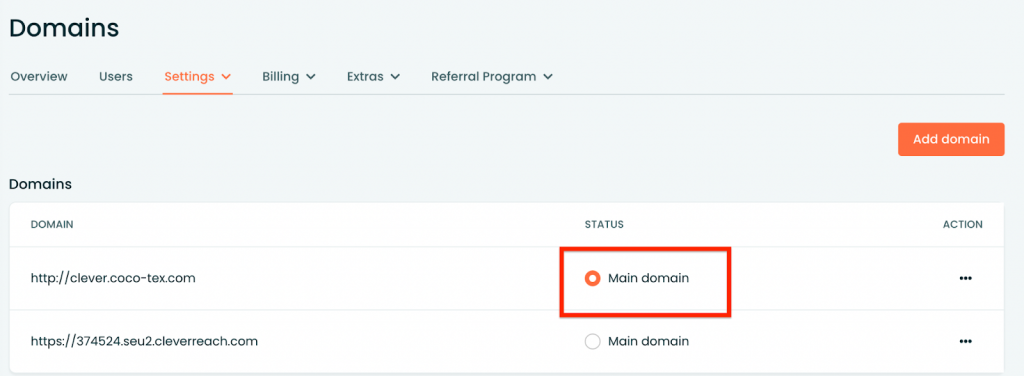
Once the CNAME record is published, return to your CleverReach account and click on “Check and save subdomain” in the popup window. On the Domains page, you will observe that the main domain is now the newly created subdomain, as shown in the screenshot below.

Important note: If the provider recommends publishing also a DMARC record, there’s no need to do so if you already have a DMARC record in place, as each domain can only have one DMARC record.
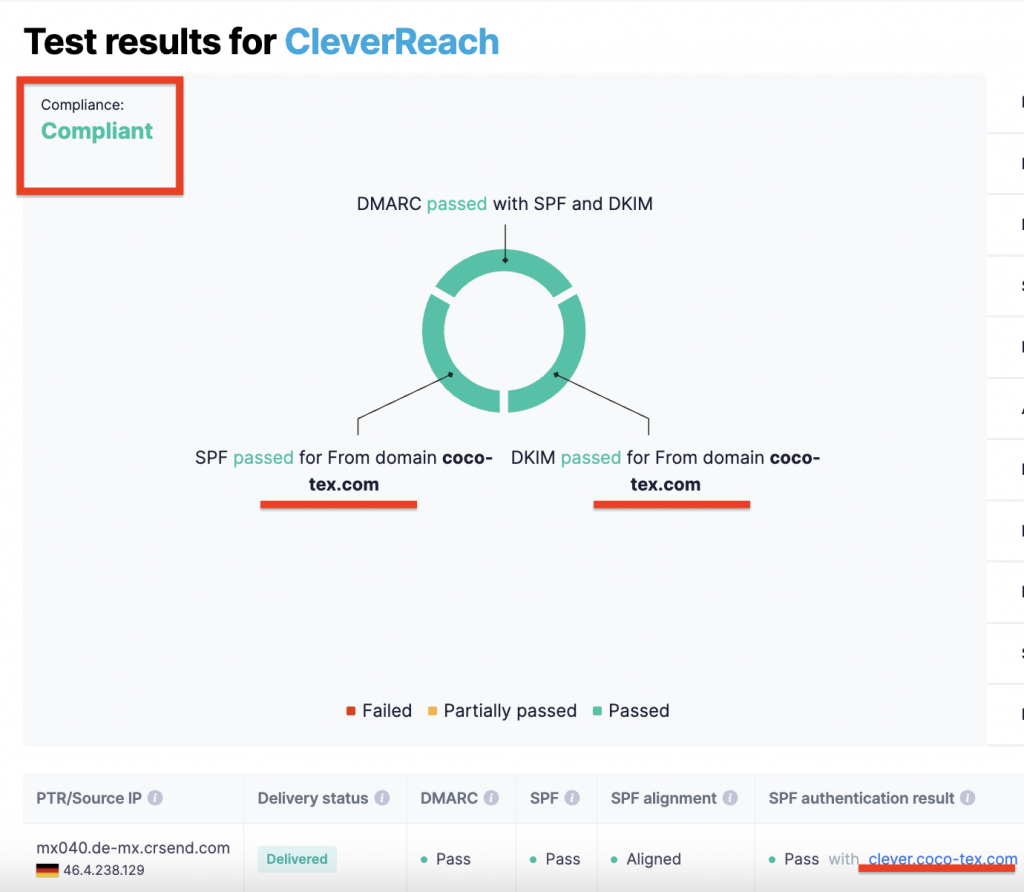
Upon completing the configuration process, you can test it using our Email Investigation tool. (See the screenshot below)