What is WordPress?
WordPress is a popular, open-source content management system (CMS) that allows users to easily create, manage, and publish websites and blogs. It is user-friendly and flexible, with a vast array of themes and plugins that enable extensive customization and functionality without needing extensive technical knowledge.
If your WordPress website sends out automated emails to users, these emails will originate from wpengine.com, where proper alignment is not configured. Specifically, wpengine.com will handle the authentication for your emails, meaning the return path address and the d= domain will be set to WPEngine. As a result, there will be no alignment, causing both SPF and DKIM protocols to fail. In this article, we will demonstrate how to configure WP SMTP Mail with multiple sending sources to ensure proper alignment for these emails.

What is the SMTP Mail plugin?
SMTP (Simple Mail Transfer Protocol) Mail plugins for WordPress help ensure that emails sent from your WordPress site are delivered successfully. These plugins configure your WordPress site to send emails through a reliable SMTP server instead of the default PHP mail function.
In this article, we will demonstrate the WP SMTP configuration for Google, Brevo, and SendGrid and guide you through the alignment process. Whether you want to use Google WP SMTP, Brevo WP SMTP, or even SendGrid WP SMTP, you need to be aware of these key points.
Advantages of bulk sending ESPs (Brevo/SendGrid/MailGun):
- Designed for Bulk Email: These ESPs are specifically designed for bulk email marketing, with features tailored to manage large email campaigns.
- Higher Sending Limits: Offers generous sending limits and scales according to your plan, making it suitable for sending thousands or even millions of emails.
- Advanced Features: Includes tools for campaign management, list segmentation, automation, A/B testing, and detailed analytics.
- Deliverability Optimization: Focuses on deliverability, ensuring your emails reach the recipients’ inboxes through dedicated IP addresses and optimized sending practices.
- Integration and Support: Seamlessly integrates with WordPress and provides excellent support and documentation.
Disadvantage
Cost: While these ESPs offer a free plan, the more advanced features and higher sending limits come at a cost. However, the pricing is competitive and often worth it for the additional capabilities.
Advantages of Google/Microsoft365/etc.
- Easy Setup: If you already have a Gmail or Google Workspace account, setting up the Google WP SMTP plugin can be straightforward.
- Reliable Delivery: Emails sent through Gmail’s SMTP servers are generally reliable and have good deliverability.
- Security: Google’s SMTP server uses robust security protocols, ensuring the secure transmission of emails.
Disadvantages of Google:
1. Rate Limits: Gmail has strict sending limits:
- Free Gmail accounts: Up to 500 emails per day.
- Google Workspace accounts: Up to 2,000 emails per day, depending on the plan.
- These limits make Gmail unsuitable for large-scale bulk email campaigns.
⒉ Not Designed for Bulk Email: Gmail is primarily intended for personal and small business use, not for sending large volumes of marketing emails.
Additionally, there are other sending sources similar to Google, such as Zoho, and similar to Brevo, such as AmazonSES and PostMark. These are just a few examples.
Choosing the right provider depends on your business needs. If your WordPress emails are sent in bulk, you can opt for bulk-sending options such as Mailgun or SendGrid. If your email volume is lower, you can use Google or Microsoft 365. Below, we will provide instructions for both bulk and non-bulk providers to help you configure your chosen option.
Send emails in WordPress using the WP SMTP Mail plugin
Instead of using the default PHP mail() function, you can send emails via SMTP services using an SMTP plugin in WordPress. In this guide, we will set up the recommended WP Mail SMTP plugin for WordPress to send emails.
Tip: Upgrading to the Pro version of this plugin is not necessary to use the SMTP servers.
- Install and activate the plugin
- Specify settings for “Mailer”
- Send a test email
Step 1 -Install and activate the plugin
- Log in to your WP Admin.
- In the left section, click on Plugin and then Add New.
- You can use the search field in the right corner to look for “WP Mail SMTP”.
- Find the plugin WP Mail SMTP by WPForms and click on the button: Install Now.
- After installation, the button should change to Activate. Click on Activate.
If this is your first time activating the plugin, the WP Mail SMTP Setup guide will open automatically. If you’ve previously installed or completed the setup guide, you will be redirected to the default WP Plugins overview.
If the setup guide appears after activation, click the grey link “Go back to the Dashboard” below the orange button to access the plugin’s settings page.
Step 2 – Specify settings for “Mailer”
Head to the settings page of the plugin and use the following setup:
Note: Ensure that you have a domain authenticated and verified in Brevo (formerly Sendinblue) before proceeding with the steps below. If you do not have a domain authenticated in Brevo, please refer to this article for instructions.
Important Note: I will be using Brevo (formerly Sendinblue) as an example in this article.
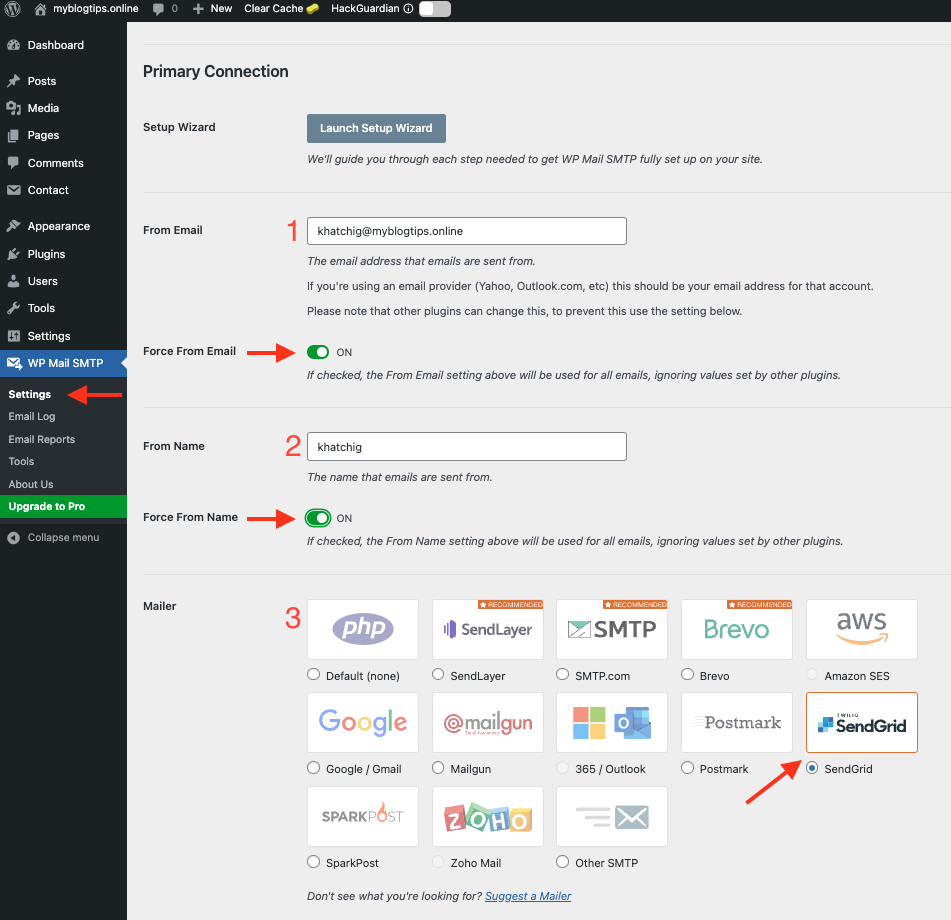
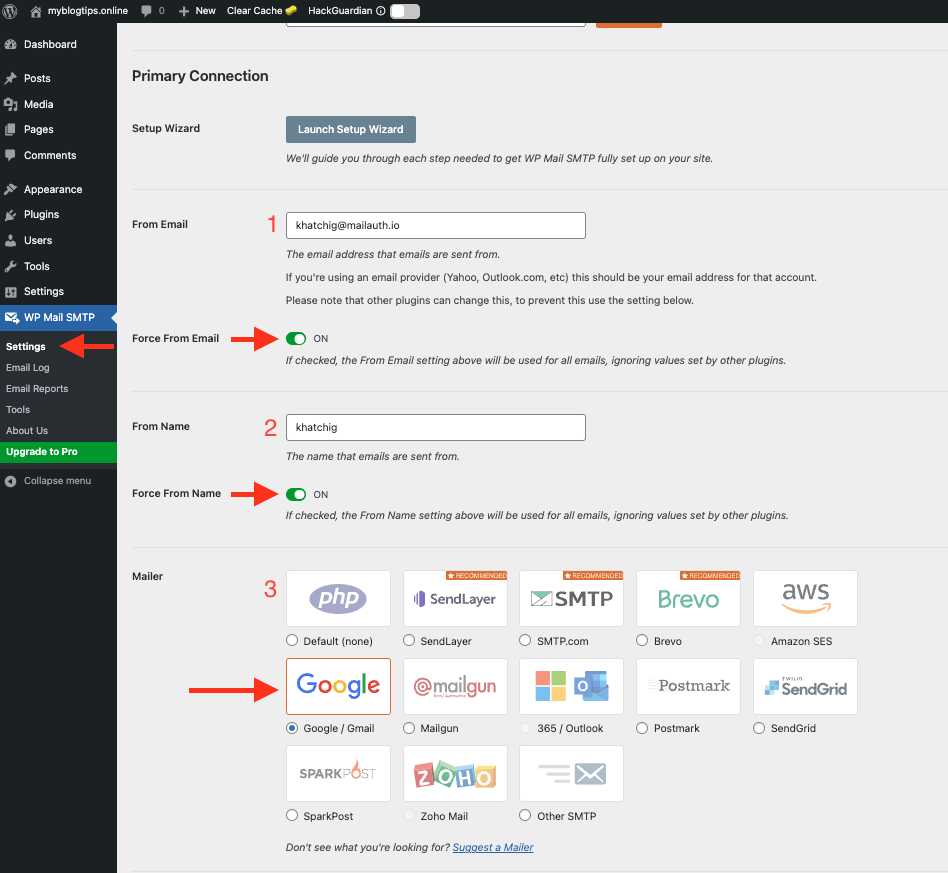
1. From Email: Enter an existing email address you want to send all emails with. I will be using my personal email address in this field.
Please Note: Email addresses from third-party providers will not function. Please use an email address created using your domain.
- Force From Email: Checking this box ensures that only designated email addresses are used in emails, preventing issues that may cause emails to fail to send.
2. From Name: You can enter anything you want in this field. It will be the display name that the recipient will see when they receive an email from you.
- Force From Name: By checking this, the From Email setting will be used for all emails.
3. Return Path: Return Path indicates where non-delivery receipts, or bounce messages, are to be sent.
- This is important to check if you are using a different SMTP plugin other than Brevo, as it’s for SPF alignment. If you are setting it up on Brevo, this field will not be visible to you, as Brevo (formerly Sendinblue) does not support SPF alignment and only relies on DKIM.
4. Mailer: Select the option Brevo (formerly Sendinblue)
Step 3 – Specify settings for “Brevo” (formerly Sendinblue)
Continue to the setup scroll down to click on “Brevo” (formerly Sendinblue) and follow the instructions below:
- API Key: You can get the API key from Brevo (formerly Sendinblue) by clicking on the link provided by the WP Mail SMTP, Or by logging into Brevo (formerly Sendinblue) and following the steps provided in the video below.
- Sending Domain: You will need to enter the sending domain/subdomain that you’ve configured in Brevo (formerly Sendinblue).
- Finally, make sure to click on “Save Settings”.
Step 4 – Send a test email
- From the WP Mail SMTP
- Click on Tools
- In the Send To field enter the email address to which you wish to send a test email
- Finally, click on Send
Note: In order to start sending out emails, you need to authorize the IP addresses that your organization us

Configuration of WP Mail SMTP Using Google
Note: Ensure that you have a domain authenticated and verified in Google before proceeding with the steps below. If you do not have a domain authenticated in Google, please refer to this article for instructions.
Step 1 – Specify settings for “Mailer”
Mailer: Select the option Google
Step 2 – Getting the API Credentials from Google
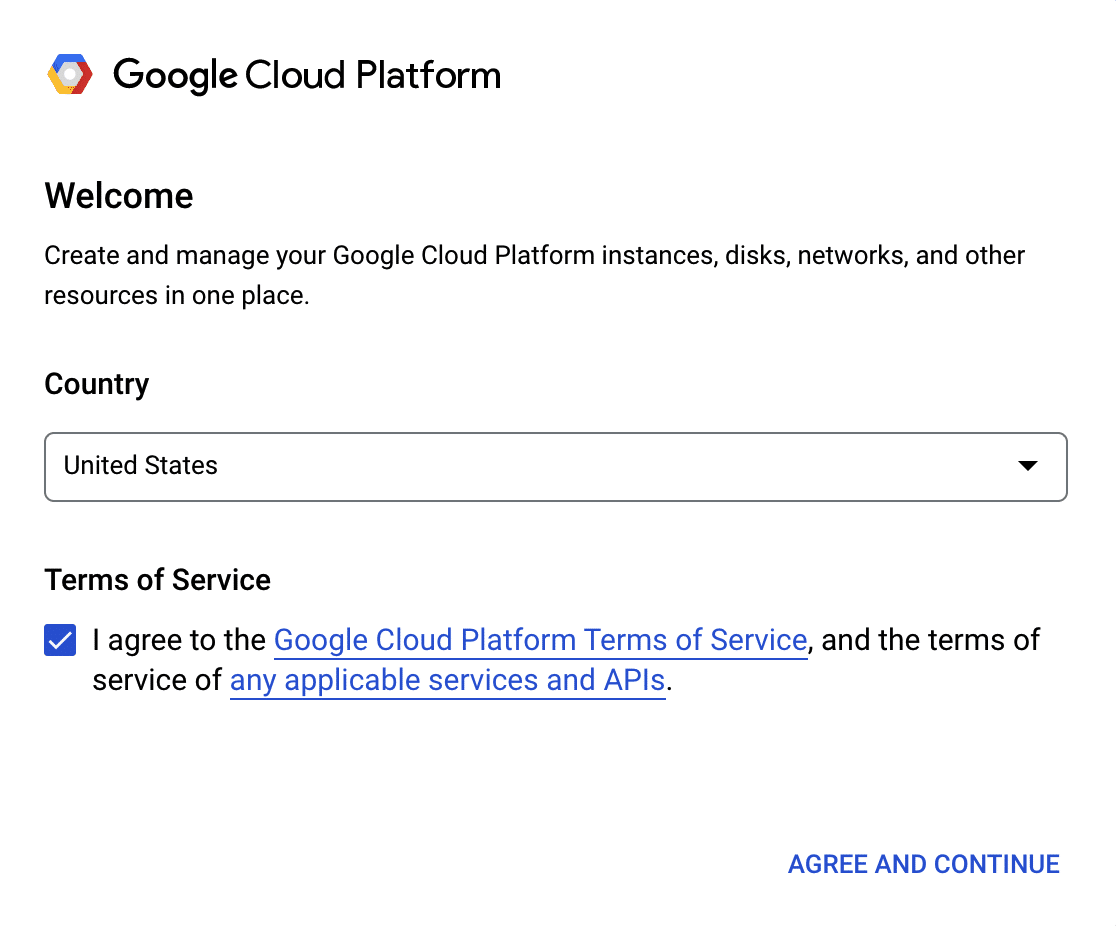
1. Open a new tab or window, log in to your Google account, and open your Google Cloud Console.
If this is your first time using Google Cloud Console, you may see a popup prompting you to select your country and agree to the Terms of Service. Please complete these steps and then click AGREE AND CONTINUE to proceed to the next step.
2. Creating or Choosing a Project
First, you need to choose a project for your app. You can either select an existing project or create a new one.
To do this, click on the project dropdown in the toolbar at the top of your dashboard.
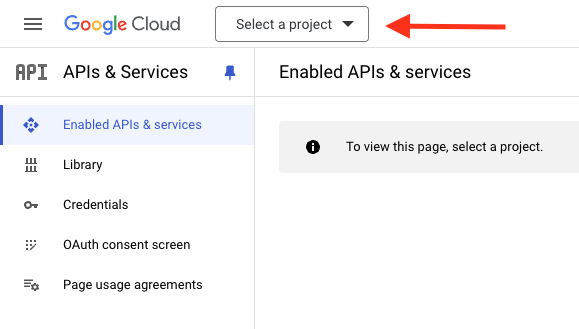
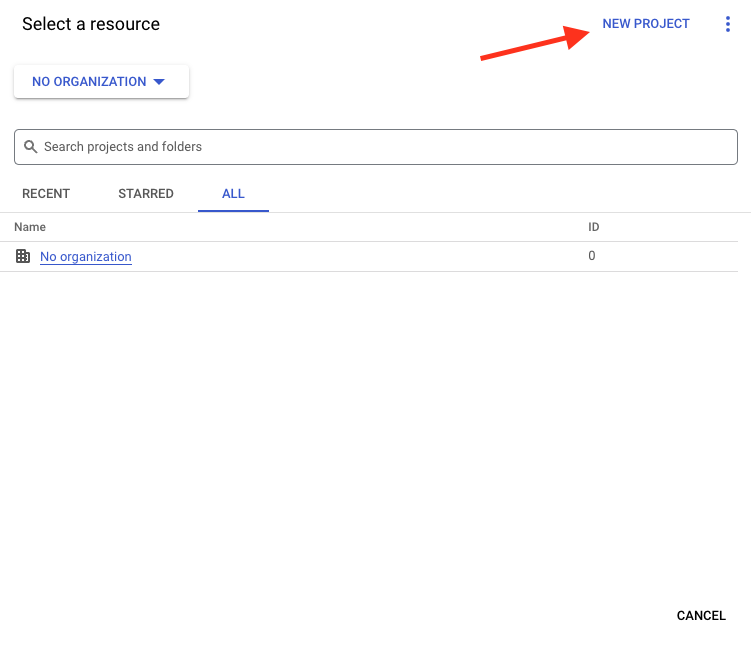
In the popup that appears, choose an existing project from the list or click on “New Project” in the top right corner.
If you selected an existing project, proceed to the next step. If you are creating a new project, enter a project name and choose an organization and location from the dropdowns.
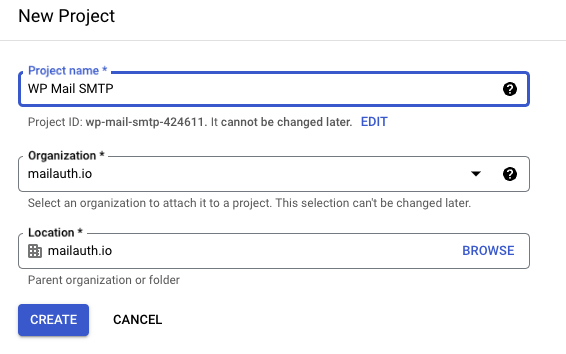
Now Click on the CREATE button.
3. Enabling the Gmail API
The next step is to enable the Gmail API for your project. In your Google Cloud Console sidebar, go to APIs and Services > Library.

Enter “Gmail API” in the search bar, then click on it.
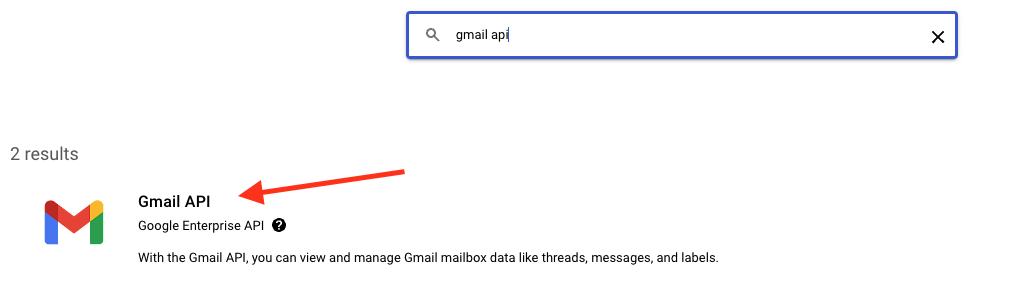
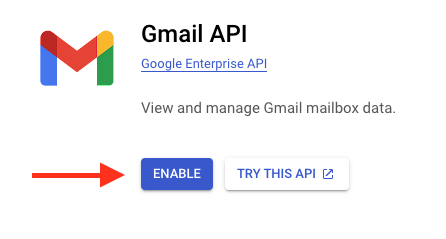
On the Gmail API page, click the blue ENABLE button.
4. Creating Your Application’s Credentials
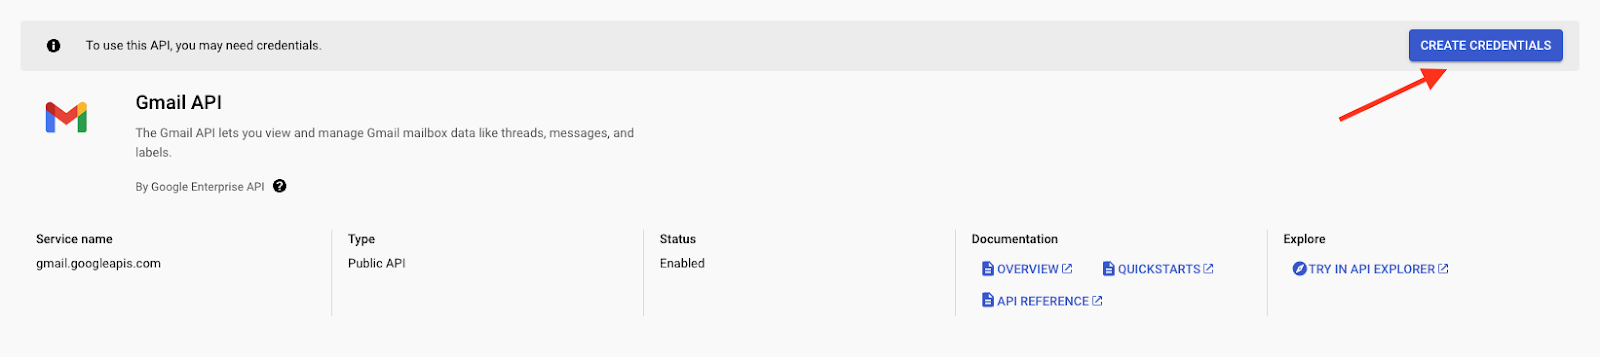
After enabling the Gmail API, you will be redirected to the Gmail API Overview page. Click on the CREATE CREDENTIALS button.
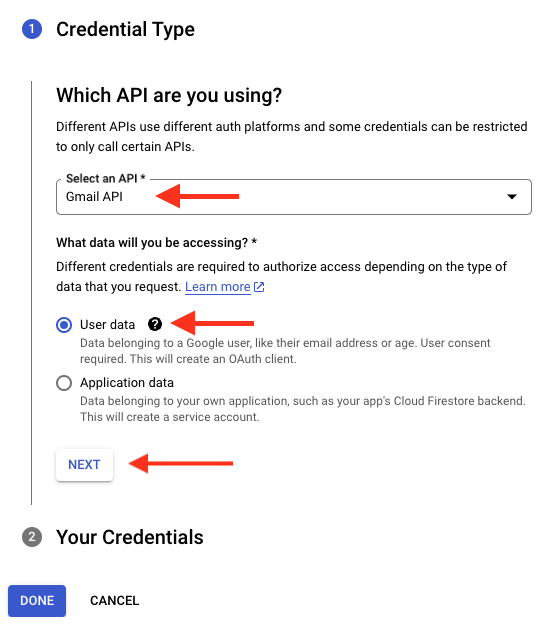
On the next page, Google will ask a few questions to determine the type of credentials you need. From the Select an API dropdown, choose Gmail API. Under What data will you be accessing?, select User data. Then click the NEXT button to proceed.
5. Setting Up Your OAuth Consent Screen
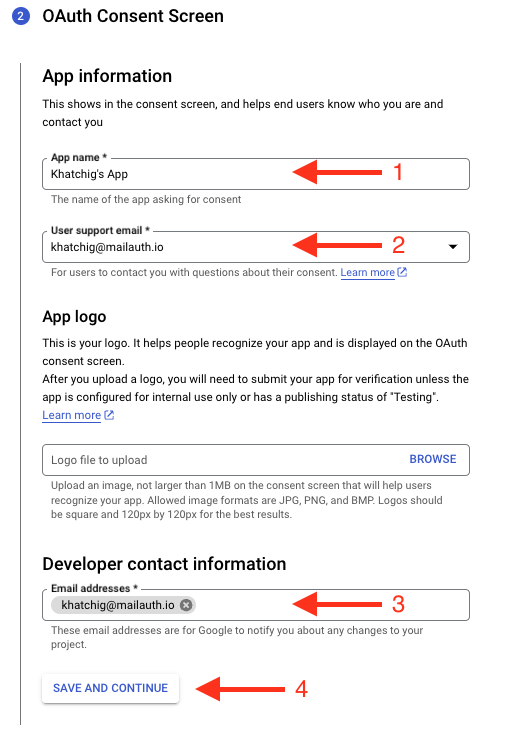
Google will then request some basic information about your app. While this section is primarily for personal use since no one else will be using your app, certain fields are marked as required:
- App name: Provide a name for your app (e.g., “Khatchig’s App”).
- User support email: Choose your email address from the provided options.
- App logo: Optionally, you can upload a logo for your app.
- Email addresses: Add your email address in the designated field.
Click on the SAVE AND CONTINUE button to proceed to the next step.
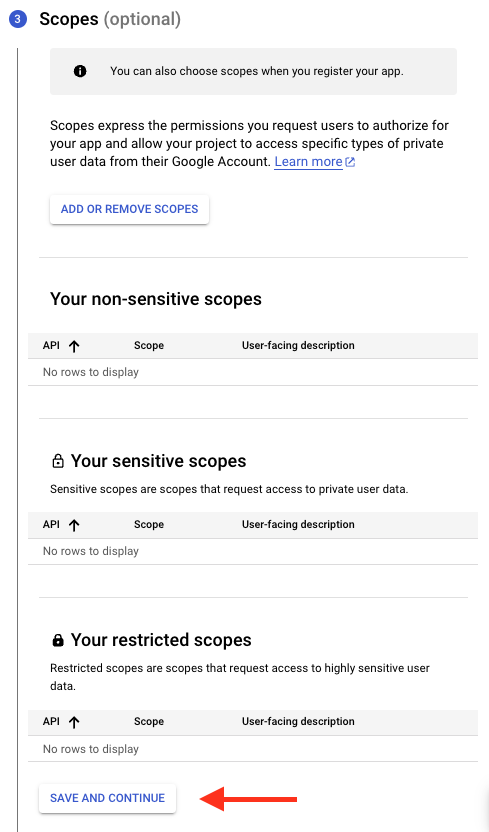
6. Configuring Scopes (Optional)
This step is optional, and for this tutorial, we will skip it. Scroll to the end of the Scopes section and click on the SAVE AND CONTINUE button to move forward.
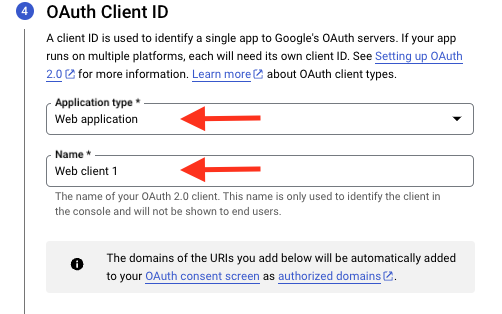
7. Configuring Your OAuth Client ID
Next, you’ll need to provide some details for your OAuth Client ID.
Choose the “Web application” option from the Application type dropdown menu. Once selected, additional fields will automatically appear.
You can keep the Name field as the default value or change it to something more relevant. In this example, we’ll retain the default name, “Web client 1.”
Next, proceed to the Authorized redirect URIs section and skip the Authorized JavaScript origins section.
Click on the + ADD URI button and enter the following URI: https://connect.wpmailsmtp.com/google/ Alternatively, you can copy this value from your WP Mail SMTP settings and paste it here if you prefer.

After adding the URI, click on the CREATE button to finish this step.
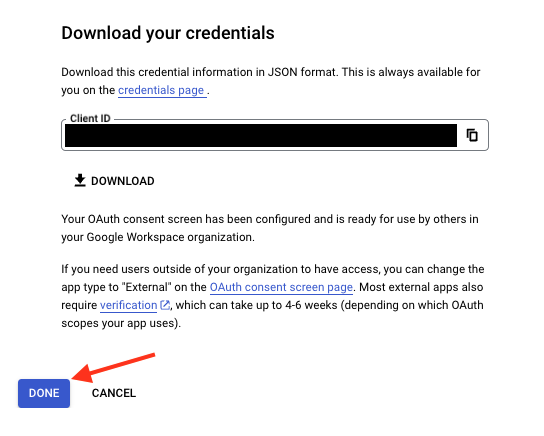
Once your app has been created, your Credentials section will expand to display your Client ID. You don’t need to copy it now, as you’ll access it from another location in a later step.
Simply click the DONE button at the bottom of the page to proceed.
8. Transitioning the Publishing Status from Testing to Production
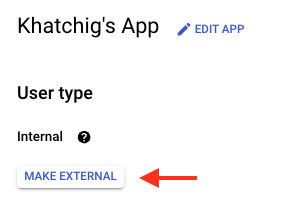
Google Workspace Users
By default, Google sets your app to Internal mode. It’s crucial to switch it to External mode and publish it to ensure proper functionality. Otherwise, your app will have significant limitations.
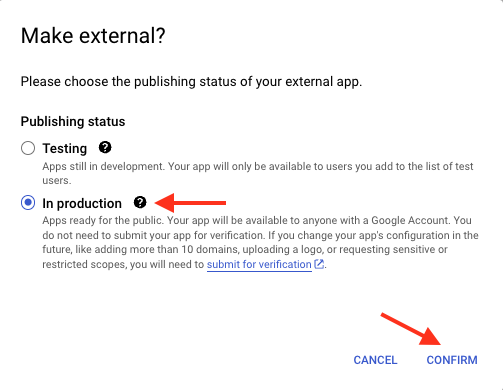
In your Google Cloud Console sidebar, navigate to the APIs & Services » OAuth consent screen. Under User type, click on the MAKE EXTERNAL button.
Note: If the User type is set to Internal, only users within your organization can access your app. For instance, if your Workspace domain is example.com, users can only access your app using an @example.com email address.
External email addresses will encounter an error message stating “Error 403: org_internal” when attempting to grant WP Mail SMTP access to your app.
In the popup window, choose the “In Production” option. Then, click on CONFIRM.
Gmail Users
If you’re not utilizing Google Workspace, the MAKE EXTERNAL option won’t be visible. Instead, you’ll need to publish your Google app.
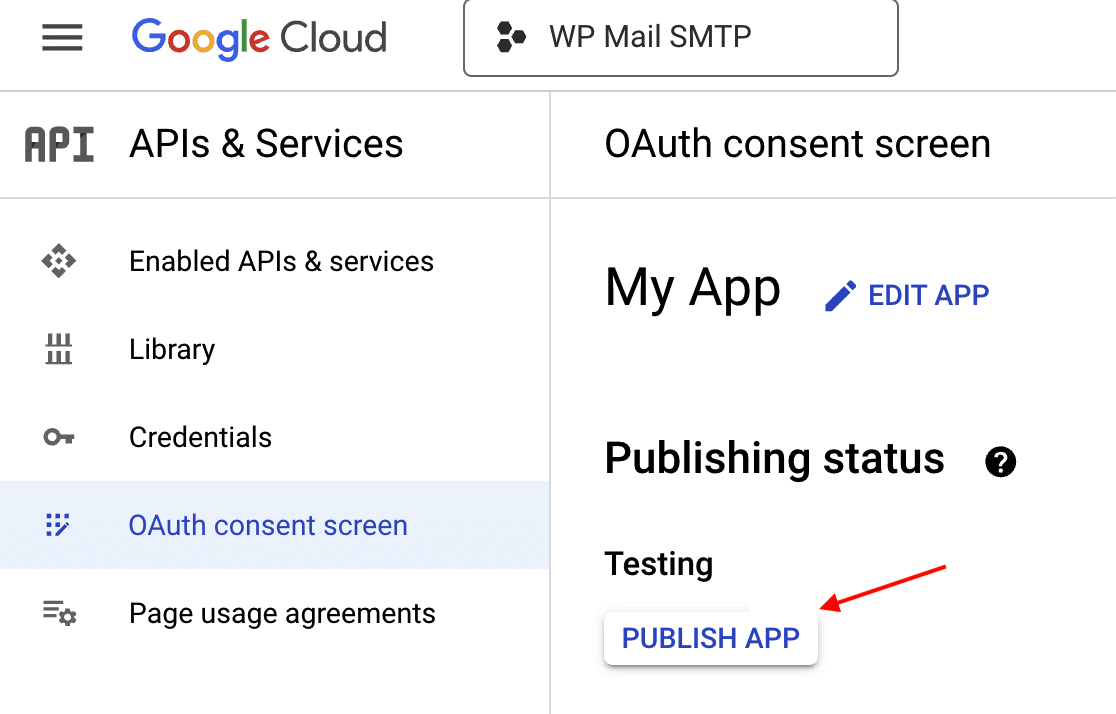
To proceed, navigate to the APIs & Services » OAuth consent screen. Under Publishing status, if the app status is set to Testing, click the PUBLISH APP button to update the status of your app.
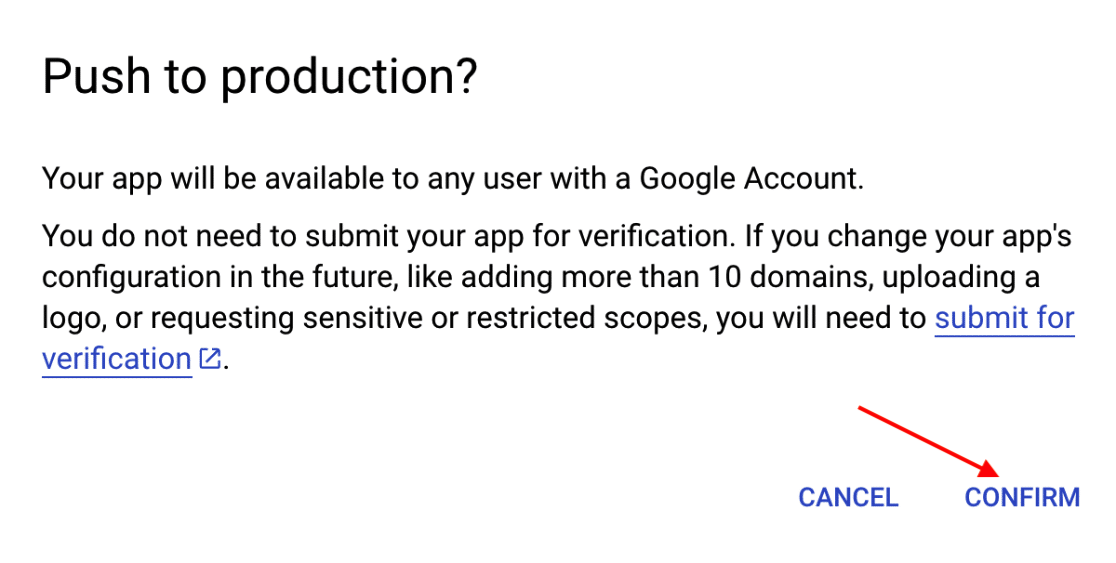
In the overlay, click CONFIRM to publish your app.
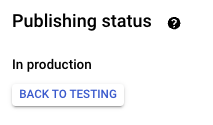
Once confirmation is complete, you’ll notice that your app’s Publishing status has been updated to “In production.”
9. Giving Your Site Google/Gmail Permissions
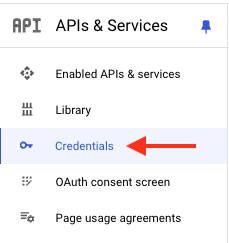
Next, select “Credentials” from the left side menu.
Once you’re on the Credentials page, locate the OAuth 2.0 Client IDs section. Here, you can view the details of the web application you just created. To access the Client ID and Client Secret, click on the pencil icon.
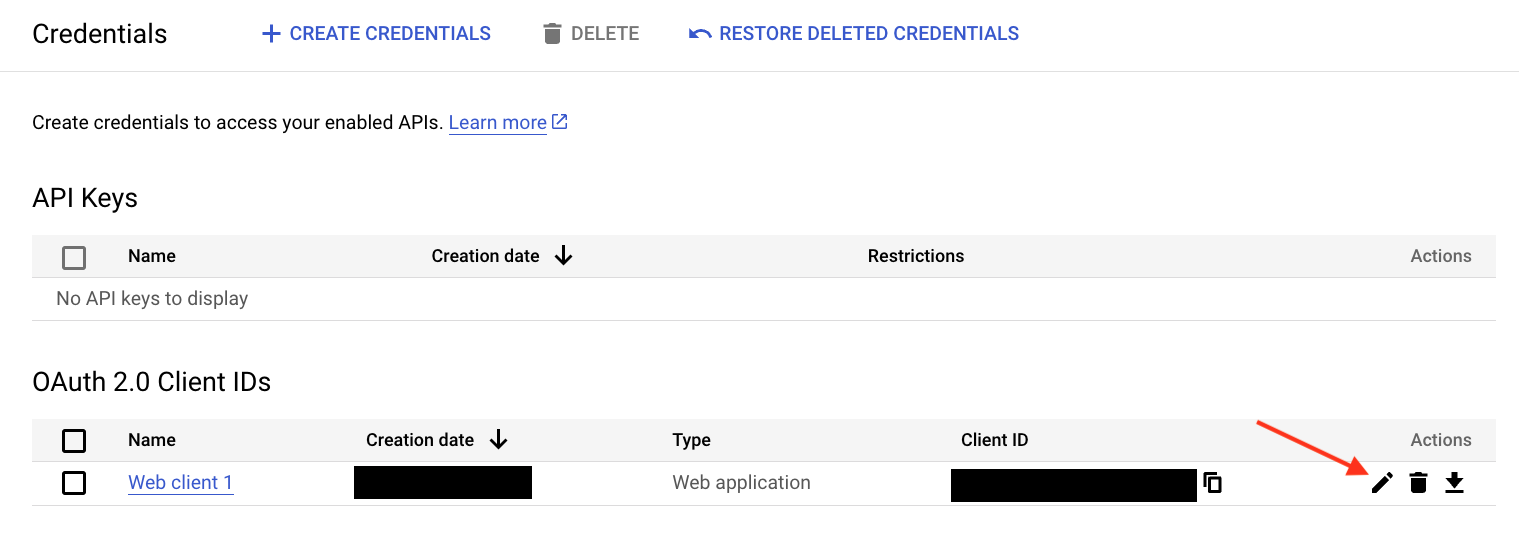
This will display all the details for your app. On the right side of this page, you’ll find the Client ID and Client Secret values.

Please proceed to copy both of these values into the corresponding fields in your WP Mail SMTP settings.

Note: Ensure that you are cautious not to include any extra text or spaces with your Client ID or Client Secret, as this may lead to errors in the subsequent steps.
After adding these values, click on the “Save Settings” button located at the bottom of the page.
After saving your settings, you need to grant permission before Google allows our plugin to utilize your Gmail API to send emails.
To grant permission, scroll to the bottom of the WP Mail SMTP settings page and click on the button labeled “Allow plugin to send emails using your Google account.”

Clicking this button will open a Google login screen. Please proceed to log in to the account you are setting up SMTP with.
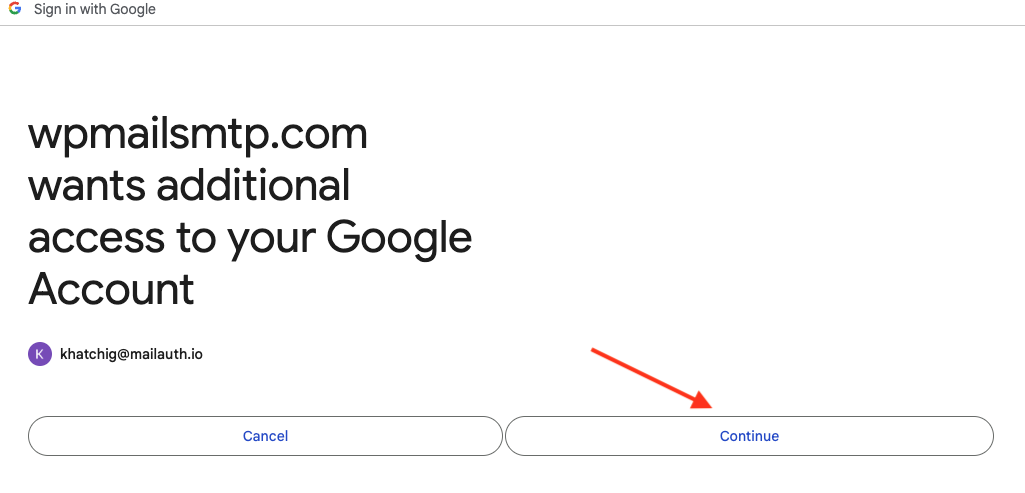
Next, you’ll encounter a screen requesting permission for this site to send emails on your behalf.
When you’re prepared, click the “Allow” button and proceed by clicking the Continue button.
10. Send a Test Email
- From the WP Mail SMTP
- Click on Tools
- In the Send To field enter the email address to which you wish to send a test email
- Finally, click on Send
Congratulations, you have successfully configured WP Mail SMTP with Google.
Configuration of WP Mail SMTP Using SendGrid
Note: Ensure that you have a domain authenticated and verified in SendGrid before proceeding with the steps below. If you do not have a domain authenticated in SendGrid, please refer to this article for instructions.
Step 1 – Specify settings for “Mailer”
- Mailer: Select the option SendGrid

Step 2 – Specify settings for SendGrid
You need to obtain the API key from SendGrid to be able to send emails using WP SMTP.
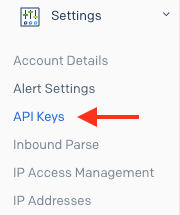
1. Go to Settings, then click on “API Keys” from the bottom left side.
2. Click on “Create API Key” from the upper right section.
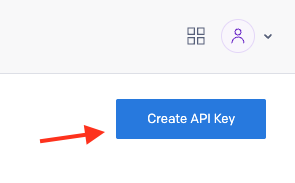
3. Once clicked, enter the Name of your API Key. In my case, I will name it “Test” and choose the “Full Access” option, and then click on Create & View.

4. After clicking, the platform will provide you with the API key. You’ll need to copy and paste it directly into the API key section in WP SMTP.
- Note: You will only be able to view it once, so be sure to copy and paste it somewhere safe for future reference.
5. Paste it into the API key section in WP SMTP, add your sending domain, and finally, be sure to click on “Save Settings.”

Step 3 – Send a Test Email
- From the WP Mail SMTP
- Click on Tools
- In the Send To field enter the email address to which you wish to send a test email
- Finally, click on Send
Congratulations, you have successfully configured WP Mail SMTP with SendGrid.