


Constant Contact is an EmailMarketing platform. If you are using Constant Contact to send emails on your domain’s behalf, you should set up a DKIM record to ensure your emails are sent from your domain.
Constant Contact SPF Record Configuration
Note: There is no need to set up SPF record for Constant Contact, as the “Envelope From” domain will always be handled by the server of Constant Contact. For SPF to be aligned you should have your “From address” domain in the “Envelope From” address. Constant Contact always handles the “Envelope From” domain, during the DMARC record lookup, this “Envelope From” domain will not match with your “From address” domain, so SPF alignment will fail. This happens not only with Constant Contact but with the majority of Email Service Providers. Sometimes, you’ll be suggested to add “include:spf.constantcontact.com” to your SPF record, but doing this you won’t achieve alignment. Instead, you’ll just whitelist the IP addresses of Constant Contact, simply wasting precious DNS lookups.
In case you add the include provided from Constant Contact in your SPF record, your SPF record will look like the one below,
v=spf1 include:zoho.com include:mxsspf.sendpulse.cominclude:spf.constantcontact.com ~all
Just be informed that there is no need to do this, as SPF will fail due to misalignment, even if you add that “include” in your SPF record.
Constant Contact has an article regarding the SPF alignment as well, you can check it out in this link, How do I pass a DMARC check?
DMARC requires either DKIM or SPF to be authenticated and aligned, so you will pass the DMARC check even without SPF alignment. SPF alignment failing won’t affect your email deliverability if you have DKIM in place. Thus you need to set up only DKIM for Constant Contact.
DKIM for Constant Contact
Constant Contact gives you two options for configuring DKIM record.
– Self-authenticate using DKIM CNAME records
– Self-authenticate using a DKIM TXT record
FYI: A DNS record for DKIM can be entered either as a CNAME record or as a TXT record. The type to be used depends on whether the DNS record contains a key or a pointer to a key.
TXT – Used if the DNS record contains a key.
CNAME – Used if the DNS record is a pointer to a key.
Self-authenticate using DKIM CNAME records
Please follow the below instructions for configuring DKIM with CNAME records.
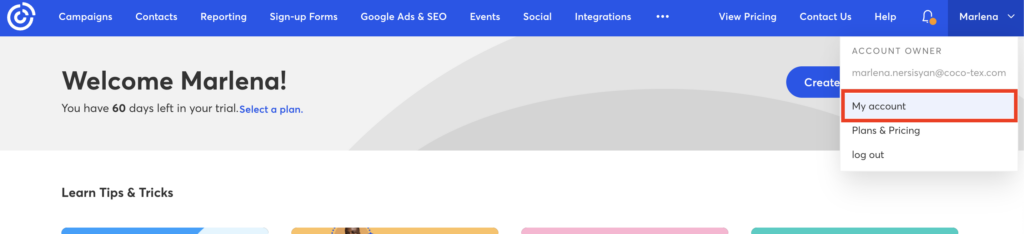
1. Click the profile name in the upper-right and select My Account
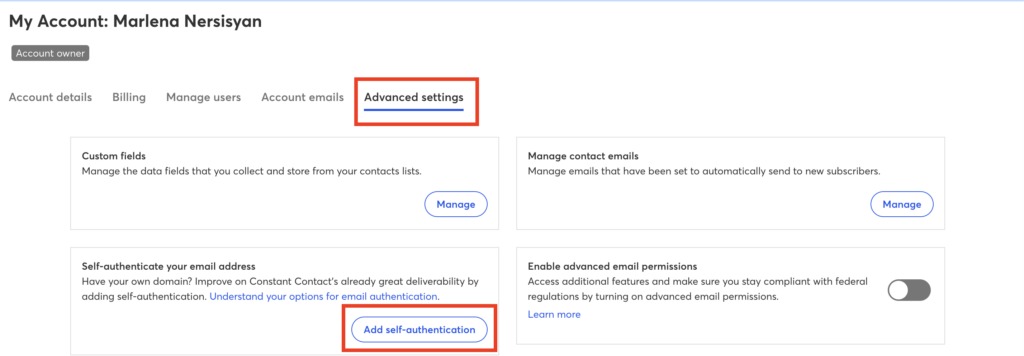
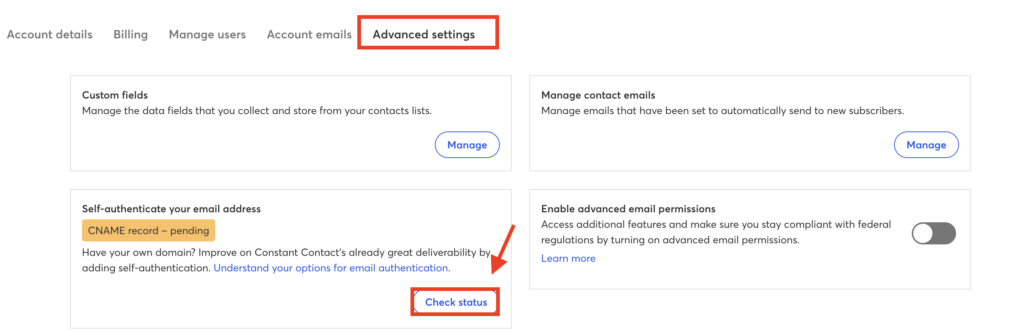
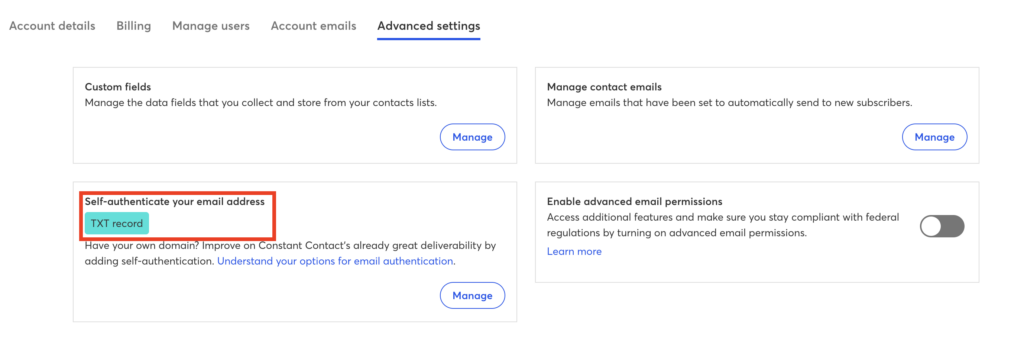
2. Click on the Advanced settings tab.
3. Click on Add self-authentication.
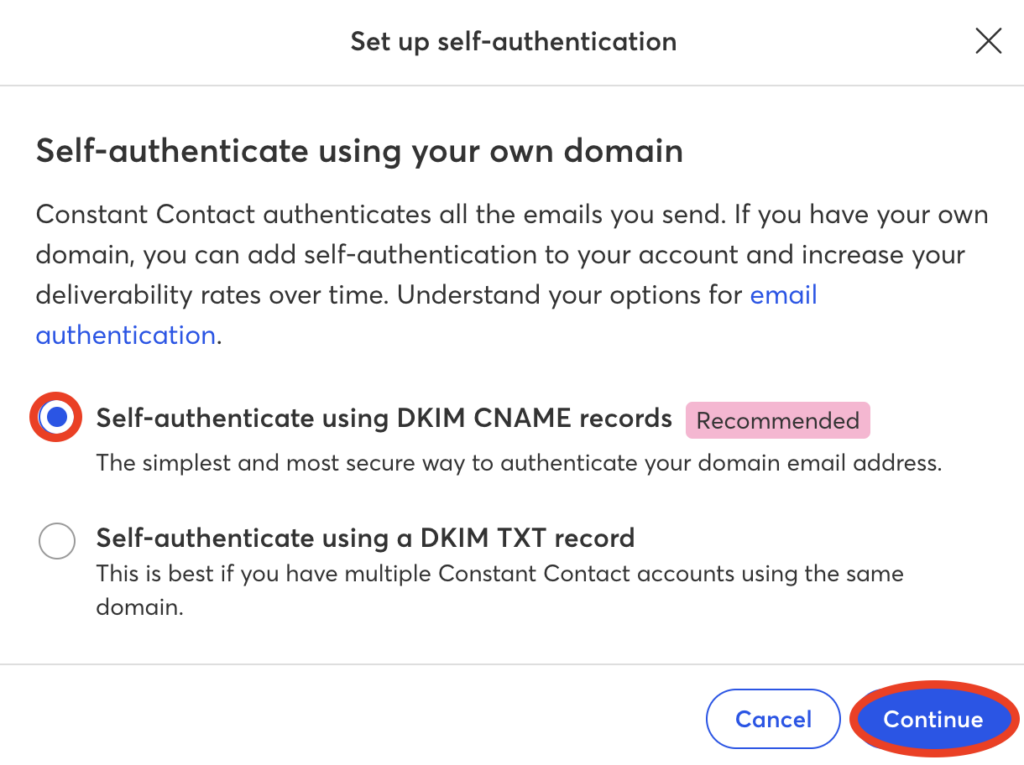
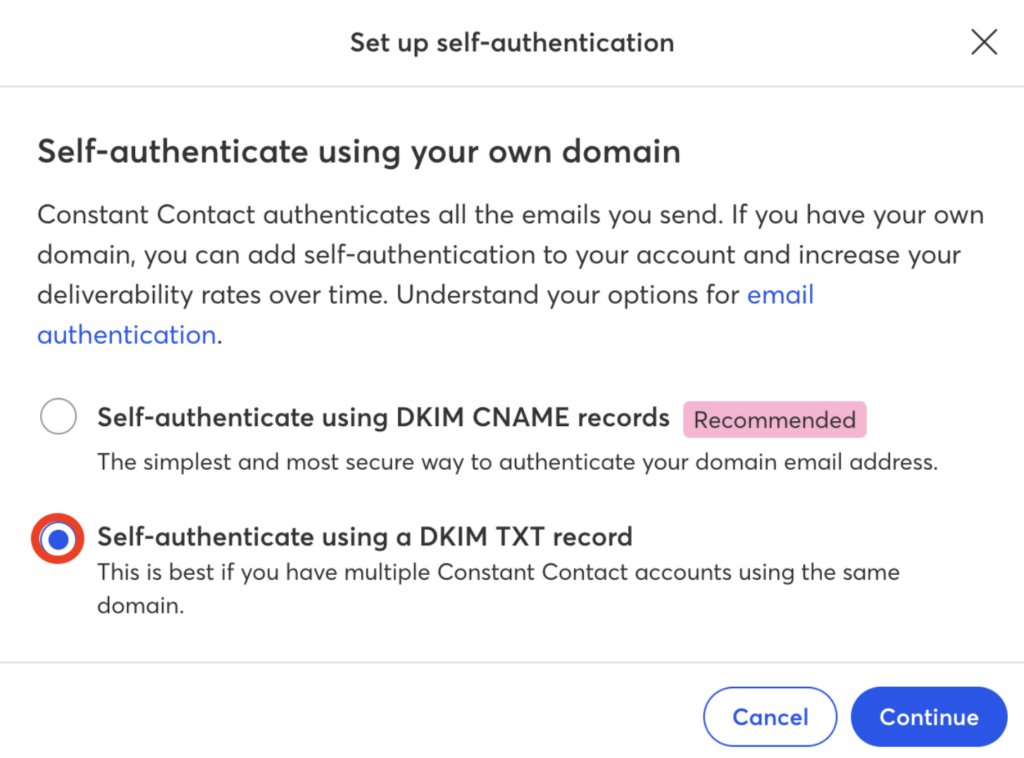
4. Select “Self-authenticate using DKIM CNAME records.” on the popup window.
5. Click on Continue.
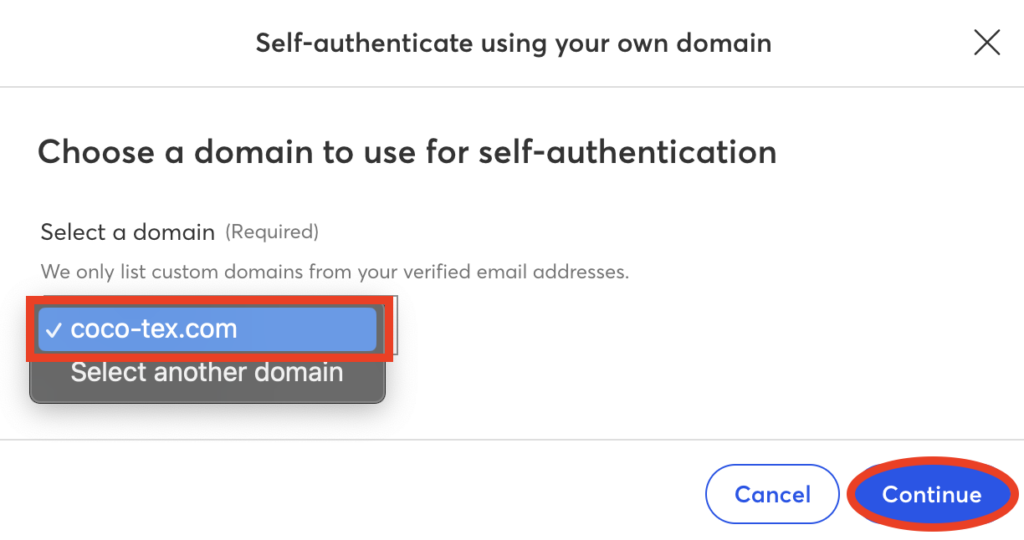
6. From the popup window, select the domain you want to authenticate. If the domain you want isn’t listed, choose “Select another domain” from the drop-down to add and verify a new email address.
7. Click Continue.

8. Copy and paste those two CNAME records in your DNS provider.
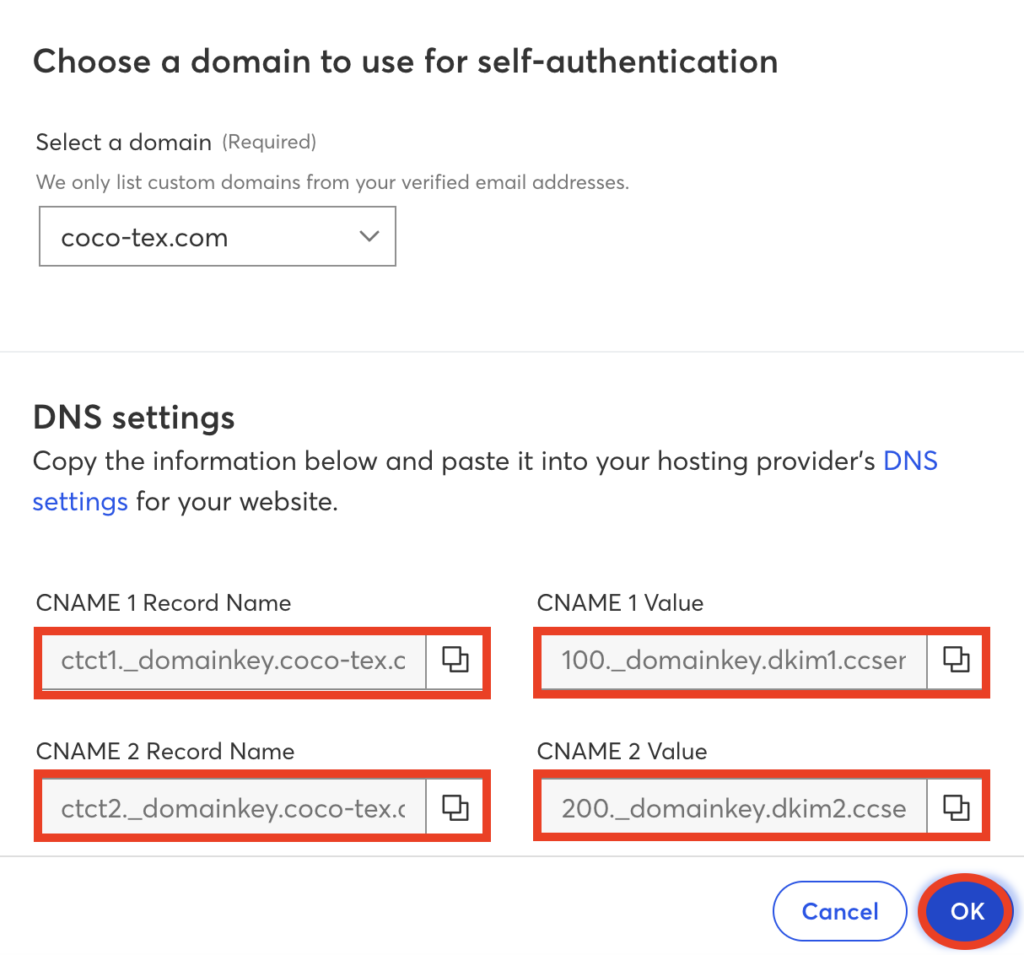
9. Click Ok, once you finish publishing the CNAME records in your DNS.
10. A popup window will inform you that the implementation takes up to 48 hours. Click on Got it.

11. Click on OK to return to your account.
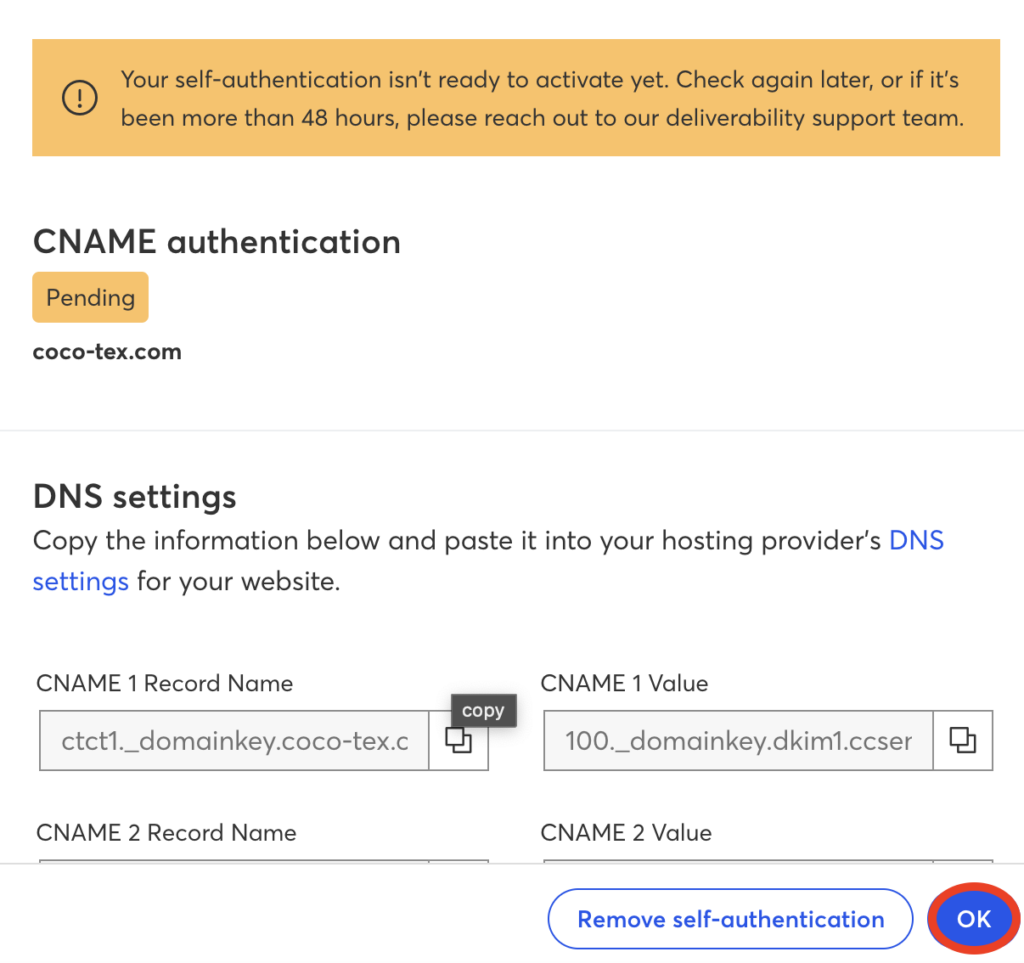
12. Approximately 24-48 hours after you’ve published the CNAME records into your DNS settings, click Check status to finish activating your authentication.
13. If you see that it is already ready to activate, click on the Activate button and finish the authentication process.
Self-authenticate using a DKIM TXT record
Constant Contact recommends you authenticating your domain with a DKIM TXT record if you have multiple Constant Contact accounts using the same domain. When you authenticate your domain using a DKIM TXT record, Constant Contact generates a public/private DKIM key pair for you. They use the private key to sign your outgoing emails, while you publish the public key in your DNS zone.
1. Select “Self-authenticate using a DKIM TXT record.”
2. Click on Continue.
3. From the popup window, select the domain you want to authenticate. If the domain you want isn’t listed, choose “Select another domain” from the drop-down to add and verify a new email address.
4. Click Continue.
5. Click on Generate Key

6. a DKIM public key will be generated for you to publish in your DNS zone.
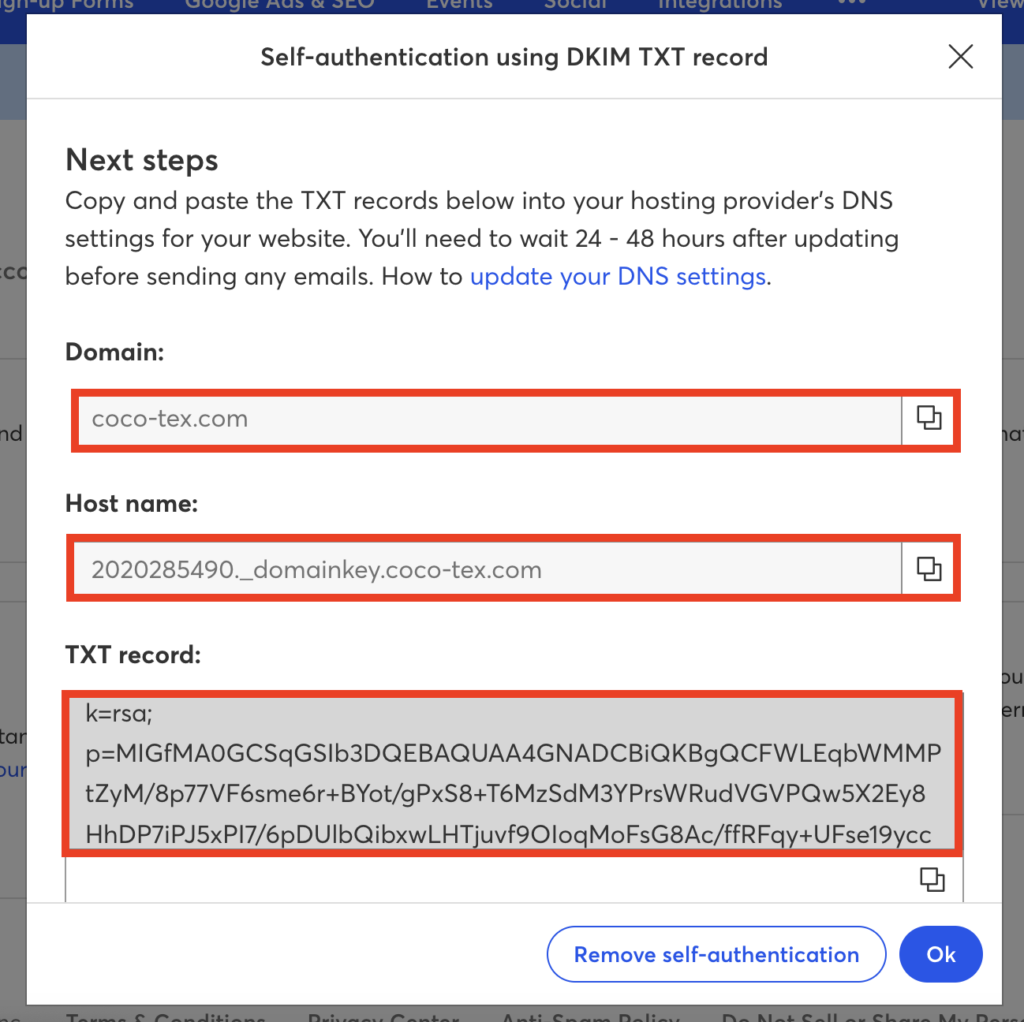
7. Copy and paste the DKIM public key in your DNS.
The propagation of the DKIM TXT record is being completed very quickly.
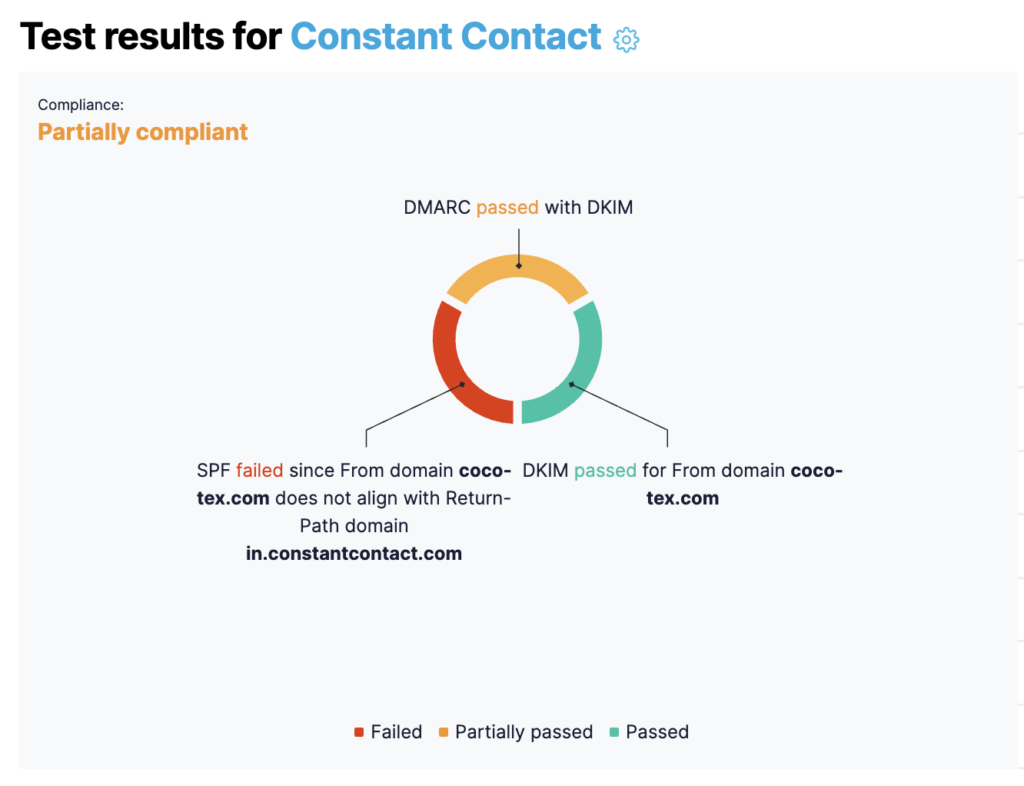
Important: DMARC compliance for Constant Contact is achieved via DKIM authentication and alignment only. Although you’ve not configured SPF, DMARC will still pass. You can test it with our Email Investigation tool. (See the screenshot below)
Important note: If the provider recommends publishing also a DMARC record, there’s no need to do so if you already have a DMARC record in place, as each domain can only have one DMARC record.
Congratulations, you now successfully authenticated your outgoing mail stream from Constant Contact with DKIM.