This comprehensive guide will help you with the implementation of email authentication standards, such as DMARC, SPF and DKIM if your website and email are hosted by HostGator.
DMARC Implementation Guide
DMARC (Domain-based Message Authentication, Reporting and Conformance) is an email authentication protocol used by domain owners to protect their domains from unauthorized uses, such as spoofing attacks. Publishing DMARC Record will let MBPs (Mailbox Providers) such as Google, Verizon & Comcast define rules with reporting and handling any unauthorized use of access based on your stated DMARC policy.
Follow these simple steps to implement DMARC Record in your HostGator DNS.
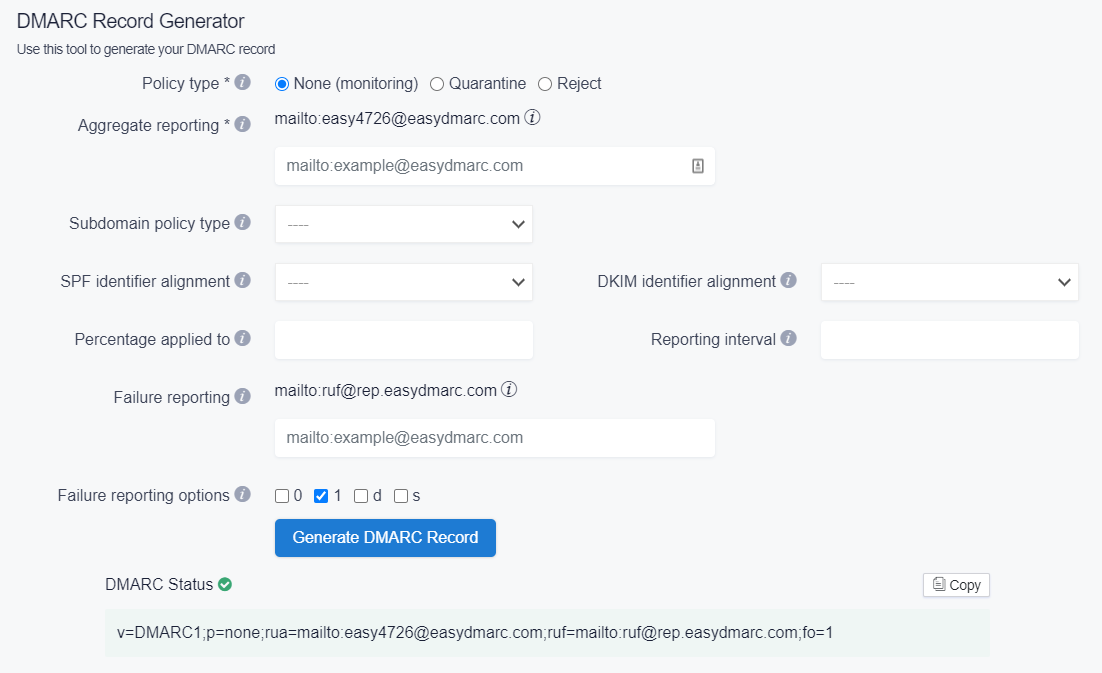
1. Generate a DMARC Record
EasyDMARC’s DMARC Generator tool will help you easily generate your custom DMARC Record.
2. Access cPanel through HostGator
You can access cPanel via https://portal.hostgator.com/
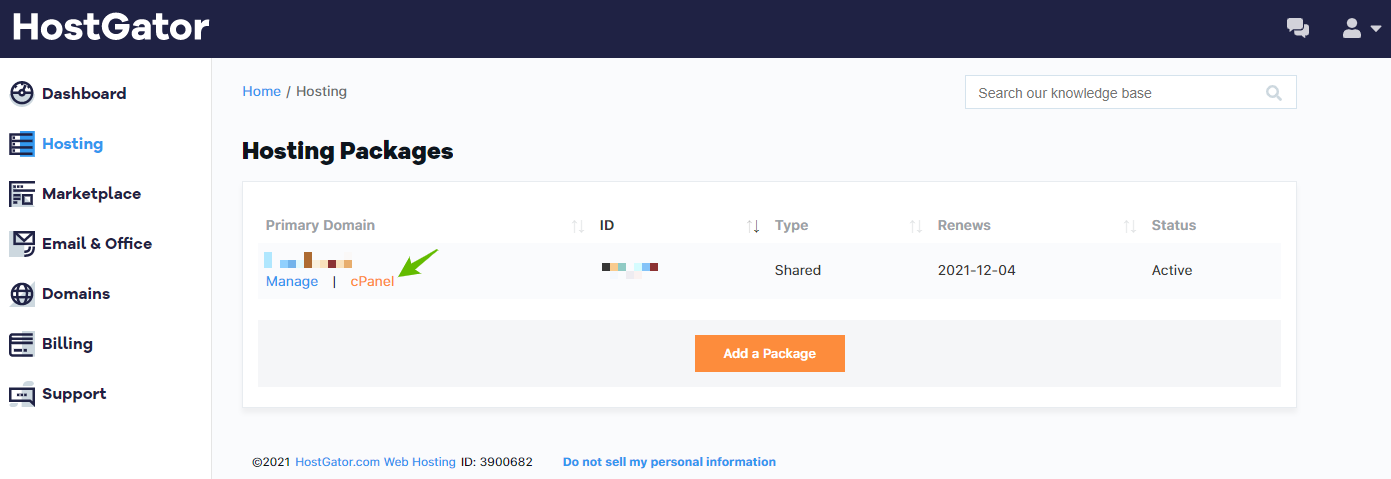
In cPanel, you need to access ‘Advanced Zone Editor’, which will take you to the DNS Management portal:

3. Add DMARC TXT Record
After generating DMARC Record (followed in the first step), you will need to publish your DMARC Record in your DNS
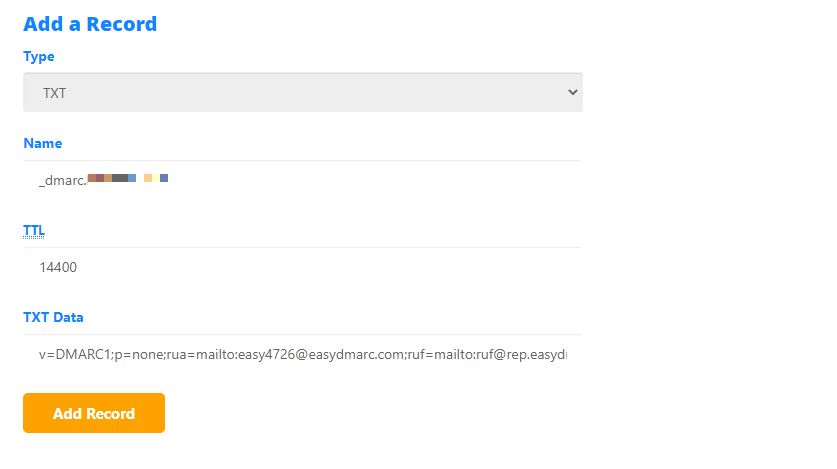
Type: TXT
Name: _dmarc.[yourdomain.com]
TTL: Enter your desired value. In this example, we used 14400
TXT Data: Your DMARC Status/Record generated by EasyDMARC DMARC Generator tool in the first step
4. Confirm DMARC TXT Record Update
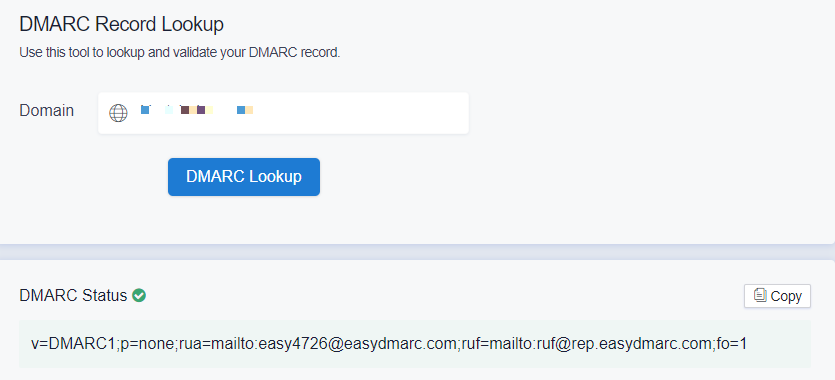
Make sure that your DMARC Record has been updated correctly, without having any errors or typos. EasyDMARC’s DMARC Record Lookup will help you with that confirmation.
5. Wait for DMARC reports
After confirming that your DMARC Record is implemented properly, you will need to wait an additional 72 hours (3 days) until you receive your DMARC reports which will be seen and analyzed in your EasyDMARC account portal.
Important note: If the provider recommends publishing also a DMARC record, there’s no need to do so if you already have a DMARC record in place, as each domain can only have one DMARC record.
SPF & DKIM Implementation Guide
SPF (Sender Policy Framework) is an Email authentication protocol that allows the domain admin to specify which servers or IP addresses are allowed (or whitelisted) to send emails from the domain name.
DKIM (DomainKeys Identified Mail) is a protocol that allows domain owners to send authenticated or signed emails so the receiver can identify the right origin. This verification is made possible through cryptographic authentication.
In order to activate these protocols for your HostGator servers, you need to first access cPanel via https://portal.hostgator.com/.
While in cPanel, go to Email -> Authentication:

In your Authentication portal, you will see SPF & DKIM options (which by default is disabled):
- In order to activate DKIM, you need to simply click on ‘Enable’ and the applicable DKIM TXT Record will be automatically implemented in your HostGator DNS Zone.

2. In order to activate SPF, you need to click on ‘Enable’, and HostGator will apply your sending server or IP address in your SPF Record, by automatically implementing it in your HostGator DNS Zone.

Important Note:
If you are using other servers or IP addresses for your various outgoing email strategies (transactional, marketing, etc.), it is important to add or include them in your SPF Record.
For example, here we added one additional IP address and two include: mechanisms in our SPF Record:
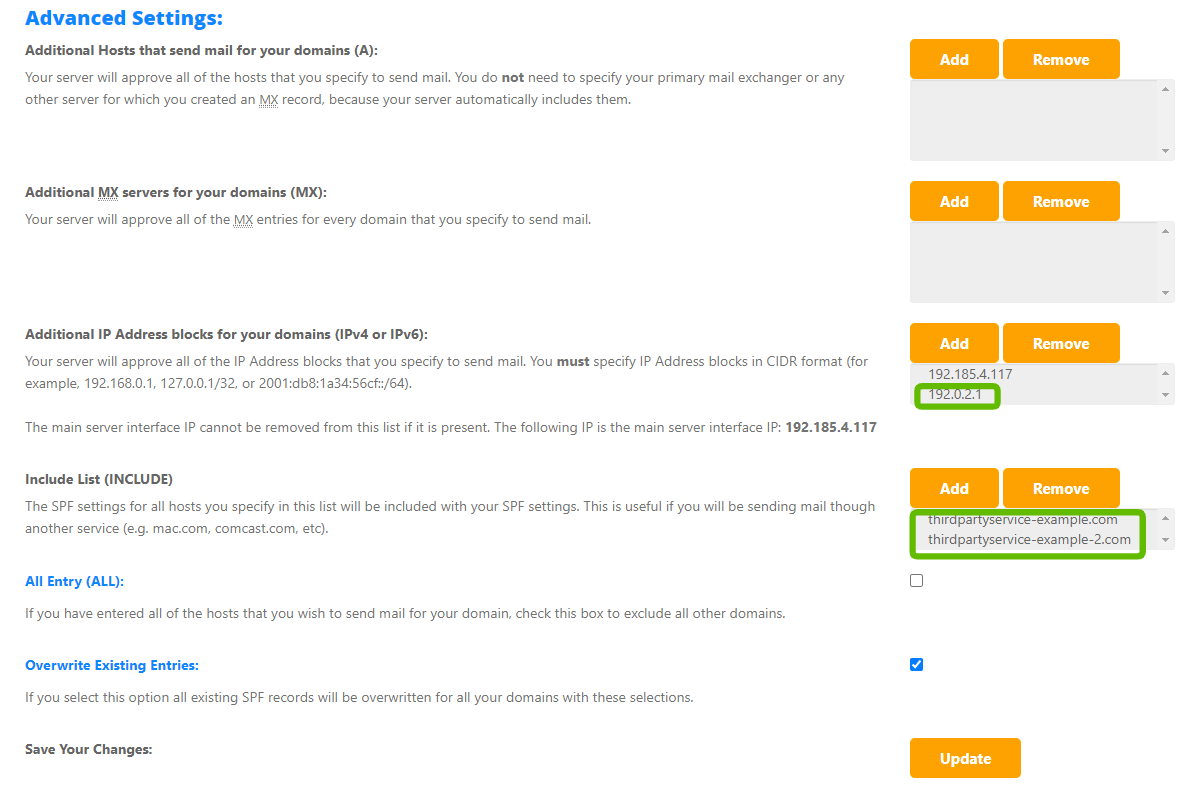
After Updating, we will get the final SPF Record with:

Next Steps
With the help of EasyDMARC Reporting, you will be able to analyze your outgoing email stream easily and adjust your SPF and DKIM Records accordingly.

