Mailgun is one of the leading email delivery services for businesses worldwide. It’s an API-based email delivery service for sending, receiving, and tracking emails. The app was founded in 2010. For the last decade, it has provided powerful APIs that enable you to send, receive and track email effortlessly whether you use Python, Ruby, PHP, C#, Node.js, or Java. This authentication guide will cover the Mailgun DKIM and SPF setup.
Setting up SPF and DKIM
Step 1: Head to your Mailgun portal.
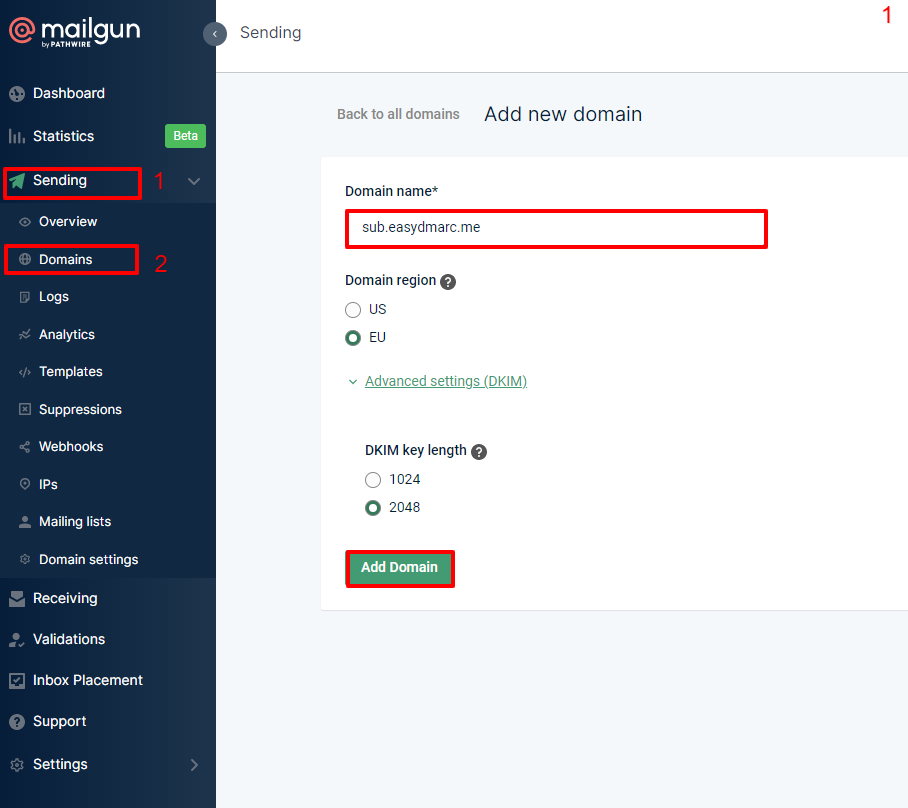
Step 2: On the left of the screen, click on the collapsible “Sending” tab and choose “Domains.”
Step 3: From there, add a subdomain.
N.B: Subdomain is important, so the MX provided by Mailgun doesn’t interfere with your root domain’s MX records.
Step 4: Mailgun will provide you with a couple of records that you’ll need to add to your DNS zone.
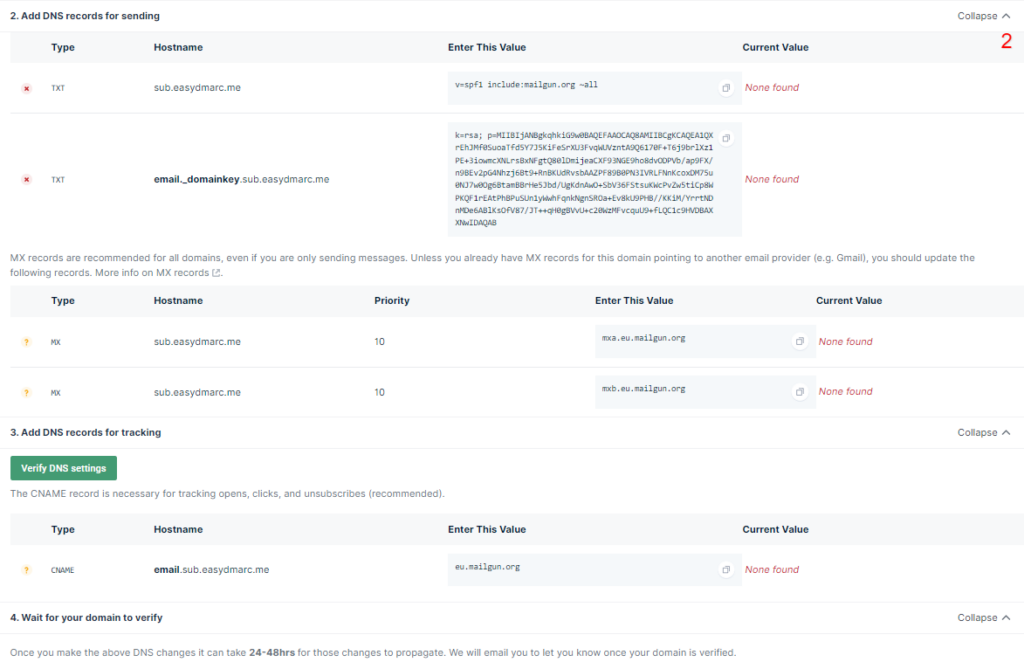
Step 5: Copy all the records and add them to your DNS zone.
Step 6: Wait a couple of minutes and click “Verify DNS settings.”

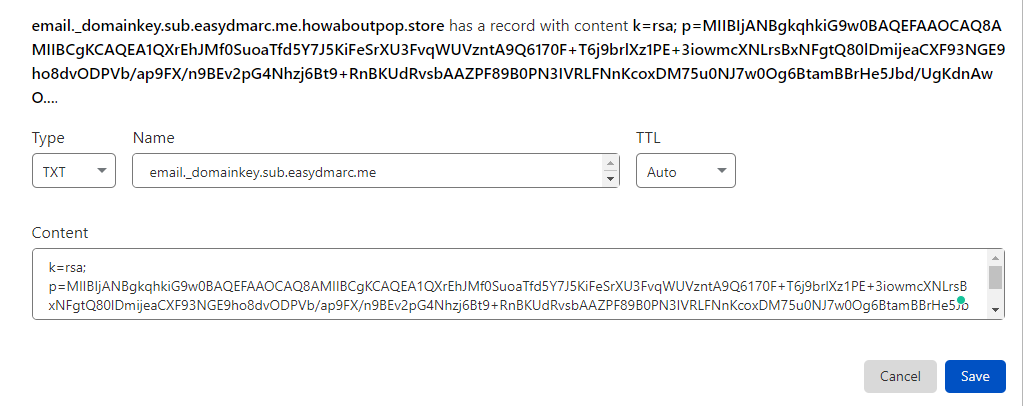


Note: Turn off the proxy status if you’re using Cloudflare.
Step 8: Mailgun will validate the records for the added subdomain with a green checkmark.

Now, your Mailgun DKIM and SPF setup is complete. Now you can send DMARC compliant emails with Mailgun. (Make sure you have your aspf and adkim set to “relaxed” instead of “strict” in your DMARC record.) More about DMARC tags here.

Note: Wait at least 24 hours to receive the updated reports.
Important note: If the provider recommends publishing also a DMARC record, there’s no need to do so if you already have a DMARC record in place, as each domain can only have one DMARC record.
If you have any further questions, don’t hesitate to contact the EasyDMARC support team via the form on our website or at [email protected].

