


This instructional article will demonstrate the ProofPoint configuration process of Sender Policy Framework (SPF), DomainKeys Identified Mail (DKIM) Signatures to ensure ProofPoint passes the DMARC alignment check and eliminates spam from your domain, and increases security.
The SPF record identifies the mail servers and domains allowed to send emails on behalf of your domain. The DKIM record, on the other hand, is a specially formatted DNS TXT record that stores the public key the receiving mail server will use to verify a message’s signature. These email authentication methods will prove to ISPs and mail services that senders are truly authorized to send emails from a particular domain and are a way of verifying that your email-sending server is sending emails through your domain.
The process of setting up the SPF record
To ensure the emails from ProofPoint are sent on behalf of your domain, we need to create or update your existing SPF record by including the following information.
| US | a:dispatch-us.ppe-hosted.com |
| EU | a:dispatch-eu.ppe-hosted.com |
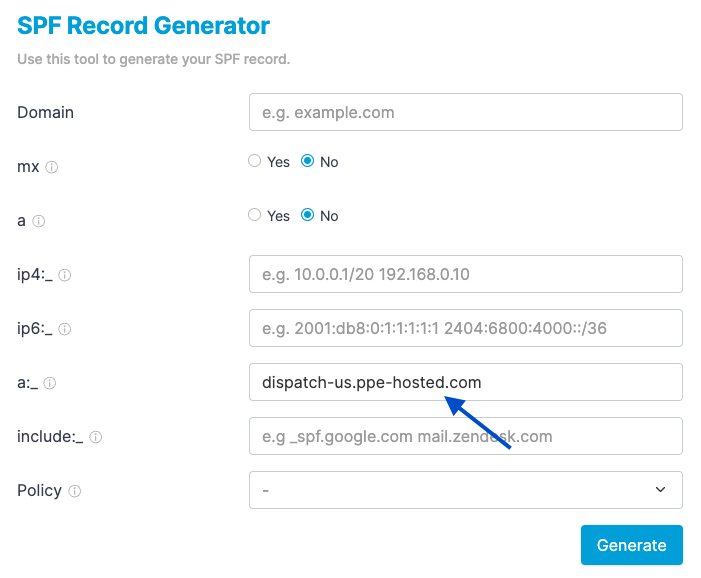
You can easily do this by using our SPF Generator Tool and following the steps below:
- Navigate to SPF Record Generator
- Add the required include mentioned above in the a:__ section.
- Choose the Policy (The options are : Fail (Not Compliant will be rejected), SoftFail (Not Compliant will be accepted but marked) and Neutral (Mails will be probably accepted)).

- When you have made followed the steps, click on the “Generate”
- Copy the provided SPF record and navigate to your DNS provider (CloudFlare, Godaddy, etc.) and create a TXT Record. We’ll be using CloudFlare for this example.
- Click on “Save”

- Wait up to 72 hours to allow your DNS to process the changes

Important Note: Each domain must have only one SPF TXT Record. If you have multiple SPF Records, SPF will return a PermError.
If you are using multiple IPs, ESPs, Third-Party services for your various email strategies, you should include them in a single SPF Record.
E.g v=spf1 ip4:18.57.156.221 a:dispatch-us.ppe-hosted.com include:thirdpartyservice.com ~all
The process of setting up the DKIM record
To ensure the emails from ProofPoint are sent on behalf of your domain, we need to create a new DKIM record by the following information.
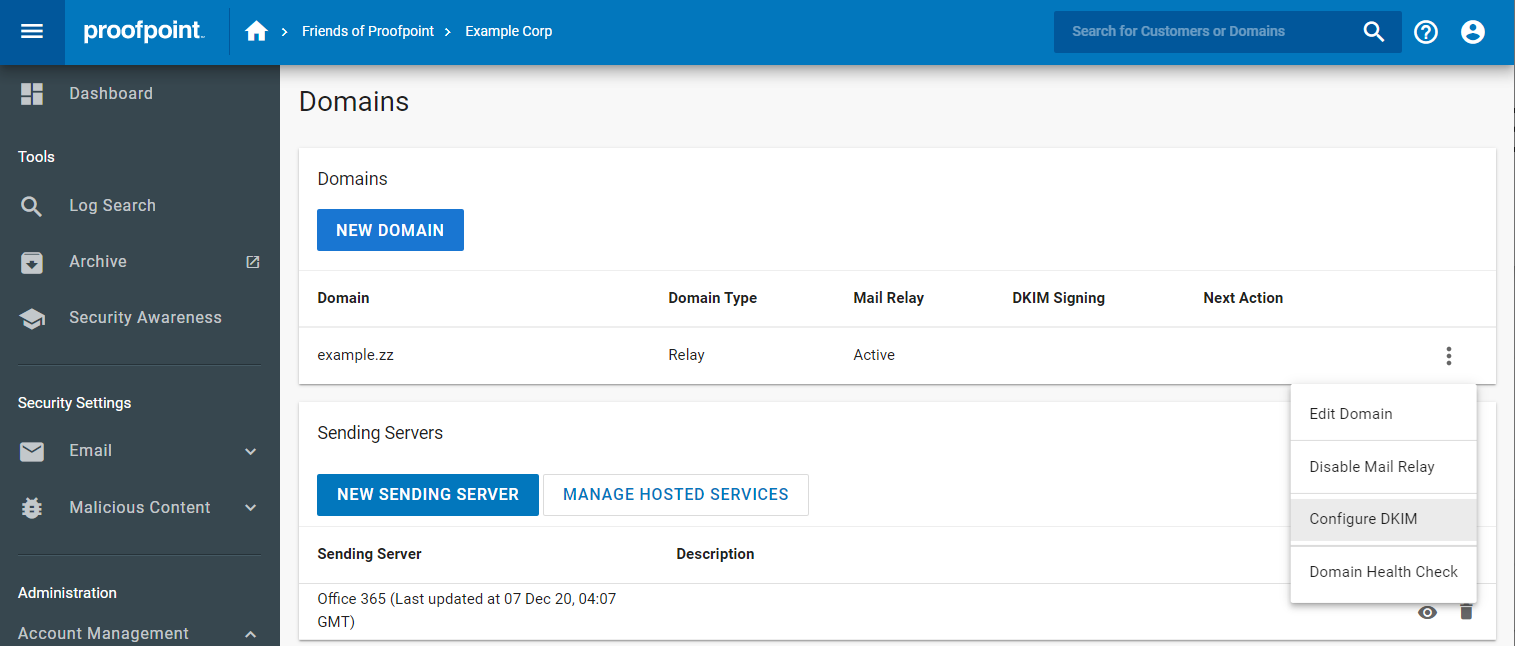
- Navigate to Administration > Account Management > Domains.
- Select the domain you want to configure and click the vertical ellipsis on the right-hand side of the Domains table.
- Click the option labeled Configure DKIM.

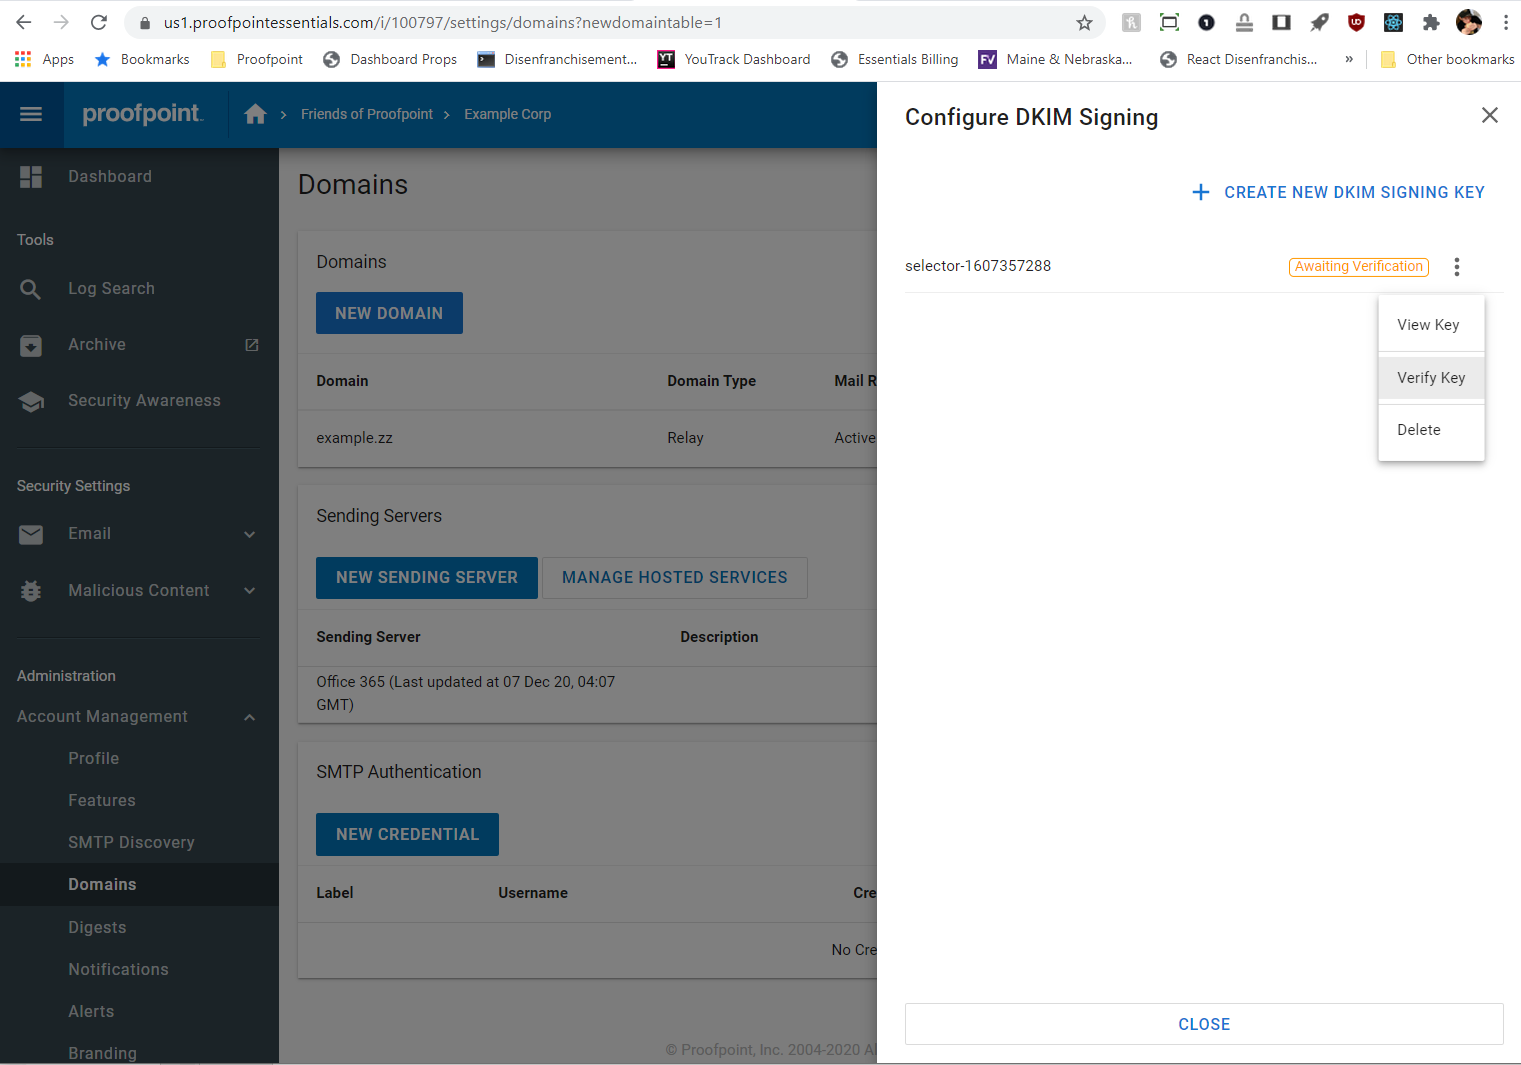
- A drawer will appear on the right side of the screen, listing all the currently configured DKIM keys. If this is your first time configuring DKIM, no keys will be listed. Click Create New DKIM Signing Key.
- The form will appear asking you to specify a selector. A selector is used to locate the public key in DNS and is not visible to end users. A value is pre-populated, but you can change it if you’d like. Click Create.

- The resulting screen will give you the hostname and value into your DNS zone. You typically do this on your domain registrar’s website (GoDaddy, Dotster, Namecheap, etc.)
Important Note: You can also save the private key to a secure location, in case you need it. This is the only time this value will be displayed.

- Once you’ve added the record to your DNS zone, Proofpoint Essentials needs to validate that it was added correctly. To do so, click the Verify Key button in the key’s context menu.

- Once the key is verified, outbound DKIM signing is automatically enabled for this domain.
Important note: If the provider recommends publishing also a DMARC record, there’s no need to do so if you already have a DMARC record in place, as each domain can only have one DMARC record.
Congratulations, you successfully authenticated your outgoing mail stream from ProofPoint Essential with SPF and DKIM.
Note: If you are using Proofpoint supplied by GoDaddy, this configuration guide is not for your use. The Advanced email Protection sold by GoDaddy does not have the same configurability as the Proofpoint Essential product sold directly by Proofpoint.
On the same topic: Find out the best Proofpoint alternatives in 2024
If you are using Proofpoint supplied by GoDaddy, this configuration guide is not for your use. The Advanced email Protection sold by GoDaddy does not have the same configurability as the Proofpoint Essential product sold directly by Proofpoint.
Thank you for the feedback, Mark!
Typically, we write technical how-tos directly from the source rather than from resellers. I’ll verify with the team to see if we can produce any guides for Proofpoint by GoDaddy.