


This instructional article will demonstrate the Salsa Labs configuration process of Sender Policy Framework (SPF), DomainKeys Identified Mail (DKIM) Signatures to ensure Salsa Labs passes the DMARC alignment check and eliminate spam from your domain and increase security.
The SPF record identifies the mail servers and domains that are allowed to send email on behalf of your domain. The DKIM record, on the other hand, is a specially formatted DNS TXT record that stores the public key the receiving mail server will use to verify a message’s signature. These email authentication methods will be used to prove to ISPs and mail services that senders are truly authorized to send email from a particular domain and are a way of verifying your email sending server is sending emails through your domain.
The process of configuring SPF
In order to authenticate Salsa Labs on SPF, please follow these steps:
- Login and head to your DNS Zone provider
- Create a new TXT record
- Input the DNS name as @ or your domain name
- Input the DNS value as v=spf1 include:salsalabs.org ~all
- Save the record
- Wait up to 72 hours to allow your DNS to process the changes
Screenshot below will show you the example of the SPF record. We’ll be using CloudFlare for this example.

Important Note: Each domain must have only one SPF TXT Record. If you have multiple SPF Records, SPF will return a PermError.
If you are using multiple IPs, ESPs, Third-Party services for your various email strategies, you should include them in a single SPF Record.
E.g v=spf1 ip4:18.57.156.221 include:salsalabs.org include:thirdpartyservice.com ~all
The process of configuring DKIM
In order to authenticate Salsa Labs on DKIM, you need to create a CNAME record. Please follow these steps:
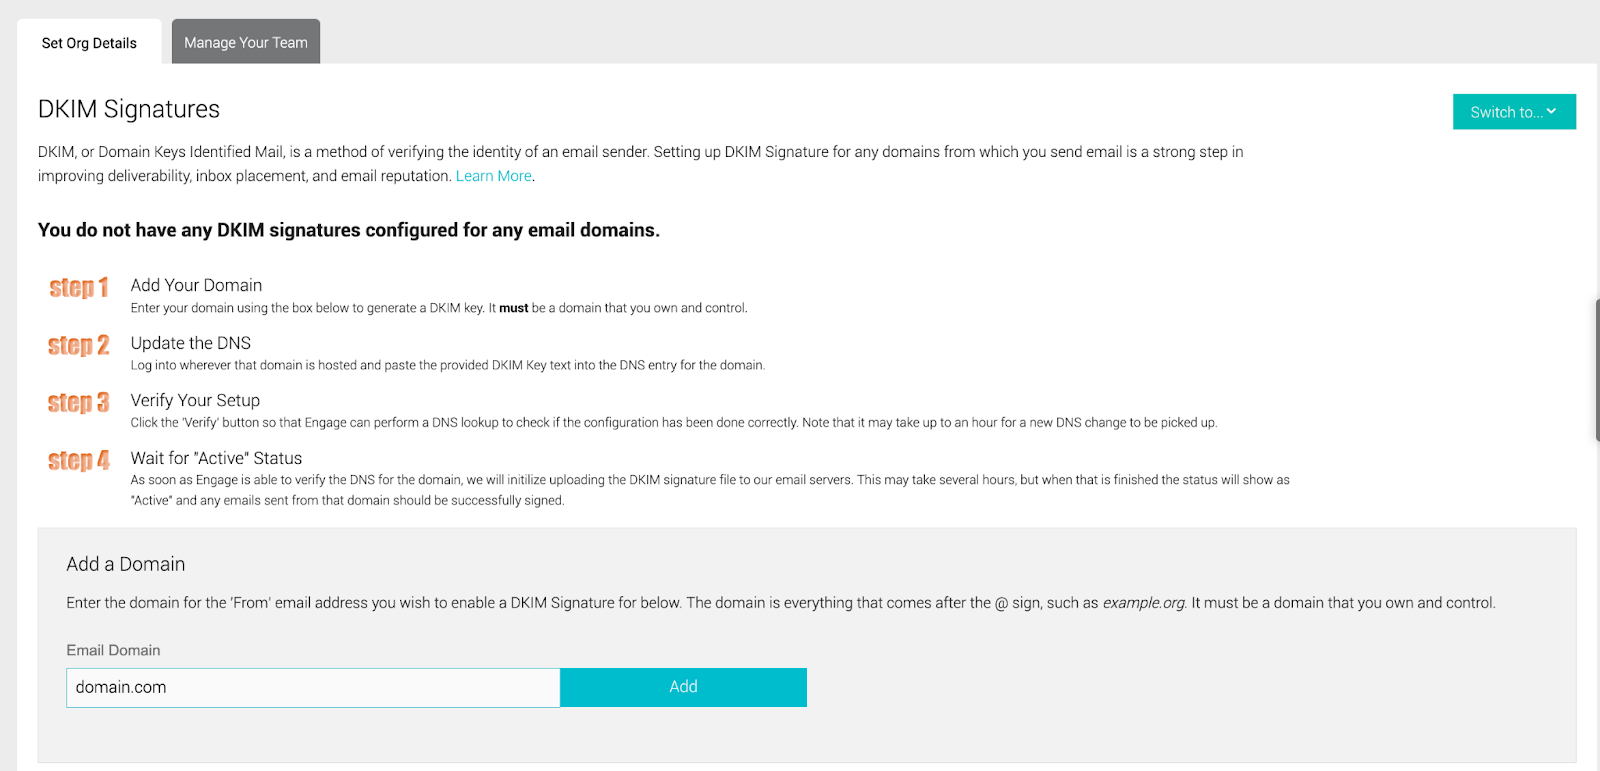
- Head to your Salsa Engage portal
- Click Settings icon(Hammer and Wrench) at the top right of your Engage account
- From the teal Switch to menu, choose DKIM
- On this page at the bottom, you will need to enter the domain of the From Address you use for autoresponders, email blast and series messages

- Once you enter your domain and click add, you will be provided an encrypted key you will need to enter into your web host or DNS provider

- Login and head to your DNS Zone provider
- Create a new TXT record
- Input the DNS name as <selector>._domainkey based on the Entry given
- Input the DNS value inside double quotation marks
- Save the record

Screenshot below will show you the example of the DKIM record. We’ll be using CloudFlare for this example.

Congratulations, you now successfully authenticated your outgoing mail stream from Salsa Labs with SPF and DKIM.
Important note: If the provider recommends publishing also a DMARC record, there’s no need to do so if you already have a DMARC record in place, as each domain can only have one DMARC record.