


SendPulse is a cloud-based marketing solution that allows users to manage email, text messaging and push notifications through a single platform.
In this article we’ll walk you through the Domain Authentication setup.
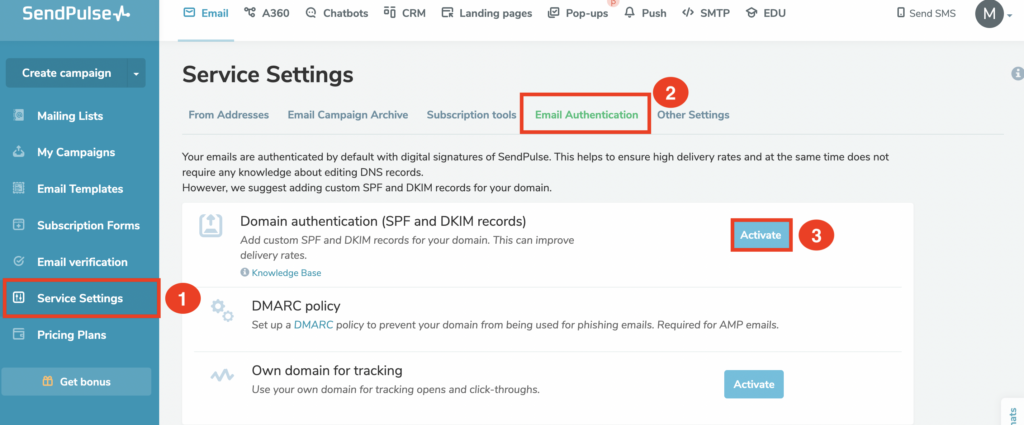
Your first step is to add your domain in SendPulse. To add your domain please follow the steps below and meanwhile have a look at the screenshot.
1 – click on Service Settings, on the left side of your dashboard,
2 – Click on Email Authentication,
3 – Click on Activate, next to the Domain authentication (SPF and DKIM records)
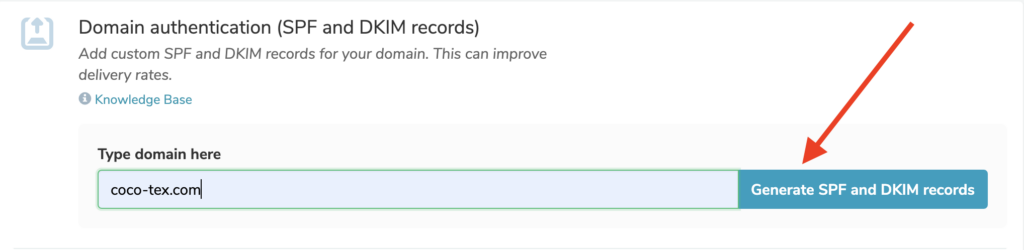
Enter your domain name and click on the Generate SPF and DKIM records button.
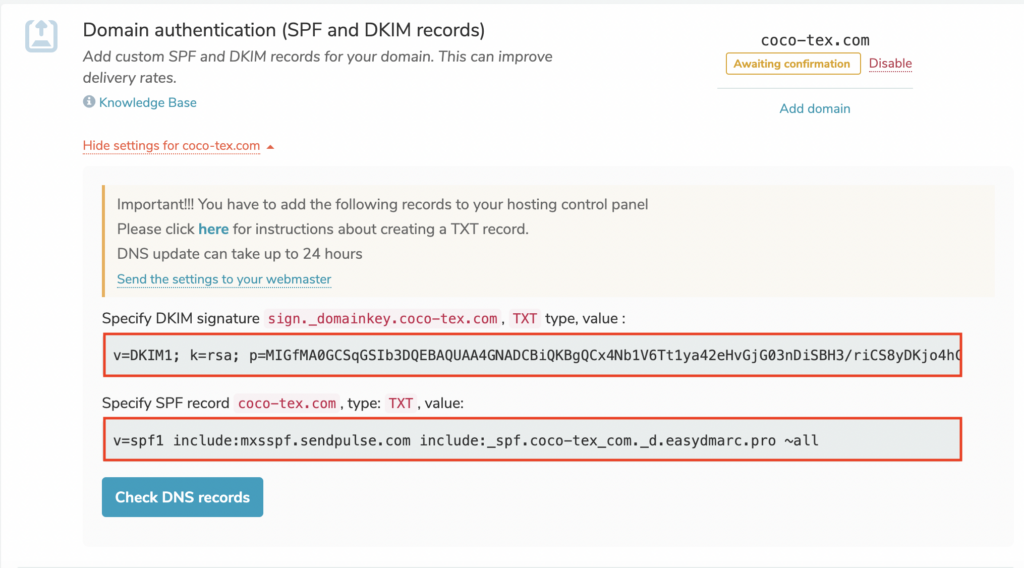
Once your domain is added you will be provided with DKIM and SPF records, to publish in your DNS zone.
SendPulse SPF Record Configuration:
Note: There is no need to set up an SPF record for SendPulse, as the “Envelope From” domain will always be handled by the servers of SendPulse. For SPF alignment you should have your “From address” domain in the “Envelope From” address. SendPulse uses its own domain in the “Envelope From” address. During the DMARC check, this “Envelope From” domain will not match with your “From address” domain, so SPF alignment will fail. This happens not only with SendPulse but with the majority of Email Service Providers. But during the configurations SendPulse will suggest you adding this include include:mxsspf.sendpulse.com in your SPF record.
In case you add the include provided from SendPulse in your SPF record, your SPF record will look like the one below,
v=spf1 include:zoho.com include:mxsspf.sendpulse.com ~all
Just be informed that there is no point in doing this, as SPF will fail due to misalignment, even if you add that “include” in your SPF record.
Also keep in mind that DMARC requires either DKIM or SPF to be authenticated and aligned, so you will pass the DMARC check even without SPF alignment. SPF alignment failing won’t affect your email deliverability if you have DKIM in place. Thus you need to set up only DKIM for SendPulse.
SendPulse DKIM Record Configuration:
You should publish the DKIM record that SendPulse provides in your DNS zone.

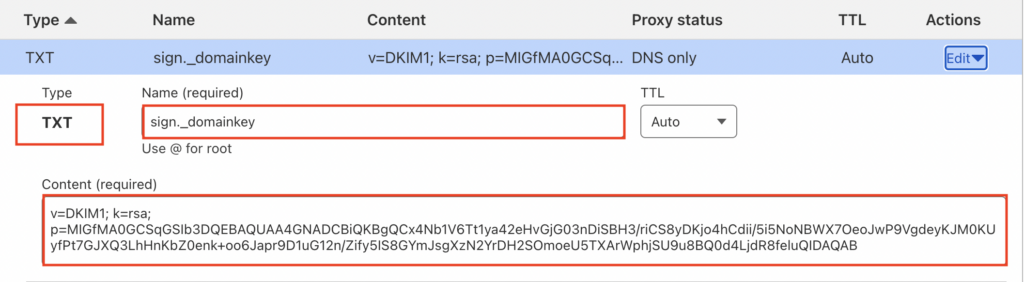
How to Add the Provided TXT Record in Your DNS?
Step 1: Head to your DNS, create a new DNS record, and set the type to TXT.
Step 2: Copy the default selector and paste into the corresponding field in your DNS. For the TXT name/host field, what you enter depends on your DNS host. Some require you to enter the full sign._domainkey.coco-tex.com, others only need the sign._domainkey part, as they automatically append your domain name in the end.
Step 3: In the Value/Content field, copy and paste the generated Value code under the DKIM record.
Like the one below (DNS Cloudflare),
Once you finish publishing the TXT records in your DNS go back to your SendPulse account and click on the Check DNS Records button. If everything is done properly, it will show your domain as Active.
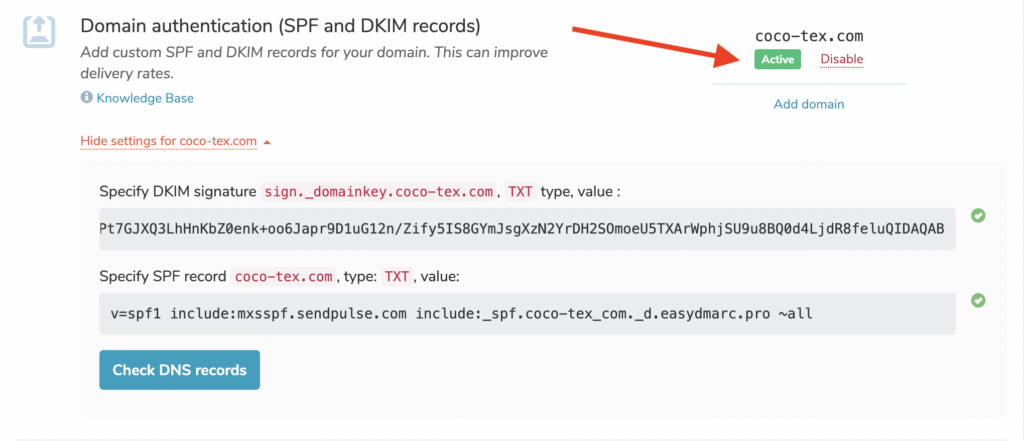
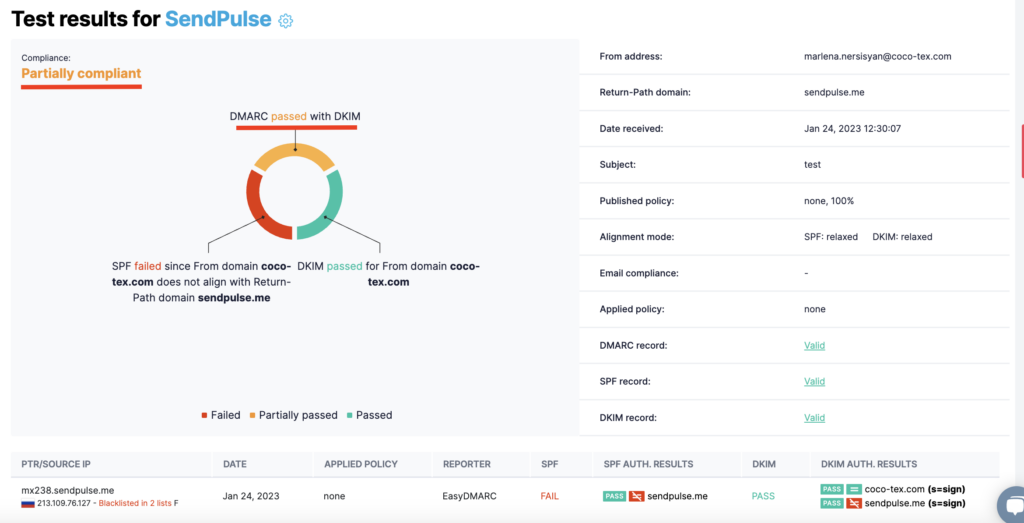
Important: DMARC compliance for SendPulse is achieved via DKIM authentication and alignment only. Although you’ve not configured SPF, DMARC will still pass. You can test it with our Email Investigation tool. (See the screenshot below)
Important note: If the provider recommends publishing also a DMARC record, there’s no need to do so if you already have a DMARC record in place, as each domain can only have one DMARC record.