


SocketLabs is an SMTP service and marketing automation platform designed to optimize your email marketing and outreach.
In this article, we will explain how to authenticate your domain and achieve DMARC compliance for SocketLabs.
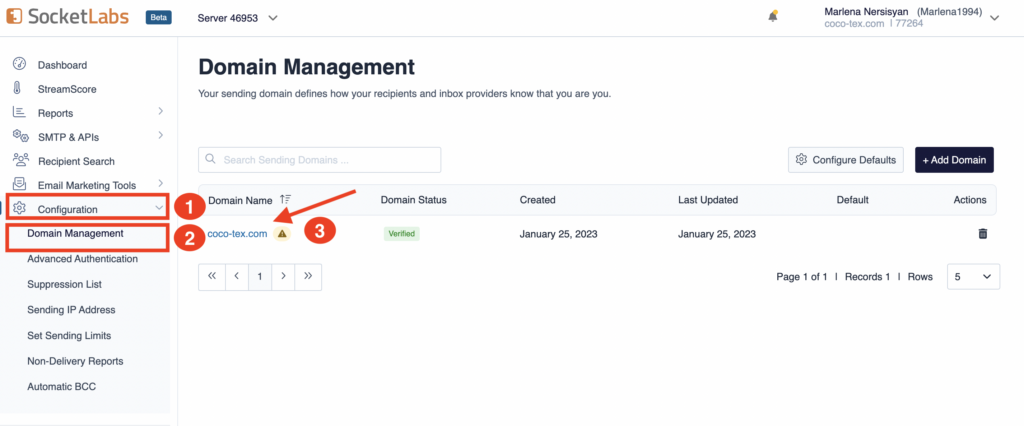
Your first step is to select or add the domain you want to authenticate. For that follow the steps below, and meanwhile have a look at the screenshot.
– Click on Configuration, from the left side of your dashboard,
– Click on Domain Management, from the drop-down menu,
– Select or add the domain you want to authenticate.
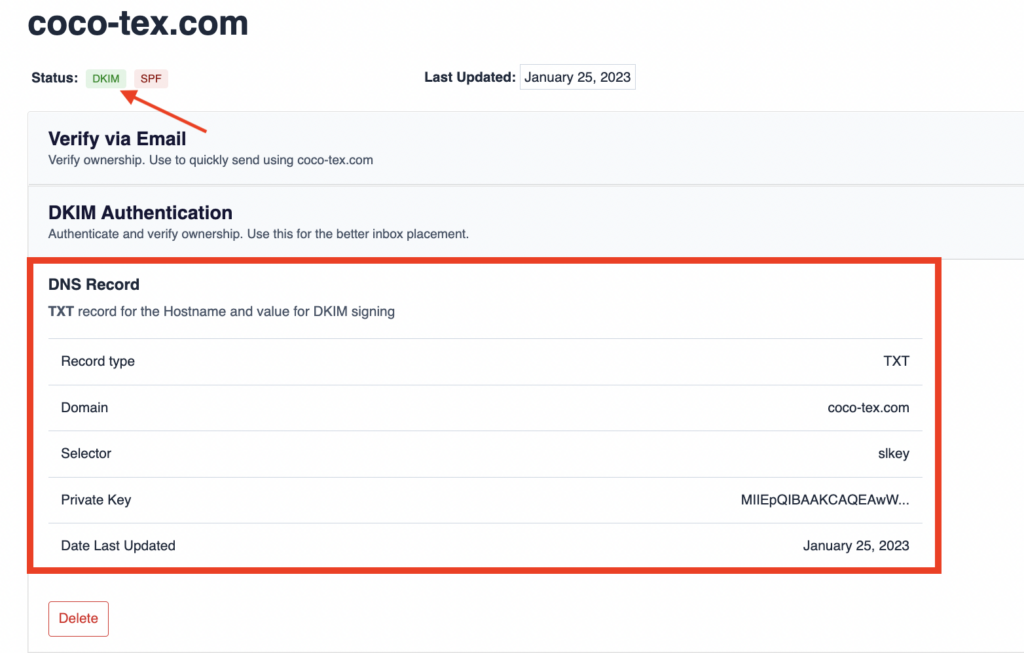
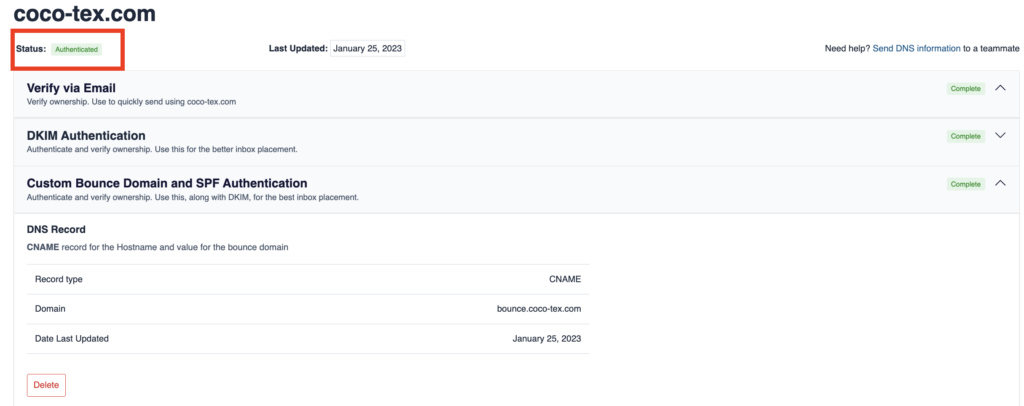
Once you enter the domain, you’ll see DKIM and SPF Authentications. See the screenshot below.

SocketLabs DKIM Record Configuration:
When you click on DKIM authentication you will be provided with a DKIM TXT record to publish in your DNS zone.

How to Add the Provided TXT Record in Your DNS?
Step 1: Head to your DNS, create a new DNS record, and set the type to TXT.
Step 2: Copy the Hostname field to paste into the corresponding field in your DNS. For the TXT name/host, what you enter depends on your DNS host. Some require you to enter the full slkey._domainkey.coco-tex.com, others only need the slkey._domainkey part, as they automatically append your domain name in the end.
Step 3: In the Value/Content field, copy and paste the generated Value code under the DKIM record.
Like the one below (DNS Cloudflare),

Once you finish publishing the TXT records in your DNS go back to your SocketLabs account and click the Verify button, and if you have done everything properly then the DKIM will show active.
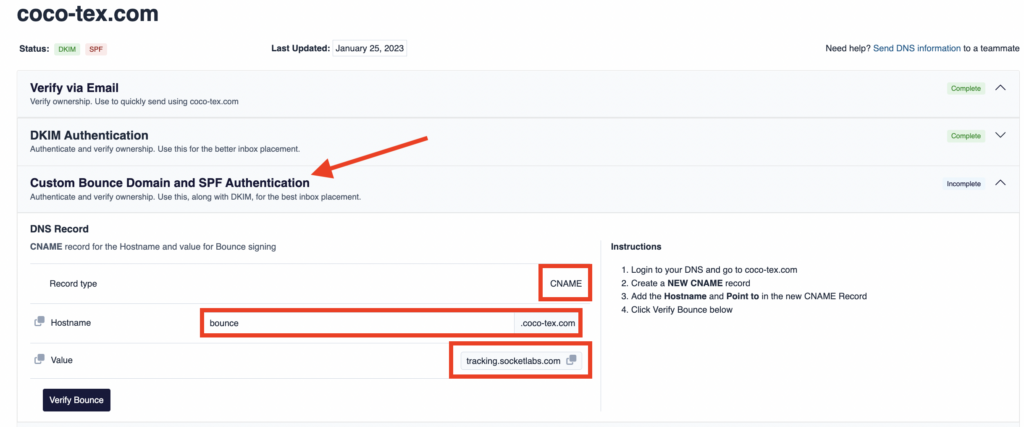
SocketLabs SPF Record Configuration:
When you click on Custom Bounce Domain and SPF Authentication SocketLAbs provides you a CNAME record to publish in your DNS zone.
Note: There is no need to update your current SPF record and add an include for SocketLAbs, as adding that CNAME record already maps your domain to another domain (tracking.socketlabs.com) that has the IP addresses whitelisted in it. Which allows you to have authentication and alignment for SPF without having to manage your SPF record manually.
Copy and paste the provided CNAME record into your DNS zone, like the one below. For
Cloudflare DNS make sure to turn off the Proxy status.

When you finish publishing the CNAME records, move back to your SocketLAbs account and Click on the Verify Bounce button. If everything is good your domain status will show authenticated.
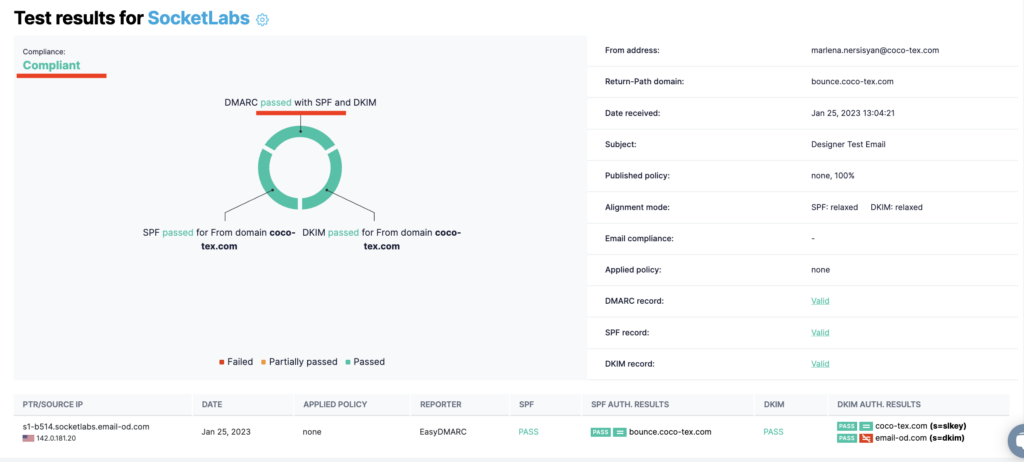
You can test it with our Email Investigation tool. (See the screenshot below)
Important note: If the provider recommends publishing also a DMARC record, there’s no need to do so if you already have a DMARC record in place, as each domain can only have one DMARC record.