Vendasta offers a white-label platform designed to assist B2B companies in delivering marketing solutions to local businesses. To begin using Vendasta, it’s crucial to establish domain authentication by setting up SPF and DKIM records.
Vendasta uses SendGrid for its email infrastructure, so please follow the steps below to obtain the SPF and DKIM records provided by Vendasta.
Here’s the process:
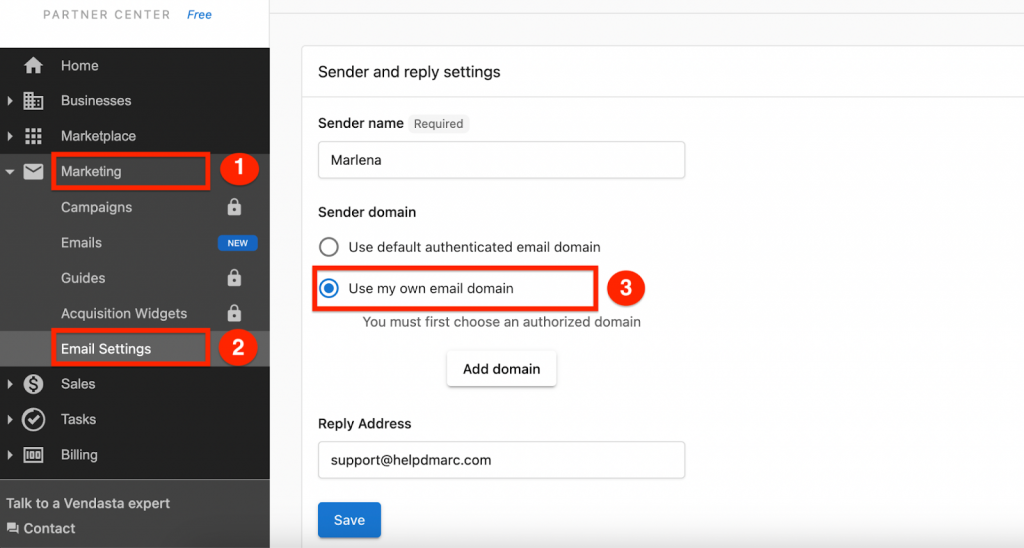
1 – Navigate to the “Marketing” section in the left-hand menu.
2 – Access the “Email Settings” option.
3 – Select “Use my own email domain“.
Refer to the screenshot below for visual guidance:
In this step, you should add your domain and click on the “Start authorizing domain” button.

Once you click on it, you’ll be provided with SPF and DKIM CNAME records that you need to publish in your DNS.

Copy and paste the CNAME Records for SPF and DKIM in your DNS host.
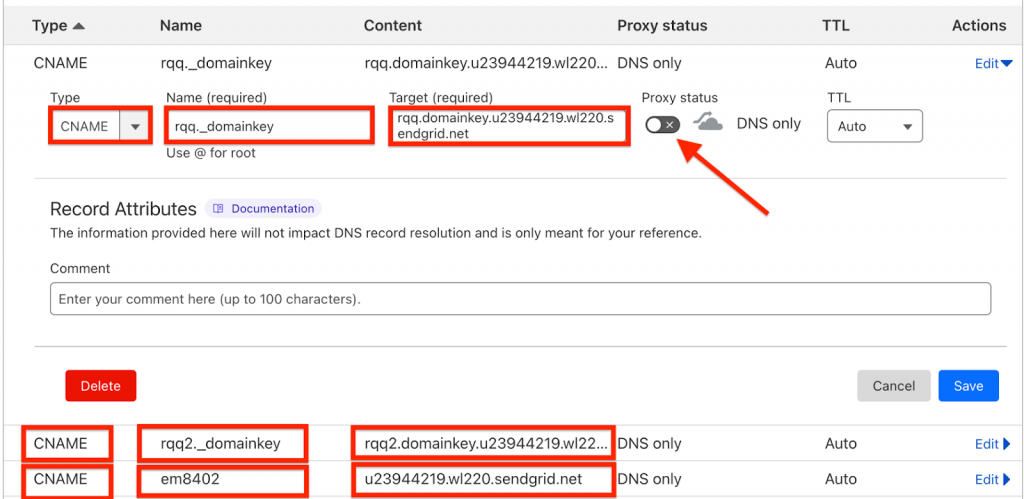
See an example of added CNAME records in Cloudflare DNS in the screenshot below. If you are using Cloudflare, please make sure to switch off the “Proxy status”.
It is important to mention that there is no need to publish a separate SPF TXT record, as the SPF configuration is achieved through the CNAME record. However, Vendasta requires the TXT record to authorize your domain. In this scenario, if you already have an existing SPF record, you should include Sendgrid’s domain (include:sendgrid.net) in your SPF record.
Like this: v=spf1 include:sendgrid.net include:_spf.salesforce.com ~all
If you don’t currently have an SPF record, you’ll need to publish the provided TXT record in your DNS (v=spf1 include:sendgrid.net -all). Like in the screenshot below (DNS Cloudflare).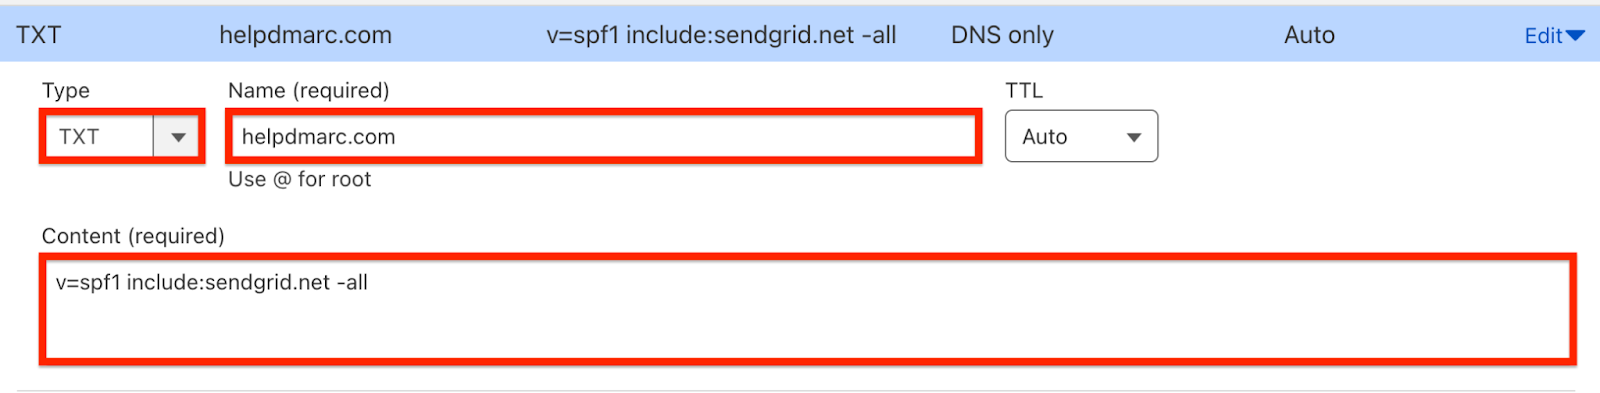
After successfully publishing both the TXT and CNAME records, return to Vendasta and click on “Check domain records” to verify and save the changes.
Once the verification is complete, you can remove the SPF TXT record (or the “include:sendgrid.net” part) from your DNS, since the SPF will properly pass as you’ve published the SPF CNAME record.
Important note: If the provider recommends publishing also a DMARC record, there’s no need to do so if you already have a DMARC record in place, as each domain can only have one DMARC record.
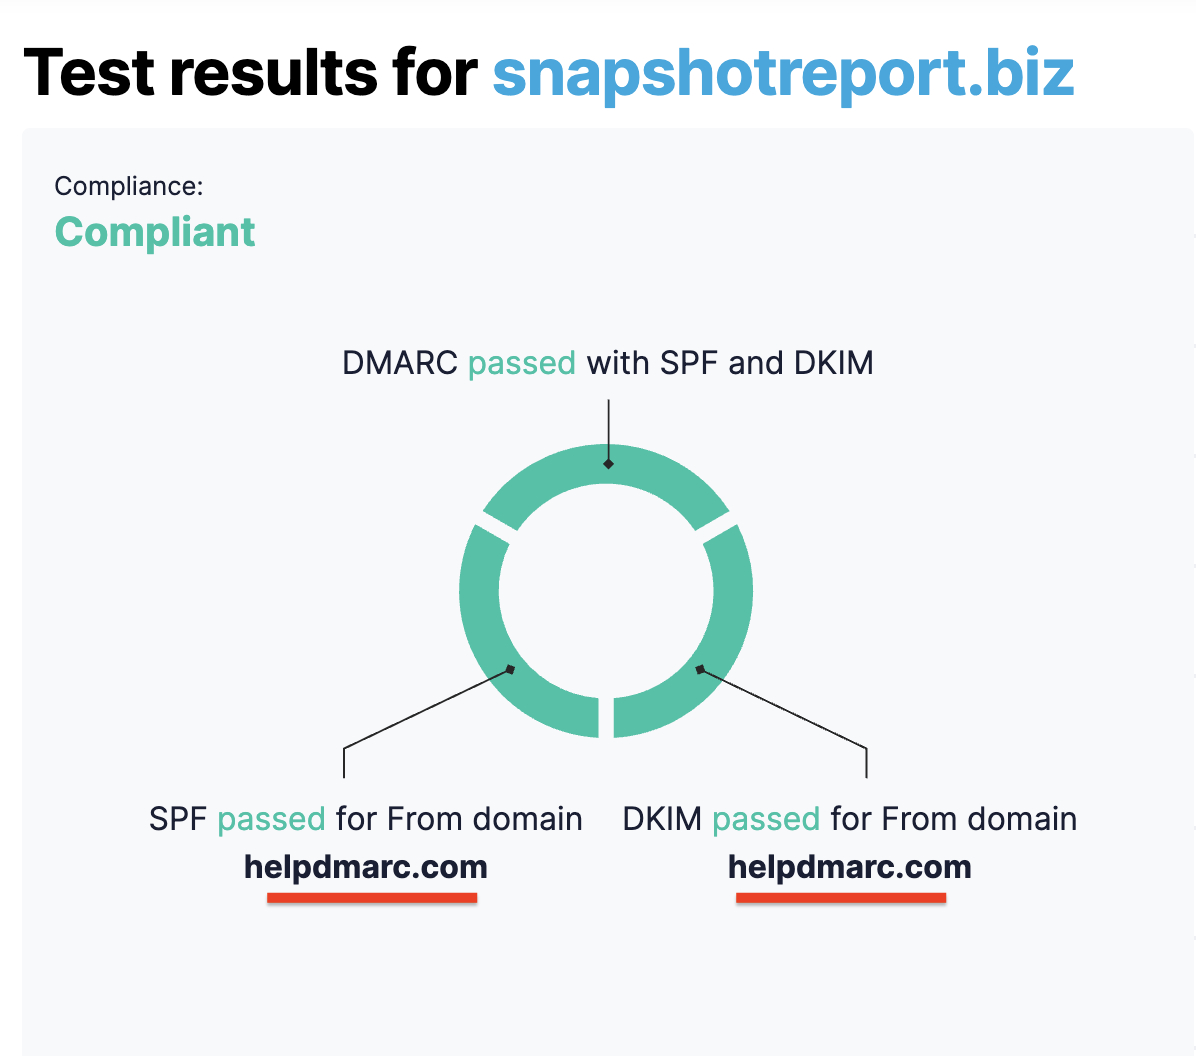
You can test it with our Email Investigation tool. (See the screenshot below)