Zoho Campaigns is an email marketing platform for creating, sending, and tracking your email campaigns. But before starting to send bulk emails, you should authenticate your domain by setting up SPF and DKIM records.
For that, go to Domain Authentication from Settings, see the screenshot below:

Find the domain you want to authenticate and click on Setup,
See the screenshot below,

Once you click on the Setup button, a popup window will appear and you will see the SPF and DKIM records that Zoho Campaigns provides you. See the screenshot below,

DKIM Configurations
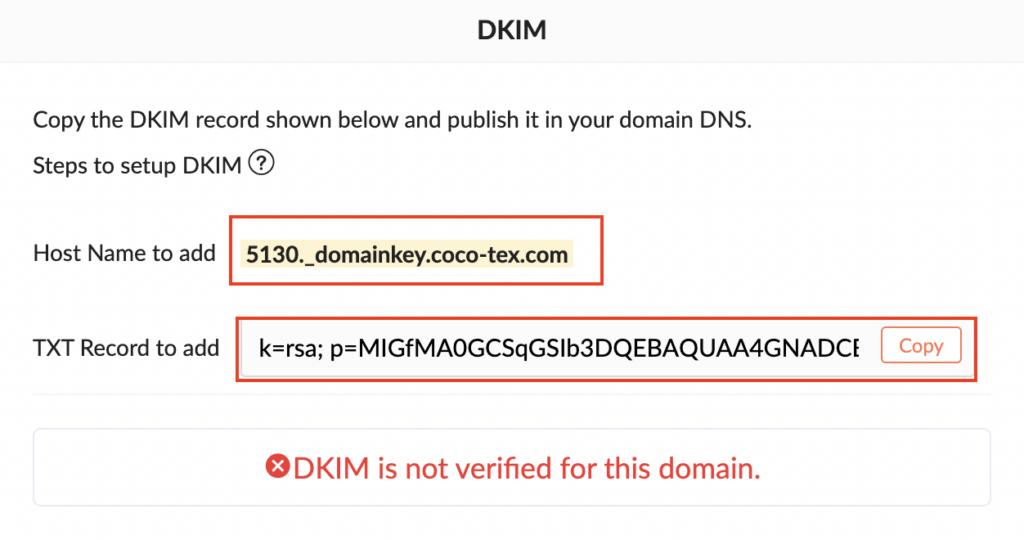
For Publishing the DKIM Record, please follow the instructions below:
- Head to your DNS provider.
- Click the Add button to add a DNS record.
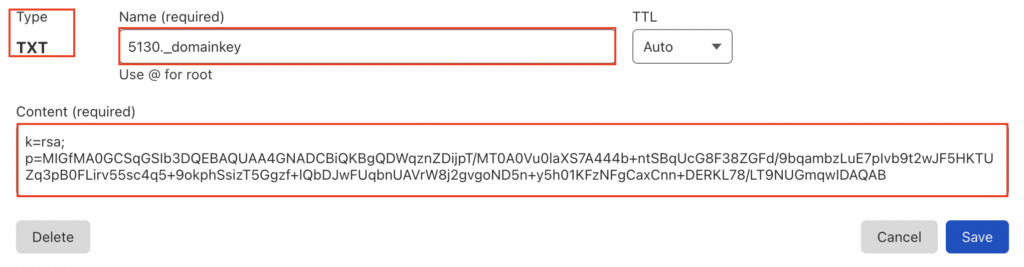
- Select TXT, from the options of Record Type,
- In the Host/Name field enter, 5130._domainkey or 5130._domainkey.yourdomain.com (depends on your DNS provider)
- In the Value field, paste the entire content you copied from the TXT Record field in Zoho Campaigns,
- Save the TXT record in the DNS Manager.
- See the screenshot below,(DNS Cloudflare)
When you finish the process of publishing the DKIM record of Zoho Campaigns, go back to your Zoho Campaigns account and click on the verify button, if you have done everything properly you will get the confirmation that you have authenticated your sender domain. See the screenshot below,

SPF Configurations
Important Note: Zoho Campaigns is considered a subdomain-capable source, which means that SPF configuration should be done at the subdomain level, not the root domain. Therefore, there’s no need to publish the provided SPF TXT record (v=spf1 include:zcsend.net ~all) along with the DKIM record. To properly set up the SPF record and ensure SPF alignment, please follow the steps outlined below.
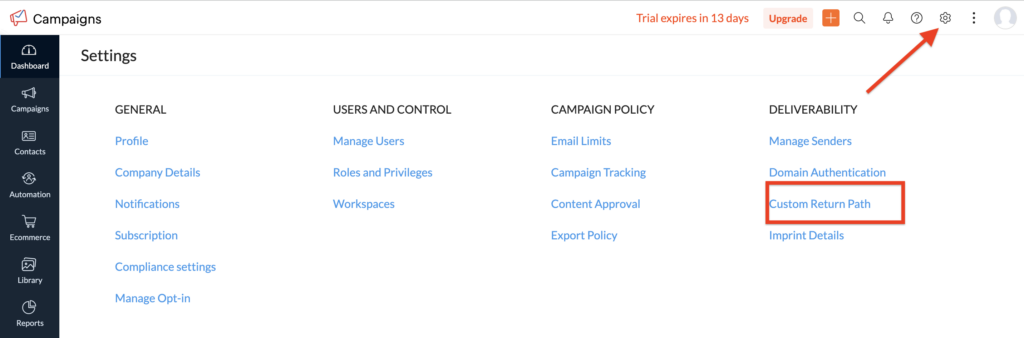
Go to “Custom Return Path” from Settings, see the screenshot below,
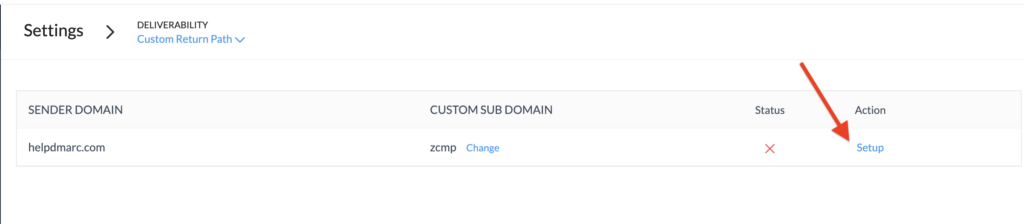
Click on “Setup” next to the domain.
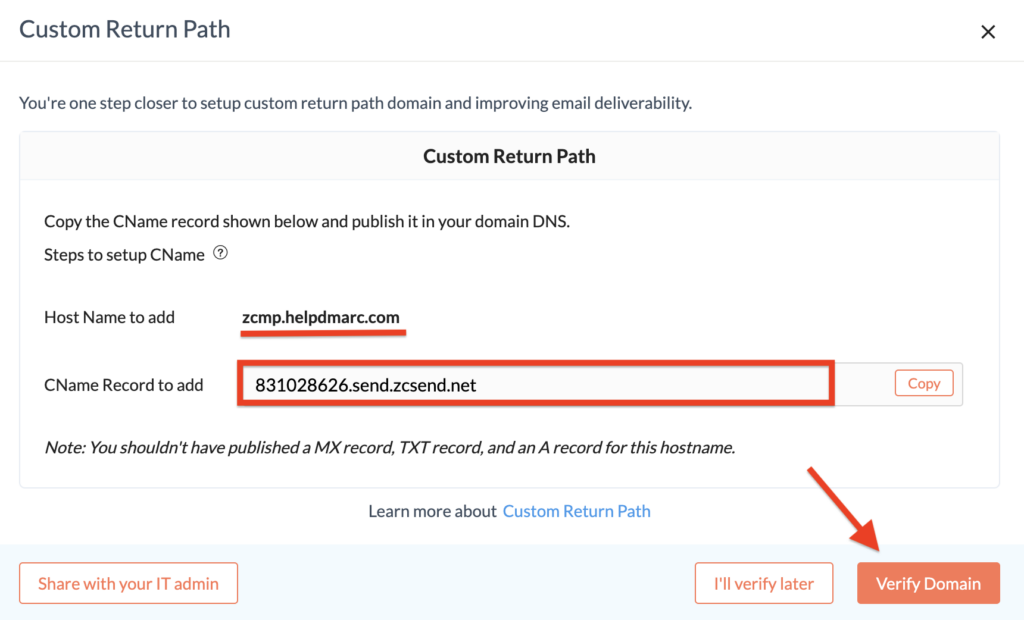
And you’ll be provided with an SPF CNAME record to publish in your DNS.
Copy and paste the record in your DNS, like in the screenshot below. If your DNS is Cloudflare, then make sure to switch off the “Proxy status”.
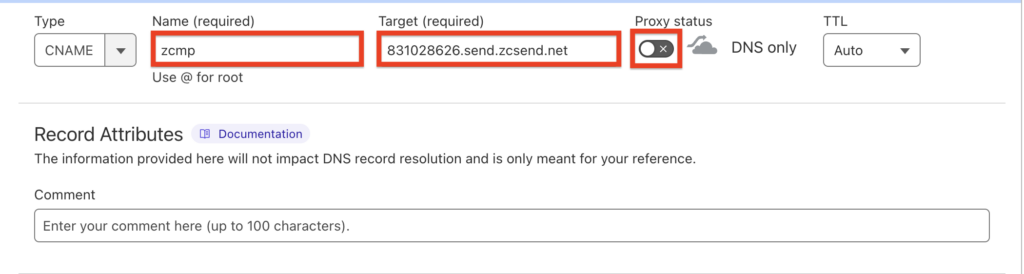
Wait for some time for the record to be propagated and head back to the Zoho Campaign and click on the “Verify Domain” button, if you have published the record properly then you’ll get the green check mark next to the domain, like in the screenshot below.

Important note: If the provider recommends publishing also a DMARC record, there’s no need to do so if you already have a DMARC record in place, as each domain can only have one DMARC record.
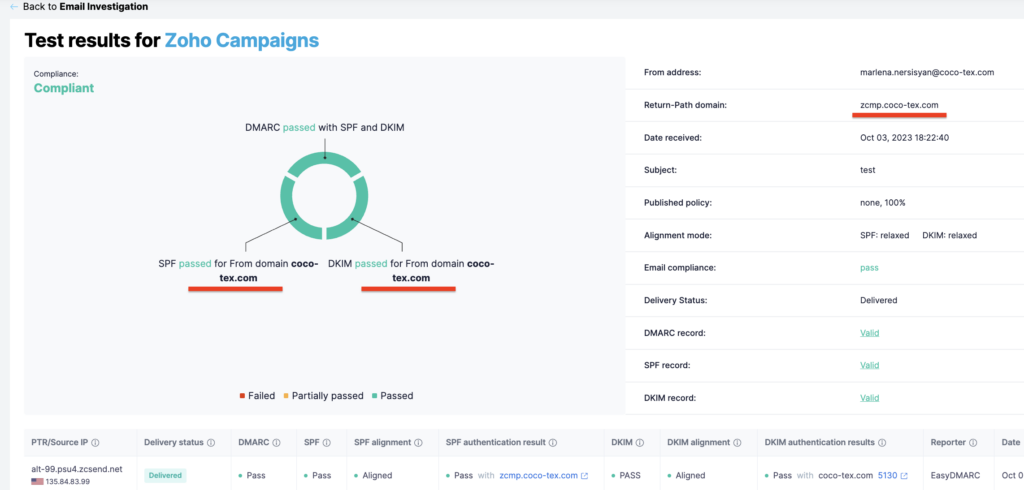
You can test it with our Email Investigation tool. (See the screenshot below)