


In this article, we are going to give you step-by-step instructions on how to configure SPF and DKIM records for Zoho Mail.
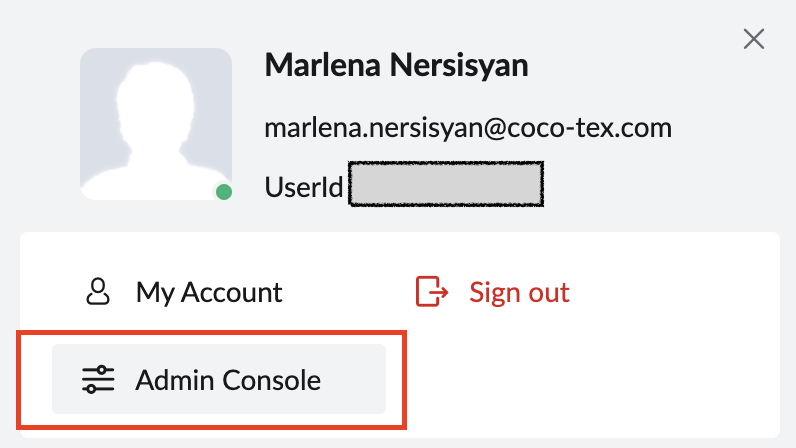
1. Go to the admin console from your Zoho Mail account.
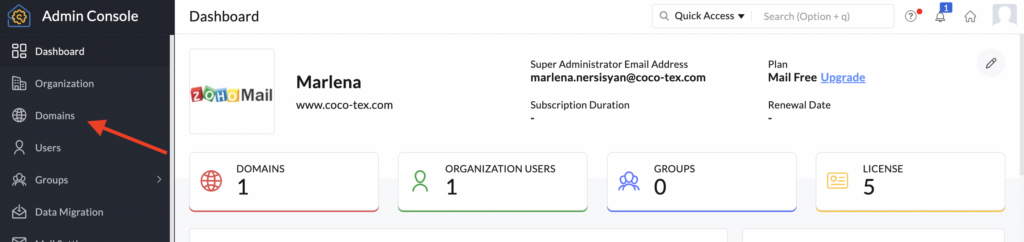
2. Click on Domains.
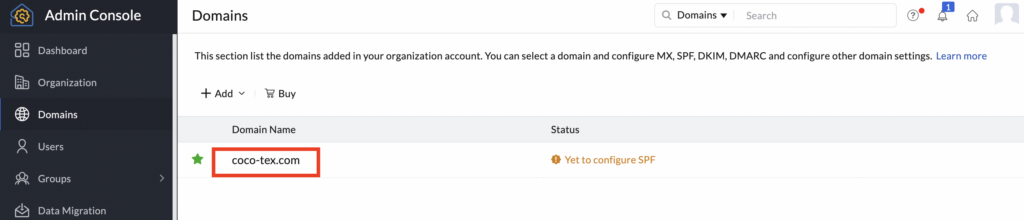
3. Select the domain you want to do configurations for.
4. After selecting the domain, enter the Email Configuration tab and click on SPF. And you will be provided with an SPF TXT record.
See the screenshot below,
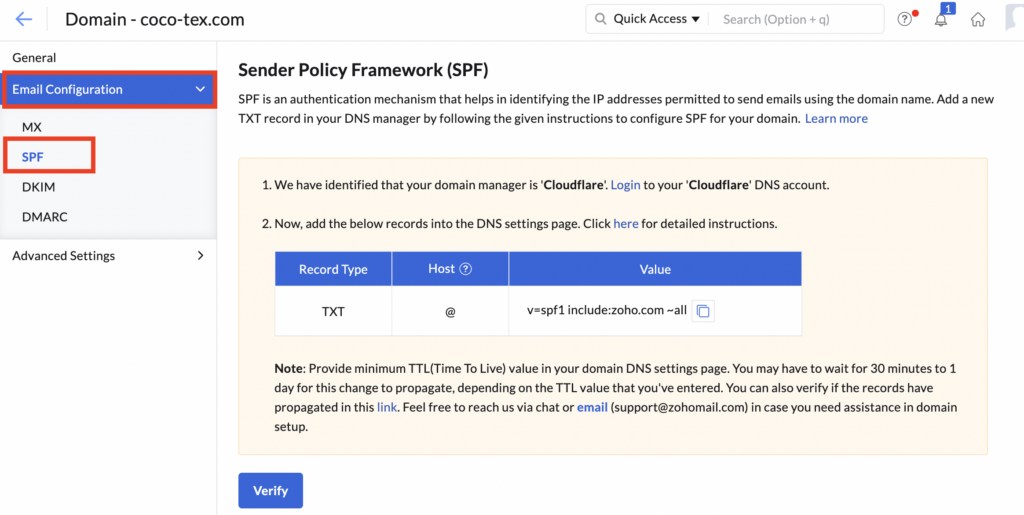
Note: If you already have an existing SPF record for your domain, then you should update your existing SPF record with this include mechanism include:zoho.com, like the one below:v=spf1 include:mail.zendesk.com include:_spf.google.com include:zoho.com ~all
If you do not have an existing SPF record, then you should publish the TXT record that Zoho provides you.
See the screenshot below,

Important: Make sure to have only one SPF record for your domain; otherwise, SPF will return a PermError.
Add SPF Record to Zoho Mail
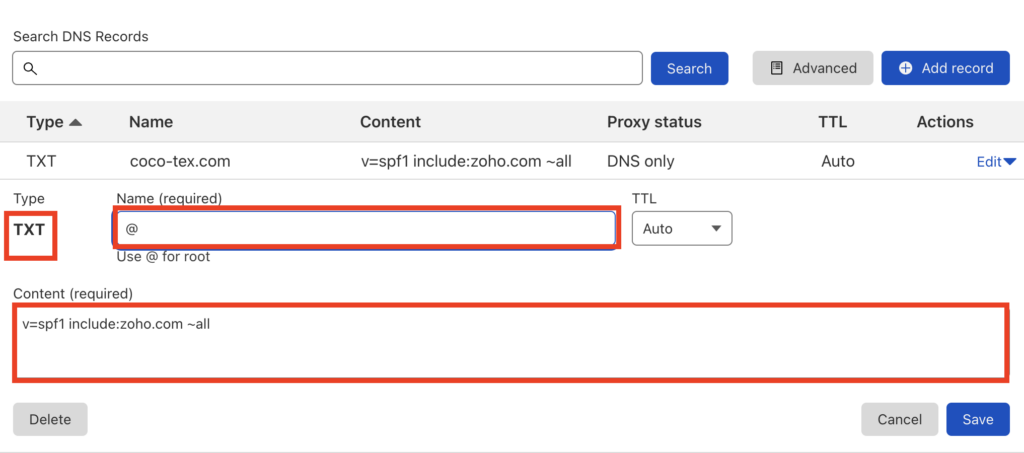
1. Head to your DNS provider.
2 . Click the Add button to add a DNS record.
3. Select TXT from the options of Record Type,
4. In the Host/Name field, enter @ or your domain name (depends on your DNS provider)
5. In the value field, enter the SPF record that Zoho has provided you. v=spf1 include:zoho.com ~all
See the screenshot below,
After having published the SPF TXT record, go back to Zoho and click on the Verify button. If you have done everything properly, you’ll get confirmation that your domain’s SPF has been published successfully.
Zoho Mail DKIM Configuration
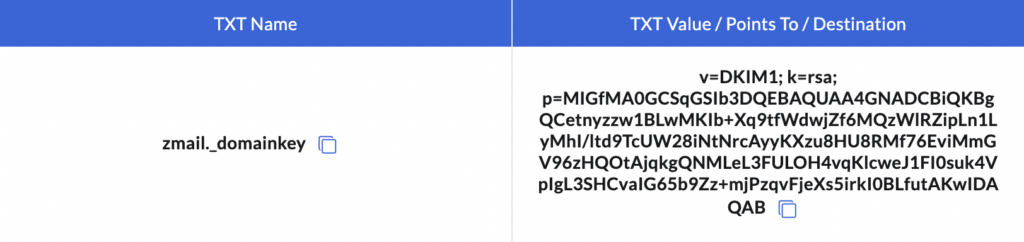
Select DKIM, In the Email Configuration tab, and you will be provided with a DKIM record, which you should publish in your DNS zone.
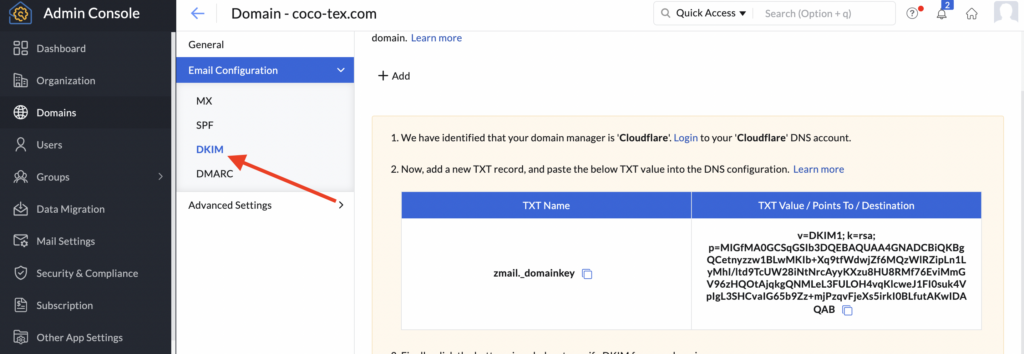
Also, you can click on Add to add one more DKIM record with another selector for your domain,

or just publish the one with the default selector provided by Zoho.
Add DKIM Record to Zoho Mail
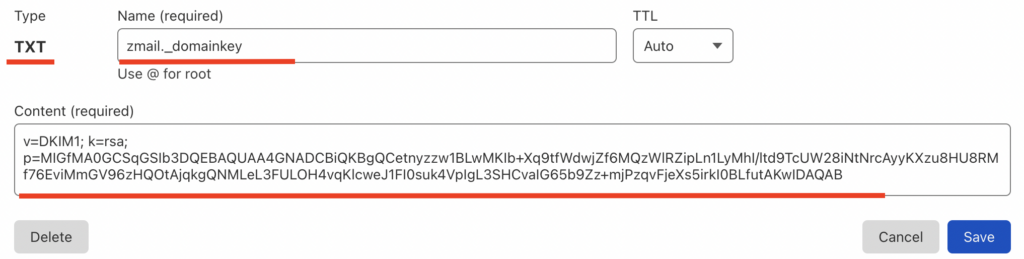
1. Click the Add button to add a DNS record.
2. Select TXT, from the options of Record Type,
3. In the Host/Name field, enter zmail._domainkey
4. In the Value field, paste the entire content you copied from the text field TXT Record Value in Zoho.
5. Save the TXT record in the DNS Manager.
See the screenshot below (DNS Cloudflare),
After saving the TXT record in your DNS, go back to Zoho and click on the Verify button. If you have done everything properly, you will get a green mark that confirms the verification of your DKIM record, like the screenshot below.

Important: The process to create a TXT record varies based on the DNS Provider/ Manager you use. Some DNS providers (like Cloudflare, GoDaddy, Wix, Squarespace, Namecheap, etc) append the domain name automatically. In such cases, you can just provide <selector>._domainkey as the TXT record name. But there are some DNS Providers that require you to add the domain name in the Host/Name field of the TXT record (<selector>._domainkey.yourdomain.com).
Congratulations, you have successfully enabled DKIM for your domain!
Important note: If the provider recommends publishing also a DMARC record, there’s no need to do so if you already have a DMARC record in place, as each domain can only have one DMARC record.