


Sophos Group plc is a UK-based security software and hardware company that provides solutions for endpoint protection, encryption, network security, email security, mobile security, and unified threat management.
Sophos supports both SPF and DKIM authentication. To ensure that outgoing emails routed through Sophos Email Security Gateways pass DMARC checks and are successfully delivered to recipients, you must correctly configure SPF and DKIM for your domain.
The process of configuring SPF
Sophos provides multiple SPF include records. Make sure to select the SPF record that corresponds to the region where your Sophos Email Security instance is hosted.
| Region | Type | Value |
| United States (West) | TXT | _spf_uswest2.prod.hydra.sophos.com |
| United States (East) | TXT | _spf_useast2.prod.hydra.sophos.com |
| Germany | TXT | _spf_eucentral1.prod.hydra.sophos.com |
| Ireland | TXT | _spf_euwest1.prod.hydra.sophos.com |
| Canada | TXT | _spf.eml100yul.ctr.sophos.com |
| Australia | TXT | _spf.eml100syd.ctr.sophos.com |
| Japan | TXT | _spf.eml100hnd.ctr.sophos.com |
| India | TXT | _spf.eml100bom.ctr.sophos.com |
| Brazil | TXT | _spf.eml100gru.ctr.sophos.com |
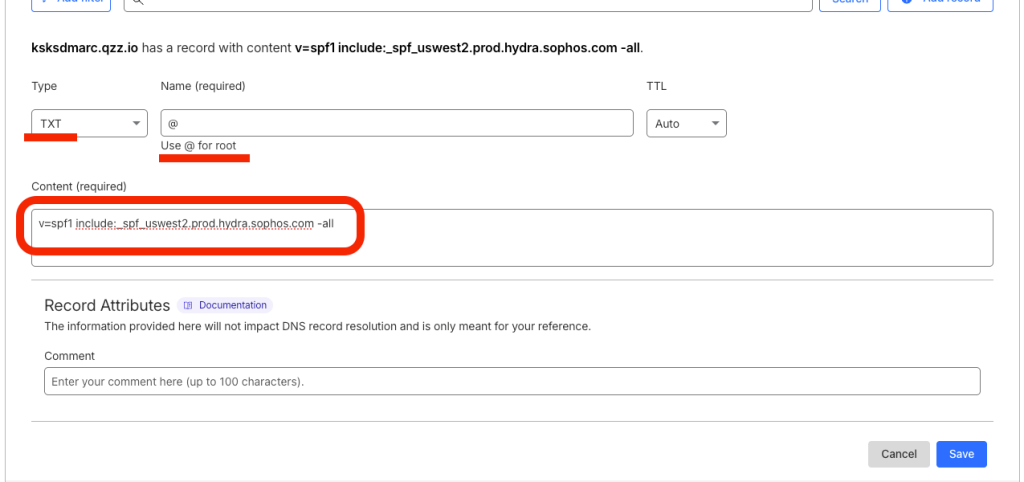
In this example, we will use the United States (West) SPF record.
Please refer to the screenshot below showing the SPF record published in DNS (Cloudflare DNS is used in this example).
If your domain already has an SPF record, you must update it rather than creating a second one.
Existing SPF record:
v=spf1 include:_spf.google.com ~all
Updated SPF record:
v=spf1 include:_spf.google.com include:_spf_uswest2.prod.hydra.sophos.com~all
Important note: After publishing or updating your SPF record, allow some time for DNS propagation to complete before testing email authentication.
The process of configuring DKIM
Step 1: Access Domain Settings
- Log in to your Sophos Email Security account.
- Navigate to My Products > General Settings > Domains Settings / Status.
- Select the domain you want to configure.
Step 2: Generate and Add the DKIM Key
- Click Add key.
- Sophos will automatically generate a DKIM selector and public key.
- Copy the generated DKIM details.
- Go to your DNS provider (e.g., Cloudflare, GoDaddy) and create a new TXT record using the provided DKIM information.
Step 3: Verify and Activate the Key
- After publishing the DKIM TXT record, allow time for DNS propagation.
- Click Test Record to confirm that the DKIM record is visible and valid.
- Once verification is successful, click Activate.
- Click Save to finalize the configuration.
Important note: If the provider recommends publishing also a DMARC record, there’s no need to do so if you already have a DMARC record in place, as each domain can only have one DMARC record.
Congratulations, you have successfully authenticated your outgoing email stream from Sophos Email Security Gateway using SPF and DKIM, helping ensure DMARC alignment and improved email deliverability.