


ConvertKit is a popular email service provider that offers automation, a clean interface, and creator-friendly features. To ensure the success of your email campaigns, the deliverability rate needs to be high. So, when you set a ConvertKit SPF record along with a corresponding DKIM record, the receiving mail servers get a way to verify that your emails are legitimate and safe to be placed in the primary inboxes.
Together with DMARC, these checks reduce spam placement, protect your domain from misuse, and improve overall deliverability. In this guide, we’ll walk through how to connect your domain to ConvertKit and configure SPF and DKIM step by step.
Please note that we will use Cloudflare as a DNS example for this guide, but the process applies to any DNS provider you use.
Process to Set Up the ConvertKit SPF and DKIM Record
Start by signing in to your ConvertKit account using the email address you want to authenticate for sending campaigns. Then follow these steps:
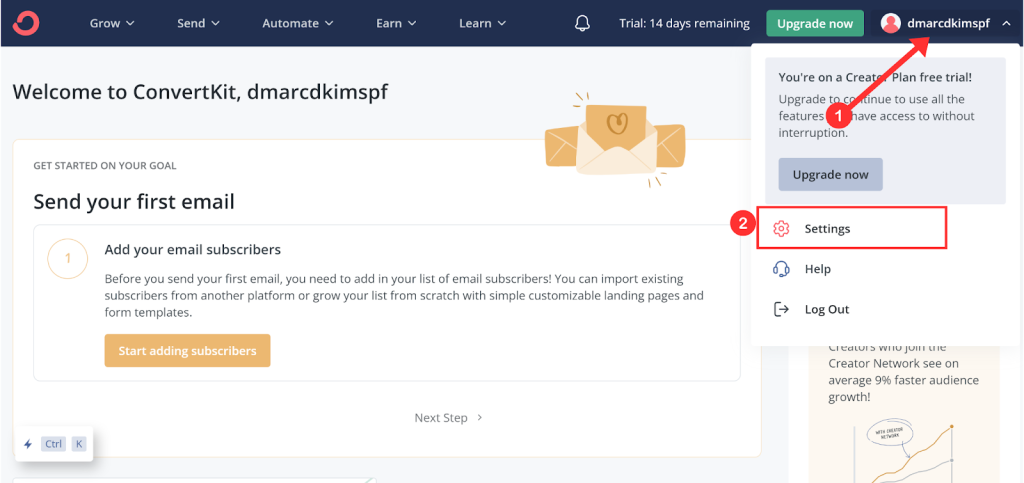
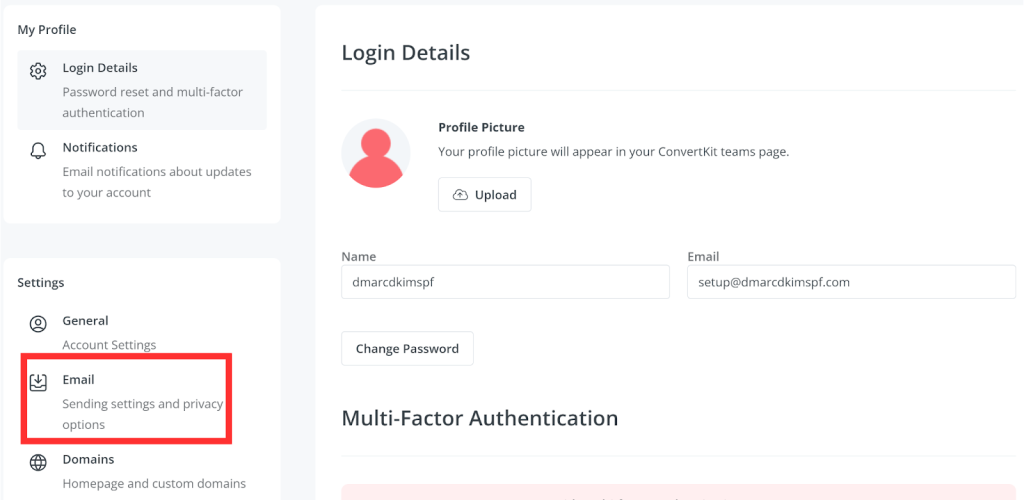
- Once logged in, click your profile icon in the top-right corner and navigate to Settings. From the left-side menu, select Emails.
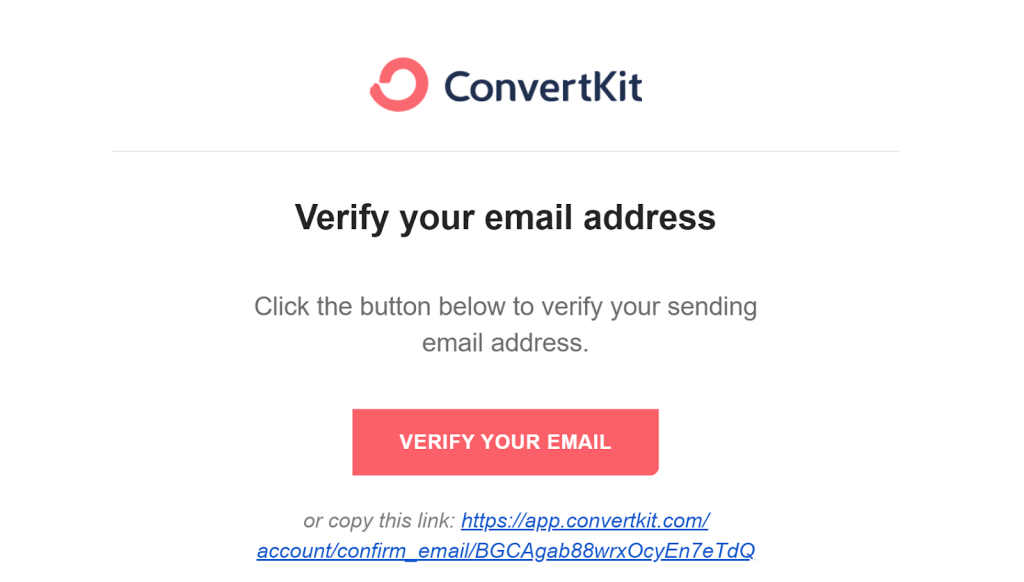
- You’ll see the email address you used during signup already listed. Open your inbox and click the verification link sent by ConvertKit. After verification, you’ll be redirected back to ConvertKit, and the email status will show as Confirmed.
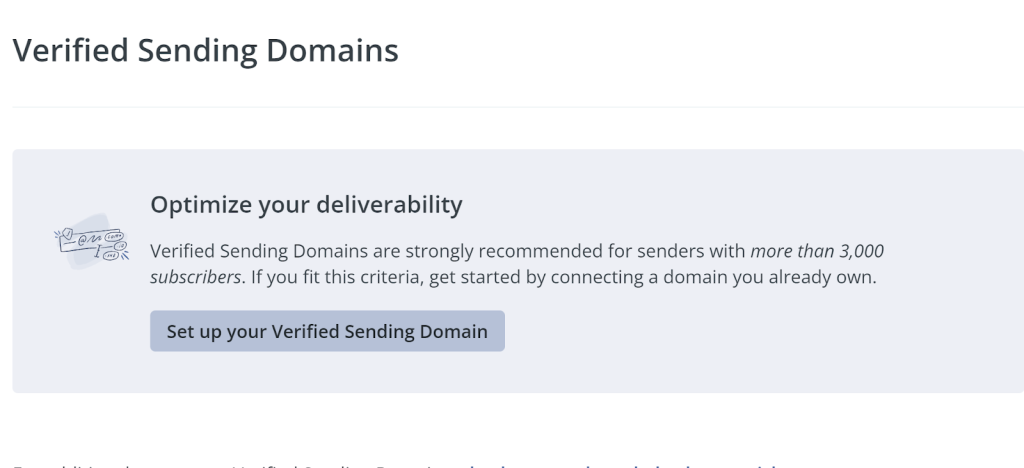
- Next, scroll down and click Set up your Verified Sending Domain.
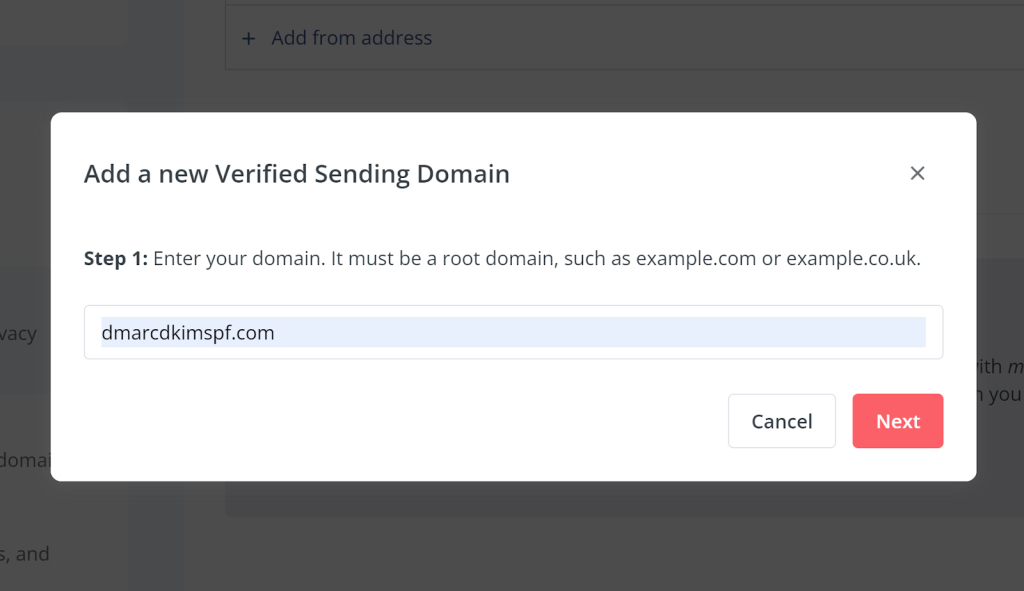
- Enter your root domain (for example, yourdomain.com) and click Next.
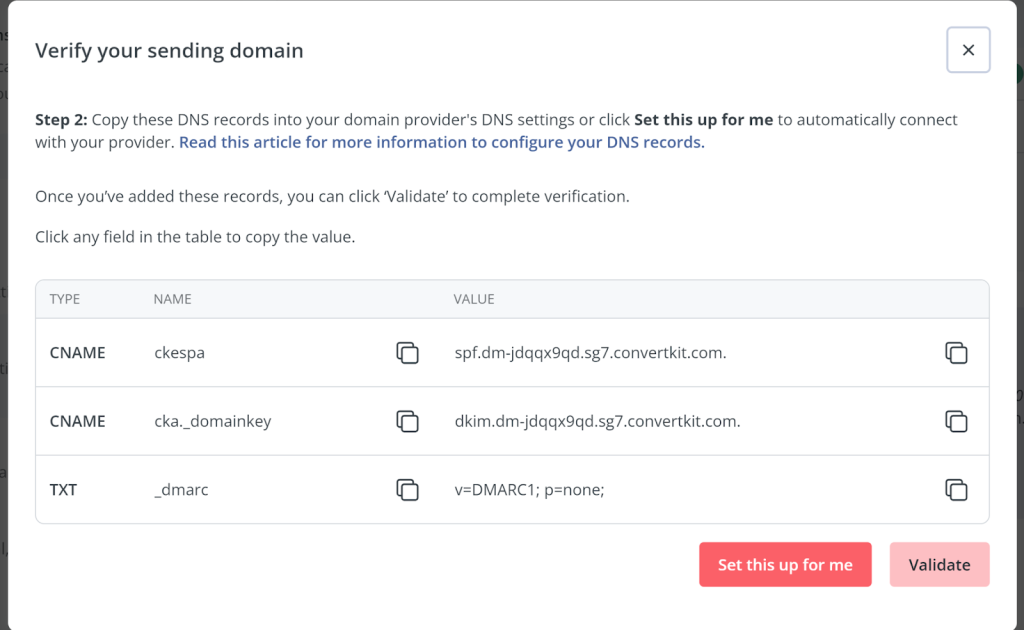
- ConvertKit will now generate the required SPF, DKIM, and DMARC records needed for ConvertKit domain authentication.
Before adding the SPF record, it’s a good idea to build and validate it properly. You can use EasyDMARC’s SPF Record Generator to safely include ConvertKit alongside other email services you may already use.
For DKIM, ConvertKit provides the selector and public key. If you want to understand or regenerate DKIM values in a structured way, DKIM Record Generator can help, especially when managing multiple sending services.
Automatic DNS Setup (Cloudflare Users)
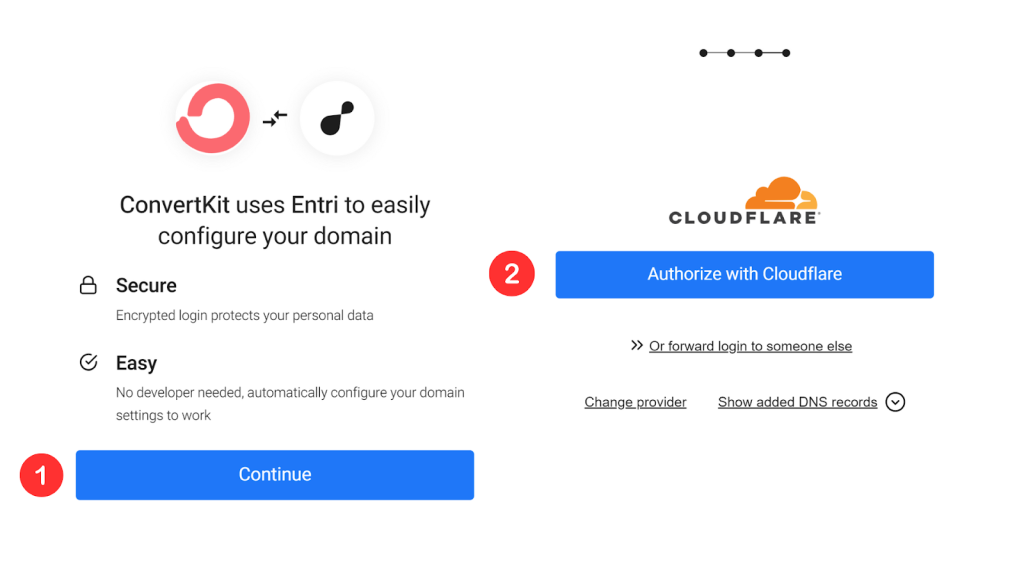
If your domain is hosted on Cloudflare, ConvertKit offers an automatic setup option. Click Set this up for me, then continue and authorize Cloudflare access. ConvertKit will detect your DNS provider and pre-add the SPF, DKIM, and DMARC records. Review them and click Authorize to confirm.
Manual DNS Setup (Any Provider)
If you prefer adding records manually, copy each SPF, DKIM, and DMARC record from ConvertKit and paste them into your DNS provider one by one.
For Cloudflare, go to your domain → DNS → Records → Add Record, select the correct record type, paste the hostname and value, and save.
After adding all records, return to ConvertKit and click Validate. If everything is configured correctly, your ConvertKit SPF and DKIM setup will authenticate successfully.
How to Verify ConvertKit SPF and DKIM
After adding the DNS records, the next step is to confirm that your authentication is working correctly. Start by using SPF Lookup tool. Enter your domain name and run a check to verify that the ConvertKit SPF record is published correctly, contains the required ConvertKit include, and does not exceed the DNS lookup limit.
Next, use DKIM Lookup tool to validate your DKIM record. This confirms that the DKIM selector is resolving properly and that emails sent through ConvertKit are being cryptographically signed. If both checks pass, your ConvertKit SPF and DKIM are active, and mailbox providers can trust your emails for better deliverability.
Common ConvertKit SPF and DKIM Problems
Even when you follow the setup steps correctly, small DNS or configuration issues can prevent ConvertKit emails from authenticating properly. Below are the most common SPF and DKIM problems you might run into, along with how to fix them.
SPF DNS Lookup Limit Exceeded
SPF allows a maximum of 10 DNS lookups, and adding ConvertKit to an already long SPF record can push you over this limit. When this happens, SPF returns a PermError and authentication fails completely. Cleaning up unused “include” statements or flattening the SPF record helps bring it back within limits.
Multiple SPF Records Found
Having more than one SPF TXT record is a common misconfiguration that breaks SPF validation. Some domains end up with separate SPF records for different tools or email providers. All SPF mechanisms must be combined into a single SPF record for authentication to work correctly.
DKIM Record Not Resolving
DKIM fails when the DKIM selector or hostname is entered incorrectly in the DNS provider. Even a small typo can stop the record from resolving, causing ConvertKit emails to be sent without a valid DKIM signature. Always match the DKIM host and value exactly as provided and confirm it using a DKIM lookup tool.
DKIM Authentication Stuck in Pending State
Sometimes, ConvertKit shows DKIM as “not authenticated” even after records are added. This usually happens due to DNS propagation delays or caching at the DNS provider level. Waiting for propagation and rechecking the record with a DKIM lookup tool typically resolves the issue.
Incorrect DKIM Record Type
ConvertKit uses a specific record type for DKIM, and adding it as the wrong type can prevent authentication. If a CNAME-based DKIM record is mistakenly added as a TXT record, DKIM will fail silently. Updating the record to the correct type and validating again ensures DKIM starts authenticating properly.
Important note: If the provider recommends publishing also a DMARC record, there’s no need to do so if you already have a DMARC record in place, as each domain can only have one DMARC record.
How Can EasyDMARC Help
Setting up ConvertKit SPF, DKIM, and DMARC is only the first step. Ongoing monitoring is what actually keeps your emails landing in inboxes. EasyDMARC helps you generate accurate SPF and DKIM records, validate them using real-time tools, and continuously monitor authentication results across all sending sources. You also get clear visibility into DMARC reports, making it easier to spot spoofing attempts and move safely toward a strict DMARC policy without breaking legitimate email flow.
If you want to simplify ConvertKit domain authentication and avoid silent deliverability issues, you can try EasyDMARC free for 14 days and see exactly how your email authentication is performing.
Frequently Asked Questions
Yes, ConvertKit allows you to authenticate multiple sending domains. Each domain must have its own SPF, DKIM, and DMARC records configured separately in DNS. This is useful if you manage newsletters or brands under different domains.
Yes, you can authenticate a subdomain instead of a root domain. This helps isolate marketing emails from your primary domain and reduces reputation risk. It also makes DMARC enforcement safer and easier to manage.
Yes, switching DNS providers requires re-adding all SPF, DKIM, and DMARC records. Authentication will fail until the records are correctly republished and verified. Always validate records after the DNS migration is complete.