FreshMail is an email marketing system that’s used to create and send online marketing campaigns providing its users a large selection of creative newsletter designs. In this step-by-step, we’ll help you follow FreshMail DKIM and SPF setup.
Setting up DKIM
Step 1: Head to your FreshMail portal.
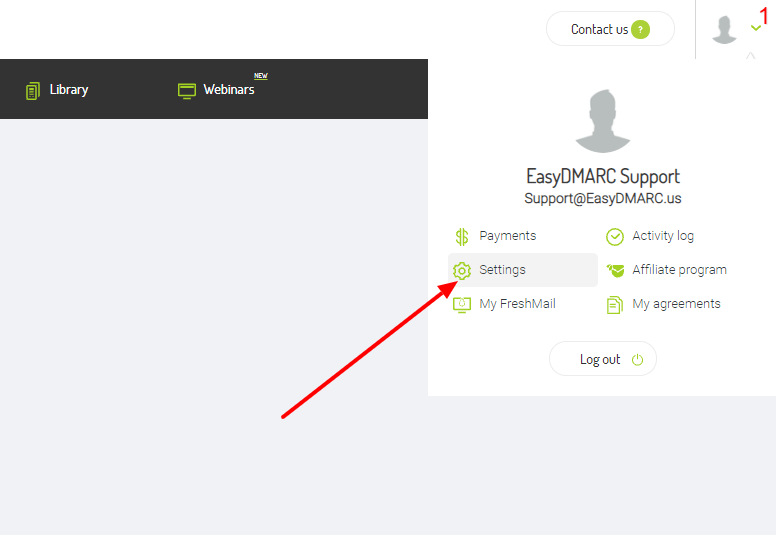
Step 2: Click on your profile at the top right and head to settings.
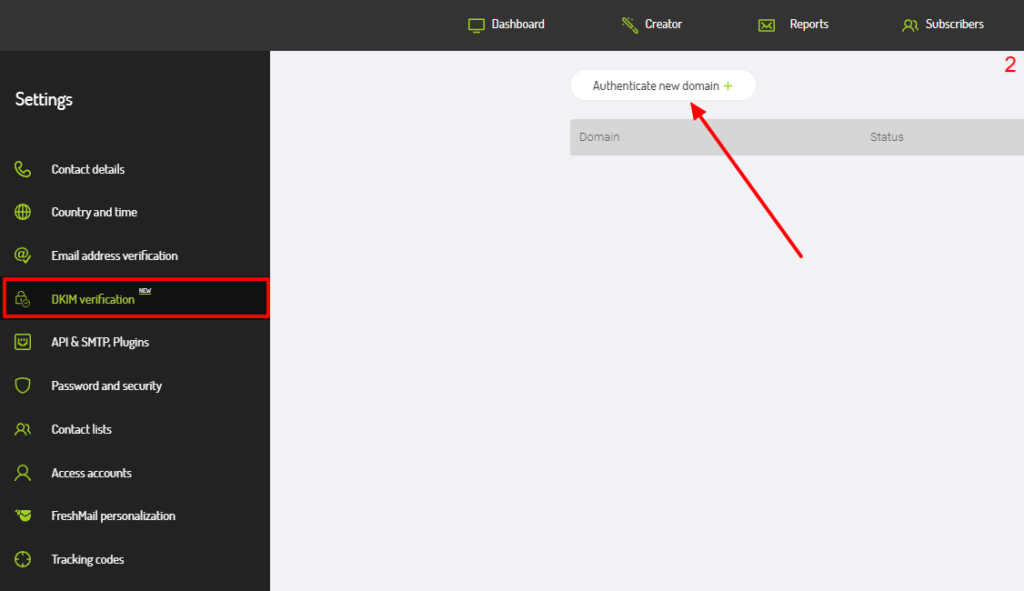
Step 3: Click “DKIM Verification”.
Step 4: Navigate to the “Authenticate new domain” section.
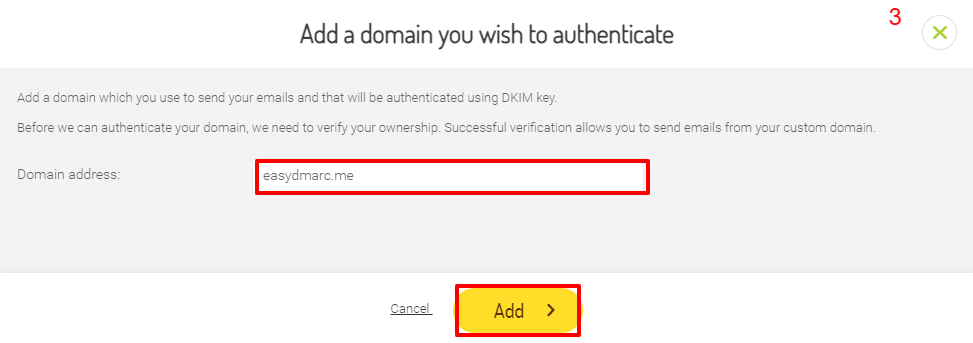
Step 5: Enter the domain that you want to verify and click “Add”.
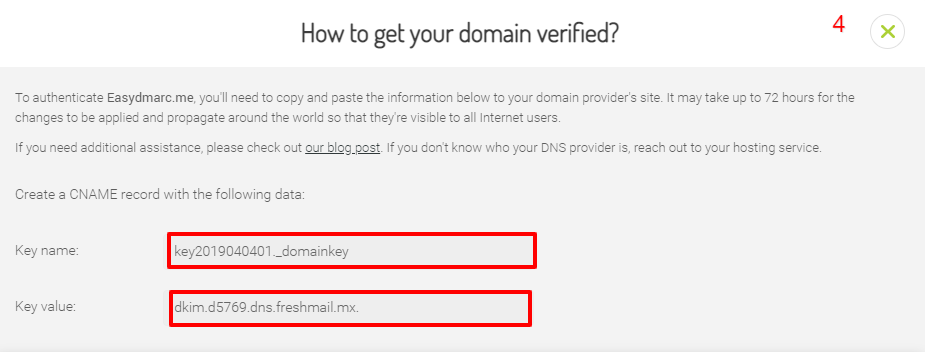
FreshMail will provide you with a CNAME record that you need to add to your DNS zone.
Step 6: Copy the provided Hostname and Value.
Step 7: Head to your DNS zone (In our case we use Cloudflare).
Step 8: Click on “Add a record”.
Step 9: Select the type as “CNAME”.
Step 10: Paste the Hostname/Name and the Value/Target, and hit save.
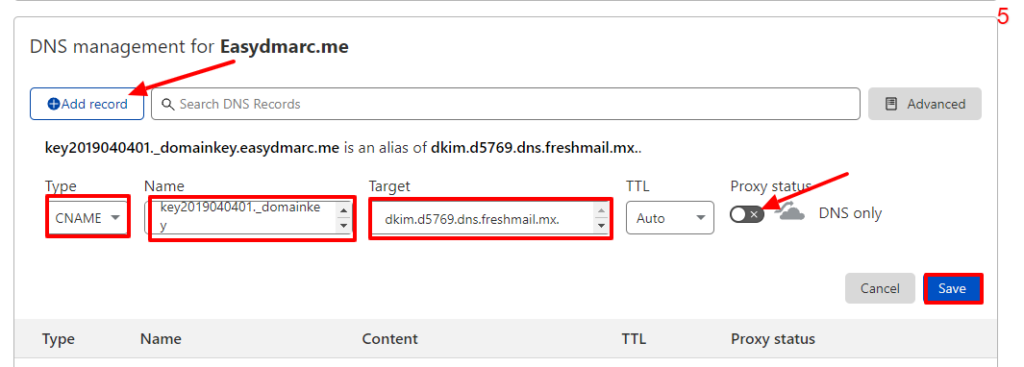
Note: Turn off the proxy status if you’re using Cloudflare.
Wait up to 24 hours until Freshmail displays a “Domain Verified” status.

Setting up SPF
As per FreshMail’s support channel, in order to authorize FreshMail to send emails on your behalf you will have to whitelist their sending server by adding “include:_spf.freshmail.pl” in your SPF record. We, at EasyDMARC, have confirmed that currently, SPF Alignment is not possible with FreshMail, hence you can skip this step to save up SPF Lookup space.
After everything is set, wait for another day and you should be able to see the reports under the DMARC compliant section with DKIM passing.
If you have any further questions don’t hesitate to contact EasyDMARC or reach out to the support team at [email protected].

