


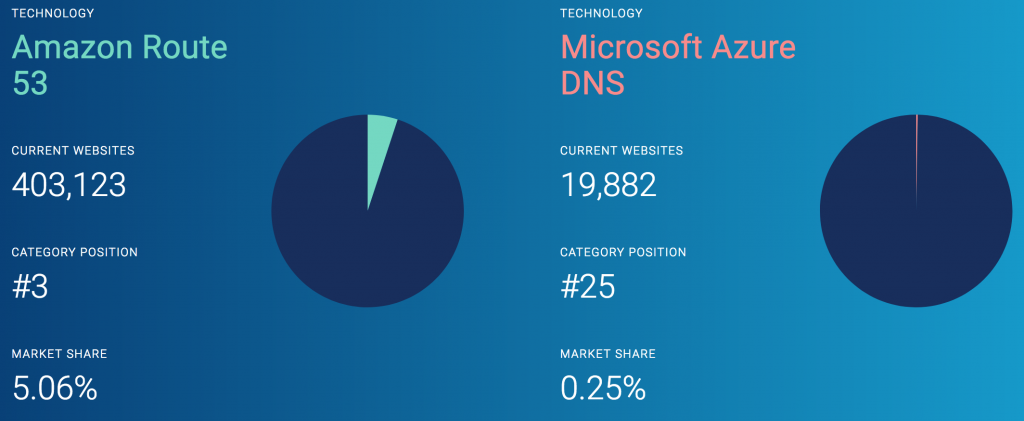
Azure DNS uses a global network of name servers to provide fast responses to DNS queries. It was first announced at the Microsoft Ignite conference in Chicago in May of 2015. They use Anycast networking, so DNS queries automatically route to the closest name servers to give you the best possible performance.
In this post, you can learn how to add a DMARC record to Azure.
Before moving forward, we recommend you check your domain to see if you have an active DMARC record or not.
Azure DMARC Setup in 4 Steps
Azure DMARC setup isn’t hard. You only need your Azure Dashboard and EasyDMARC’s DMARC record generator tool.
To start adding your Azure DMARC are the steps you need to take.
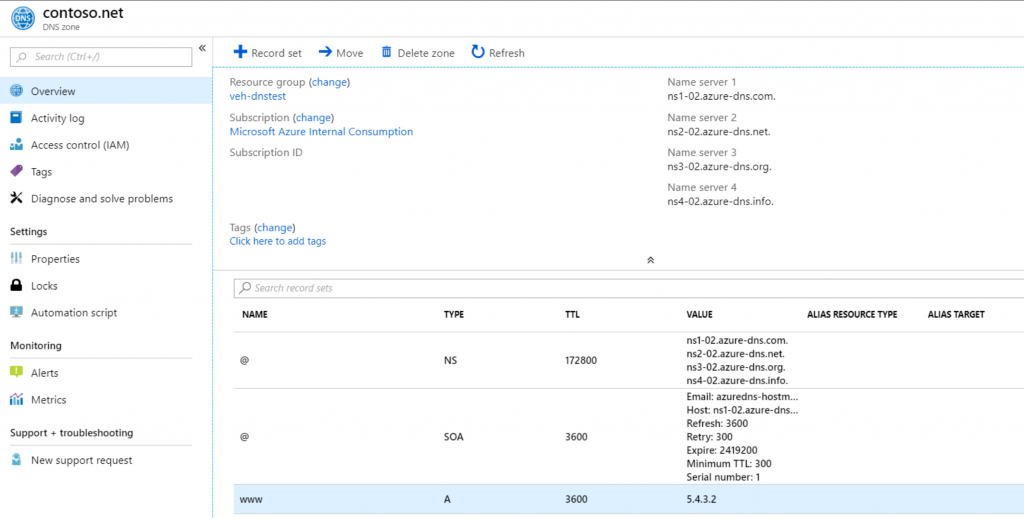
1. Go to your account at portal.azure.com and choose the DNS zones. There you can edit your zones.
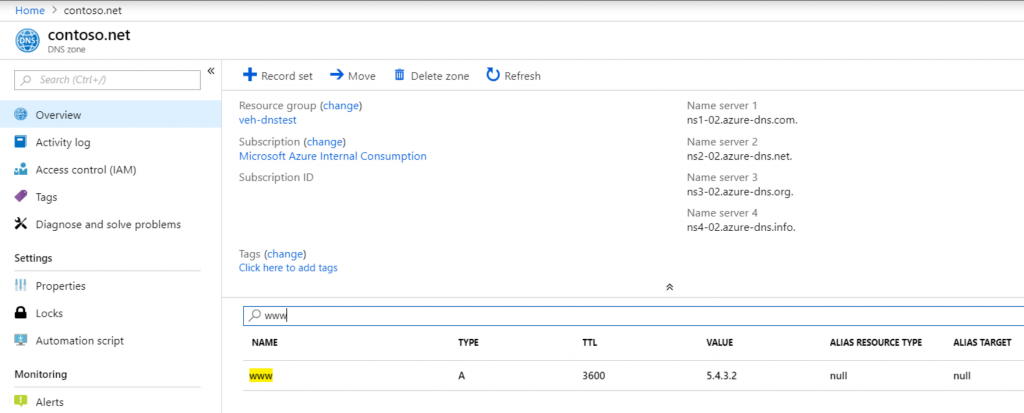
2. Click “Record Set” and add a new TXT record to your record set.
3. Go to EasyDMARC’s DMARC generator tool and create a new record.
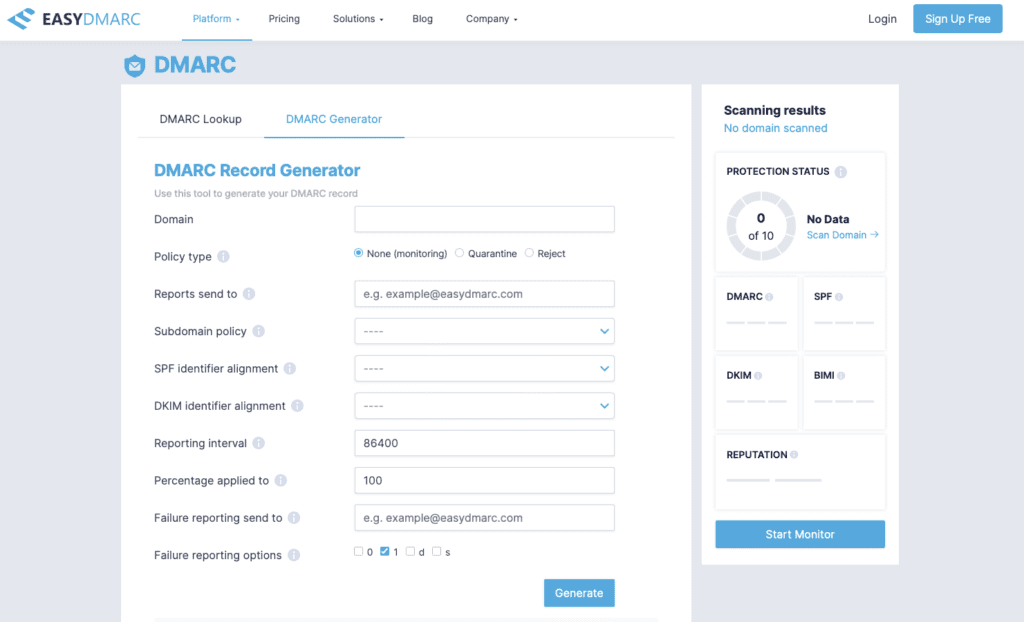
4. To add the DMARC record to Azure, copy the generated DMARC record from our free tool.
5. Use name _dmarc.yourdomain.com and paste the DMARC record into your Azure DMARC record.
Recommendation for Beginners
It might not be too hard to add a DMARC record to Azure, but you need to be alert in terms of which policy to choose.
- If this is the first time DMARC record is set for your domain, then we STRONGLY RECOMMEND using the “None” policy.
- You can read about what is DMARC here: add a link that will describe what are those policies and why beginners should use monitoring
Sign up for EasyDMARC and get recommendations for when the policy shall be changed. EasyDMARC will help with monitoring and creating the right configurations. When your domain is safe, EasyDMARC will suggest you change it p=reject with the goal-oriented alerts.
Next Steps
- Sign up for EasyDMARC
- Add your domain to get the suggested DMARC record
- Update your Azure DMARC TXT record
- Monitor and act upon the received reports