We’re excited to announce a new feature from EasyDMARC – Managed DMARC. It allows you to create a DMARC record directly from your EasyDMARC portal. This article covers the steps you need to take to enable the feature.
Important:
Before deploying managed DMARC, please make sure that you don’t have a DMARC TXT Record implemented by going to the DNS zone for your domain and deleting the TXT record under the Name/Host _dmarc or _dmarc.yourdomain.com if existing.
Deploying Managed DMARC
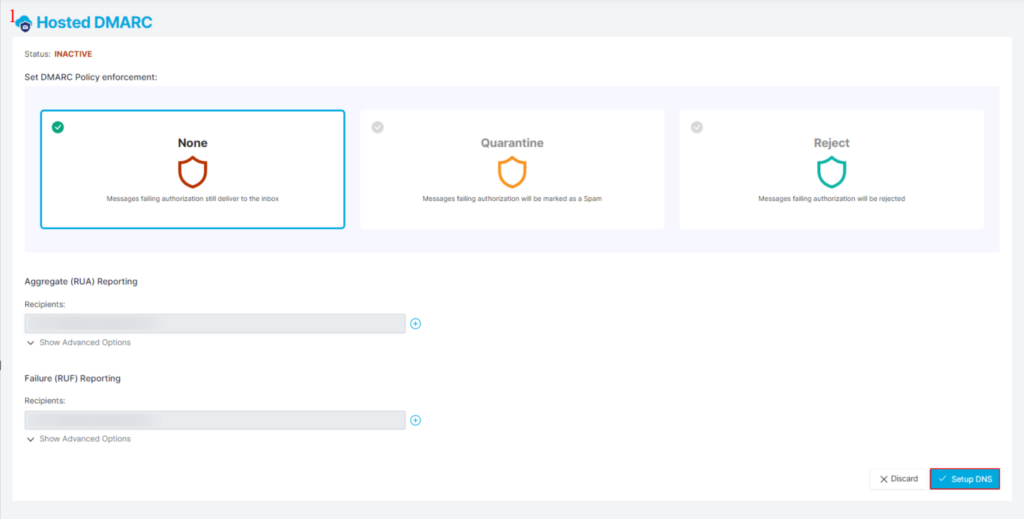
Step 1: Head to “Managed DMARC” in your EasyDMARC portal, Select the DMARC policy you want to apply to your domain, and click “Setup DNS.”
Not sure about what DMARC Policy you want to set?
EasyDMARC always recommends customers start with monitoring mode (p=none). This stage will let you analyze all reports and indicate which sources are legitimate. Next, you’ll be able to configure them and as a result, block spoofing or phishing attempts. Read more about DMARC Policies here.
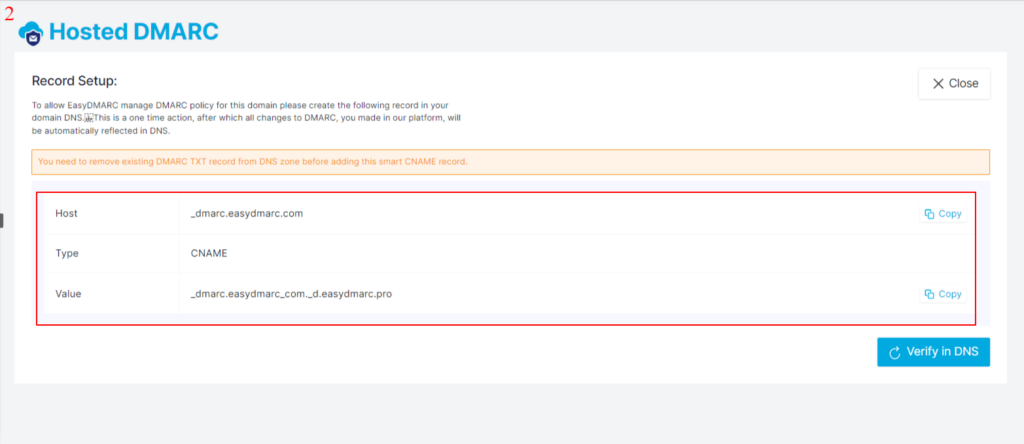
Step 2: EasyDMARC will provide you with a CNAME record that needs to be added to your DNS zone.
Step 3: Head to your domain’s DNS zone and add a new record.
Step 4: Select the Type as CNAME
Step 5: Copy and paste the Name/Host and the Value/Target provided by EasyDMARC
Step 6: Click “Save”
Important:
If you’re using CDNs such as Cloudflare, make sure to turn off any existing proxy status (if applicable).
Step 7: Head back to EasyDMARC and click “Verify” in DNS.
Please allow a few minutes to verify the record from our end.
That’s it! You have successfully deployed managed DMARC to your domain and have complete control over your DMARC record from EasyDMARC.
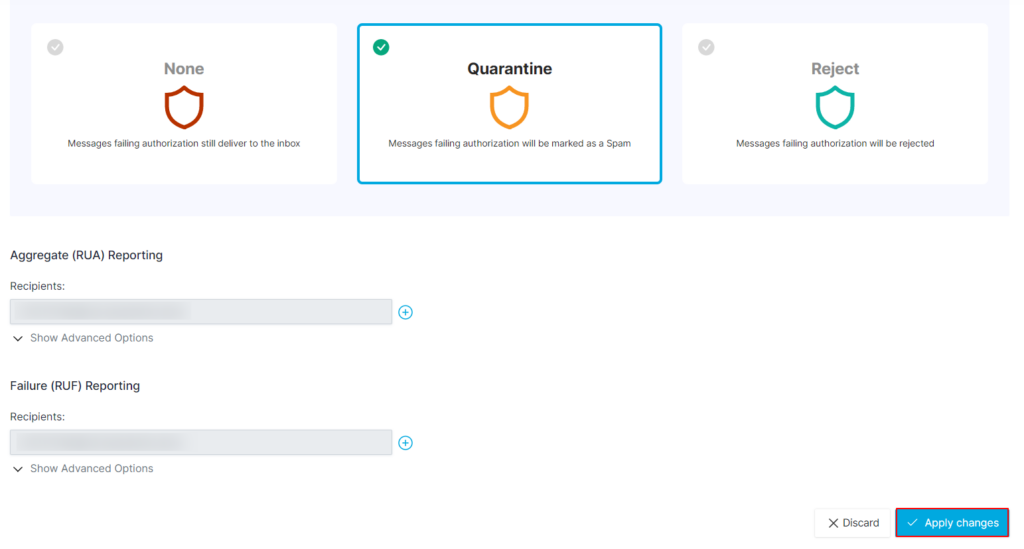
For any future updates of your DMARC record, such as setting the policy to “Quarantine” or “Reject,” you’ll need to:
- Head to your EasyDMARC “Managed DMARC” section
- Choose the desired policy
- Click “Apply Changes”
If you have any further questions feel free to contact our support team at [email protected].

