


Mailchimp is an automated email marketing platform that’s used by businesses to reach their target audience. In this informative post, we’ll go over how to configure and set up MailChimp Authentication with DomainKeys Identified Mail (DKIM). We won’t be going over the SPF setup. As of now, MailChimp does not support SPF alignment.
Verifying and setting up DKIM for MailChimp
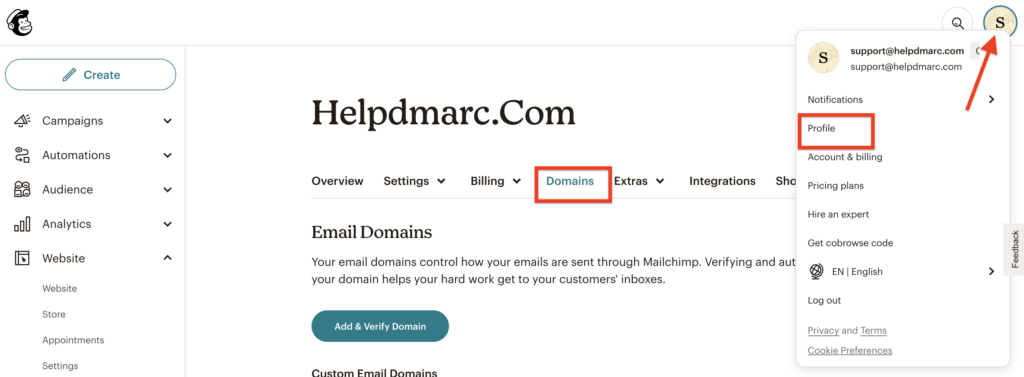
Go to your MailChimp account and click on your profile name. From there, select “Profile” and then go to the “Domains” section. You can refer to the screenshot below for further guidance.
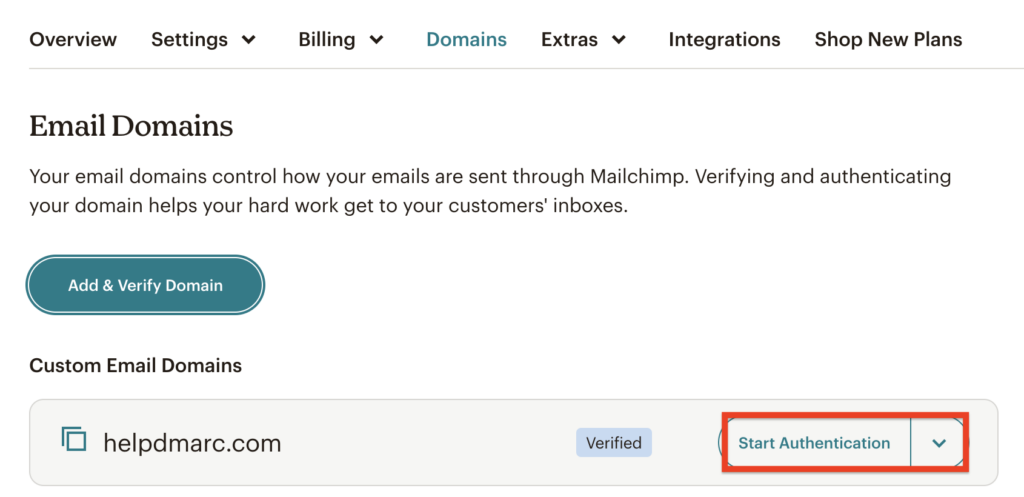
From there, you can start the authentication process.
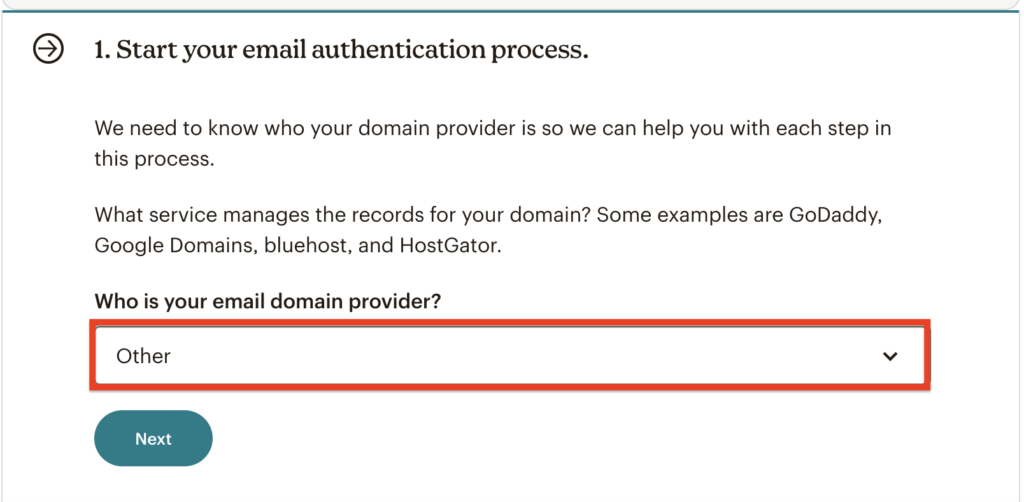
The first step would be to enter the domain provider that you’re using (NameCheap, GoDaddy…)
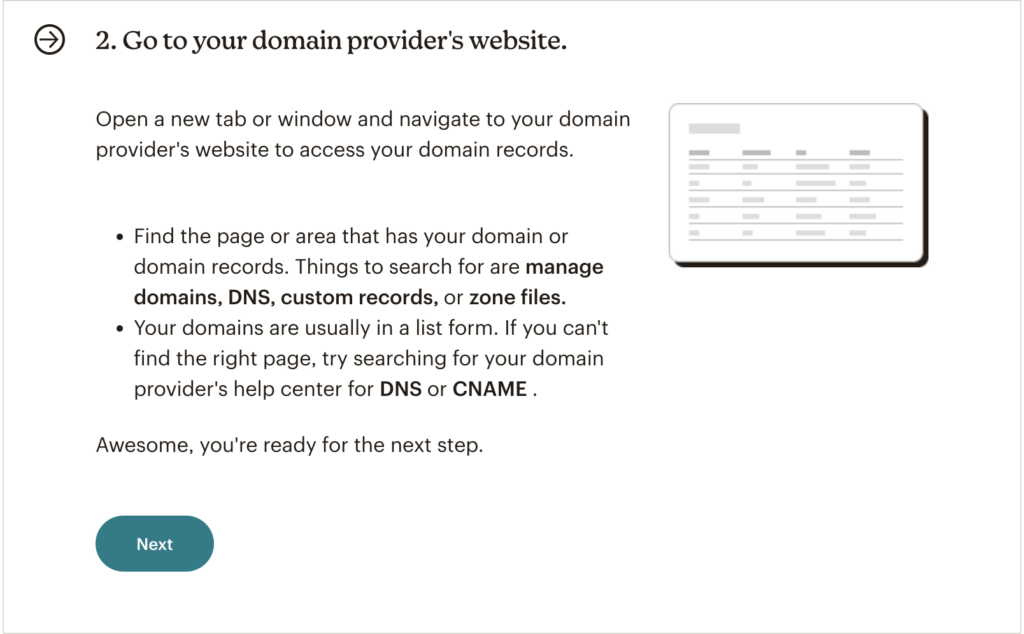
Then, head to your DNS zone to add or edit records.
In the third step, MailChimp will provide you with two CNAME records containing DomainKeys and selectors unique to your domain.
Copy the records:
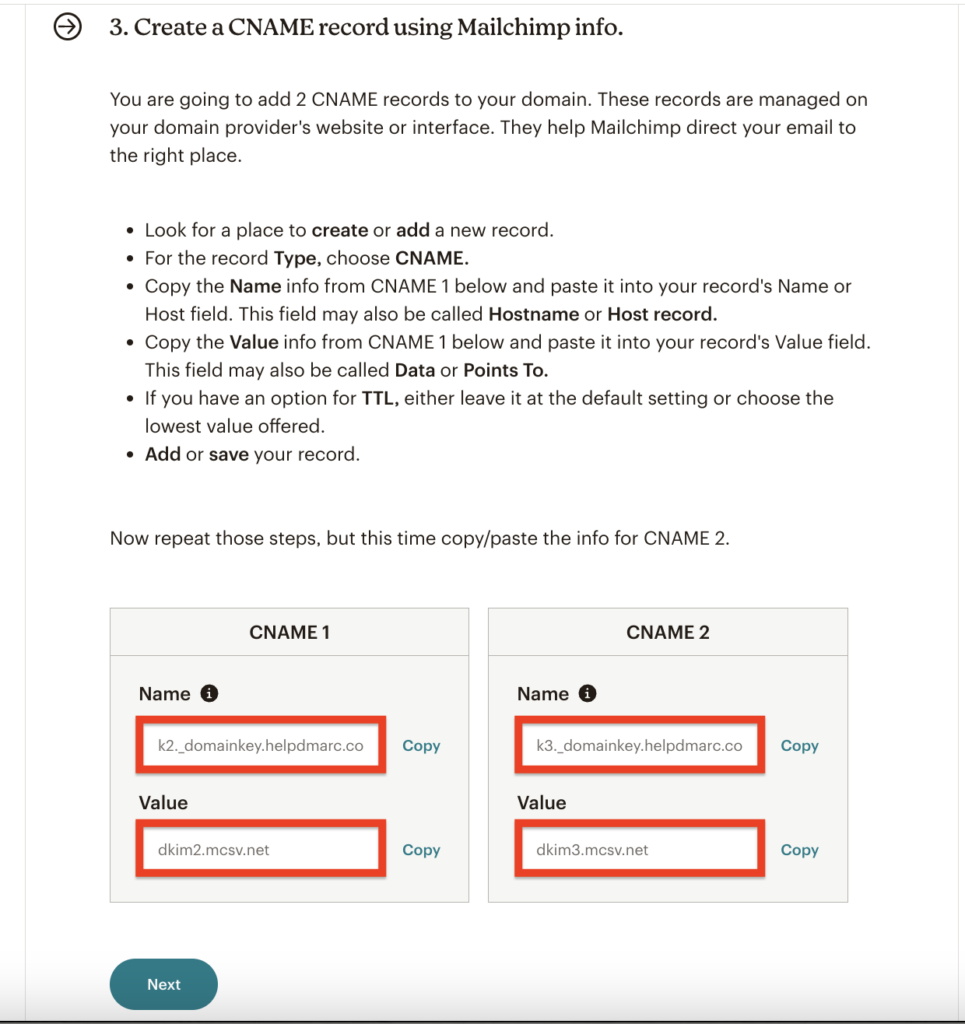
Add a new CNAME record and paste the given two records data by MailChimp.
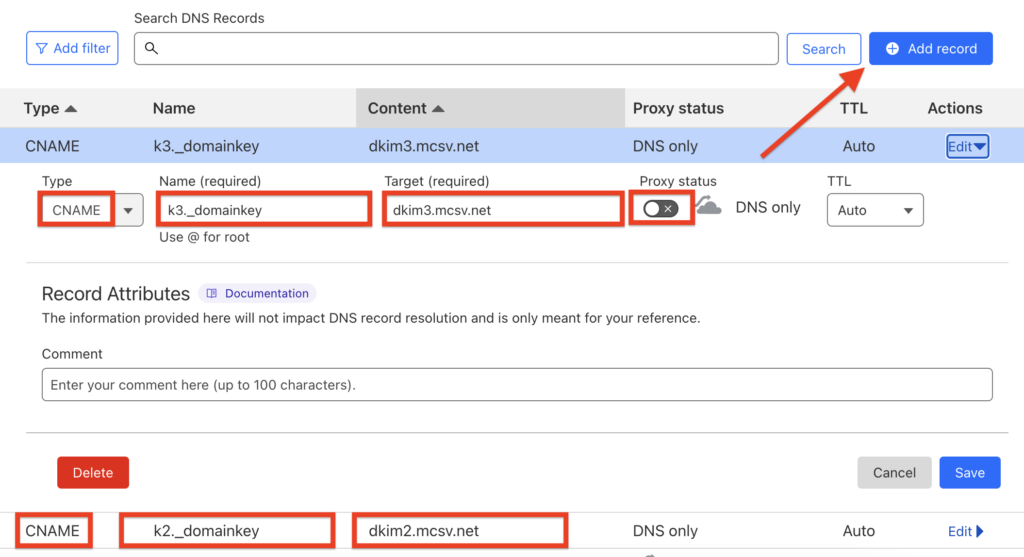
Note: Turn off the proxy status if you’re using Cloudflare.
The next step would be to sit back and enjoy your coffee while MailChimp verifies everything, this could take a couple of hours up to a full day.
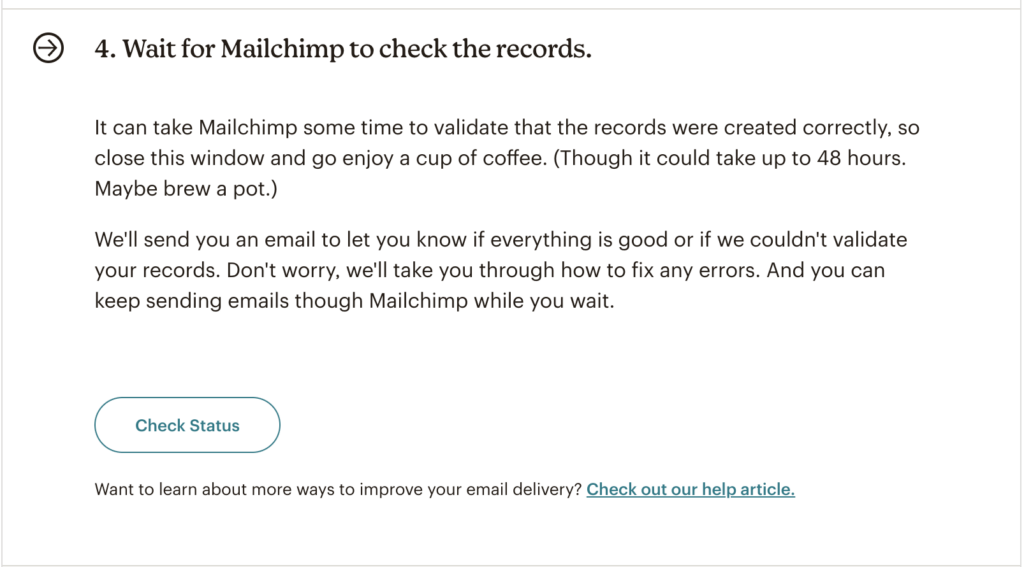
Once everything is set, MailChimp will let you know that your domain is authenticated and you can go forward with your marketing campaigns.

Note: Wait for at least 24 hours after the authentication process is done to receive the updated reports.
Important note: If the provider recommends publishing also a DMARC record, there’s no need to do so if you already have a DMARC record in place, as each domain can only have one DMARC record.
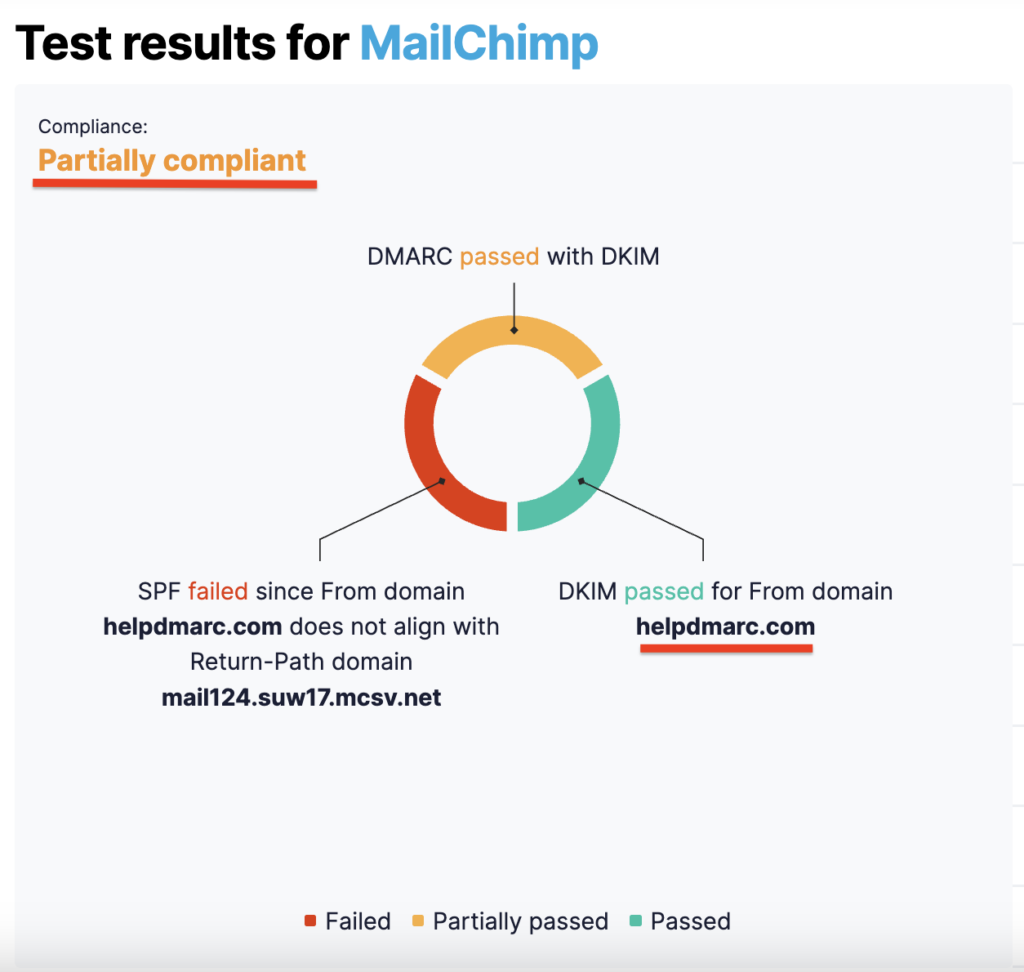
Mailchimp setup is one of those cases when DMARC compliance is achieved via DKIM authentication and alignment only. Although you’ve not configured SPF, DMARC will still pass. You can test it with our Email Investigation tool. (See the screenshot below).
Excellent Instructions!