Mailrelay is a web service for email marketing and proprietary software for sending mailings, newsletters and analysis of email campaigns. But before sending any email let’s authenticate your domain by configuring SPF and DKIM records.
To set up SPF and/or DKIM:
1. Click on Settings from the left side of the dashboard.
2. Click on Email authentication.
3. Then click on the Verify button next to the domain you want to configure with SPF and/or DKIM. See the screenshot below.
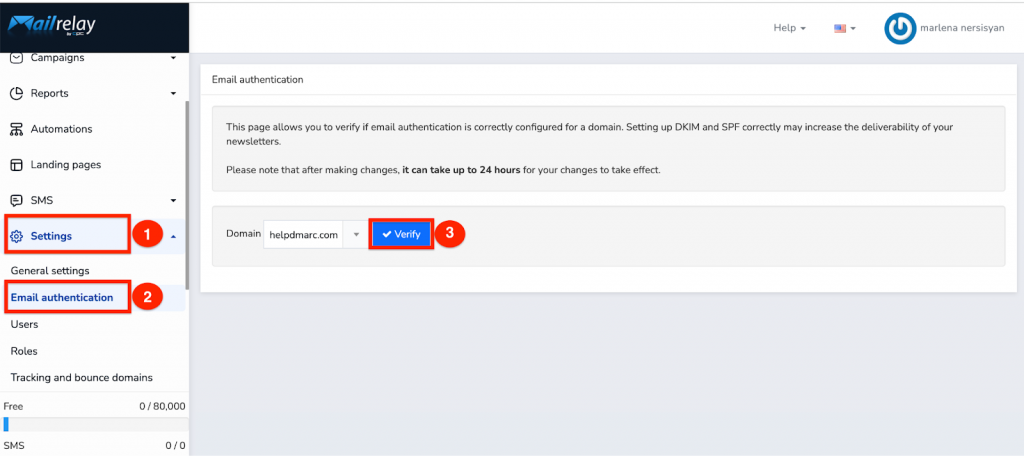
Once you click on the “Verify” button, you’ll be provided with SPF and DKIM records that you need to publish in your DNS.
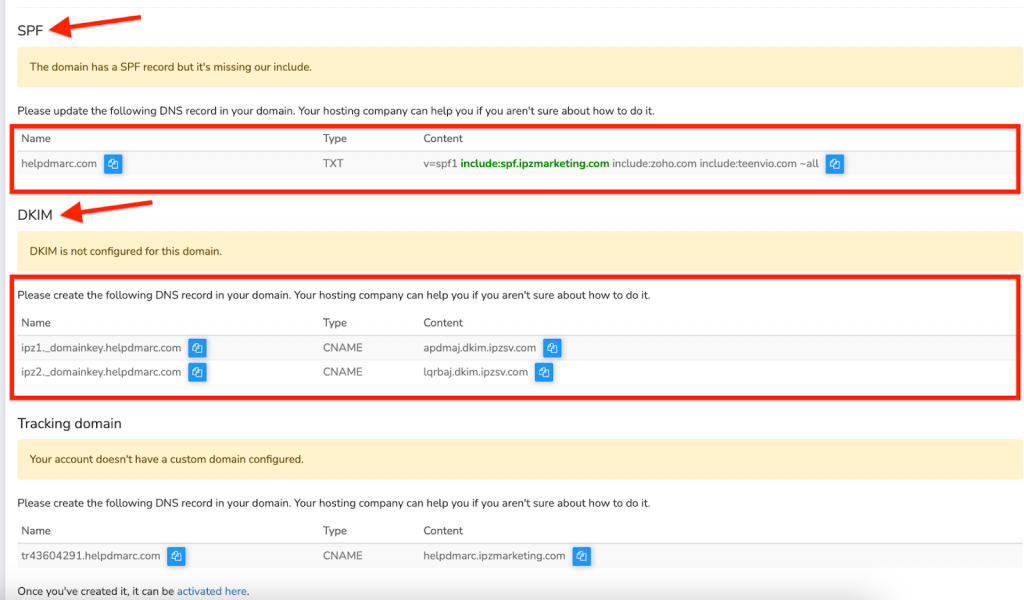
Mailrelay SPF Record Configuration
Please take note: If you already have an existing SPF record for your domain, Mailrelay will automatically provide you with an updated SPF record featuring this include mechanism: include:spf.ipzmarketing.com.
You will need to UPDATE your existing SPF record with the one provided by Mailrelay within your DNS settings.
For example:
v=spf1 include:mail.zendesk.com include:_spf.google.com include:spf.ipzmarketing.com ~all
If you do not have an existing SPF record, then Mailrelay will provide you with an SPF record similar to the example below, which you need to publish in your DNS zone.
v=spf1 include:spf.ipzmarketing.com ~all
Important: Make sure to have only one SPF record for your domain, otherwise SPF will return a PermError.
Mailrelay DKIM Record Configuration
Mailrelay will provide you with two CNAME records for DKIM. See the screenshot below.

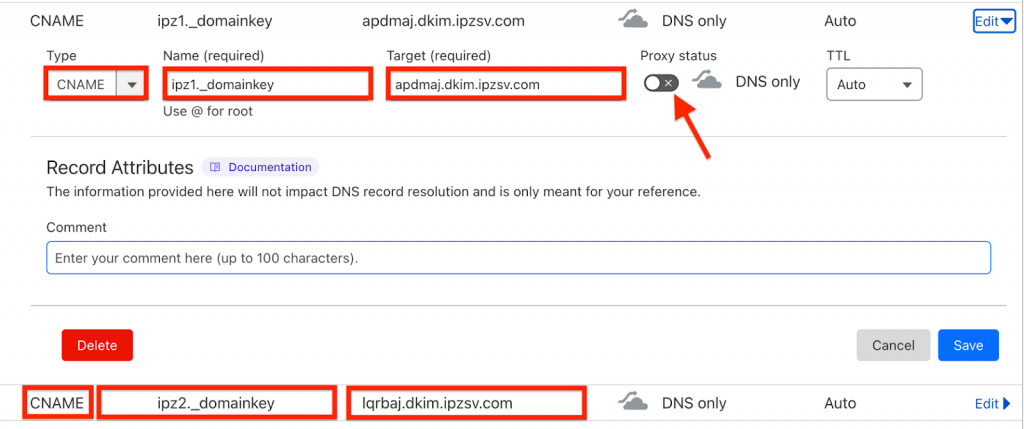
Copy and paste the CNAME Records for DKIM in your DNS host.
See an example of added CNAME Records in Cloudflare DNS in the screenshot below. If you are using Cloudflare, please make sure to switch off the “Proxy status”.
If you have correctly published the records, you will see a confirmation from Mailrelay indicating that the records have been accurately configured for the domain. Like in the screenshot below.
Important note: If the provider recommends publishing also a DMARC record, there’s no need to do so if you already have a DMARC record in place, as each domain can only have one DMARC record.
You can test it with our Email Investigation tool. (See the screenshot below)

