This instructional article will demonstrate the Microsoft Azure configuration process of Sender Policy Framework (SPF), DomainKeys Identified Mail (DKIM) Signatures to ensure Microsoft Azure passes the DMARC alignment check and eliminate spam from your domain and increase security.
The SPF record identifies the mail servers and domains that are allowed to send email on behalf of your domain. The DKIM record, on the other hand, is a specially formatted DNS TXT record that stores the public key the receiving mail server will use to verify a message’s signature. These email authentication methods will be used to prove to ISPs and mail services that senders are truly authorized to send email from a particular domain and are a way of verifying your email sending server is sending emails through your domain.
The process of verifying your domain
In order to verify your domain in Microsoft Azure, please follow these steps:
- Login and head to your Microsoft Azure dashboard
- Go the overview page of the Email Communications Service resource that you created earlier
- Click on Setup in Setup a Custom Domain section
- Click Add domain on the upper navigation bar
- Select Custom domain from the dropdown
- Navigate to Add a custom Domain
- Enter your “Domain Name” and re enter domain name
- Click Confirm
- Click on Add
- After finishing the adding section, click on Verify Domain
- You will be navigating to Verify Domain via TXT record section
- Add theTXT record mentioned in this section
- Verify that TXT record is created successfully in your DNS and Click Done
- DNS changes take up to 15 to 30 minutes. Click Close
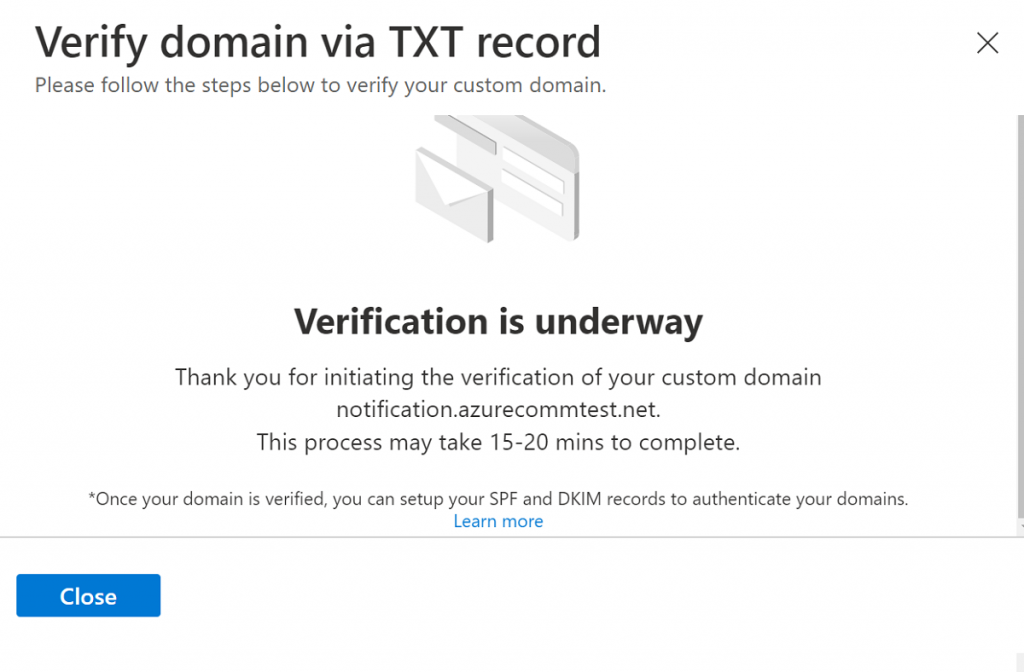
Once your domain is verified, you can add your SPF and DKIM records to authenticate your domains
The process of configuring SPF
In order to verify your domain in Microsoft Azure on SPF, please follow these steps:
1. Create a new TXT record
2. Input the DNS name as <subdomain name>
3. Input the DNS value as v=spf1 include:spf.protection.outlook.com ~all
4. Save the record
5. Wait up to 72 hours to allow your DNS to process the changes
Important Note: Microsoft Azure employs the default SPF configuration, exactly like Microsoft 365/Outlook. If you already have this source in your SPF record, there’s no need to add it again.
Screenshot below will show you the example of the SPF record. We’ll be using CloudFlare for this example.
Important Note: Each domain must have only one SPF TXT Record. If you have multiple SPF Records, SPF will return a PermError.
If you are using multiple IPs, ESPs, Third-Party services for your various email strategies, you should include them in a single SPF Record.
E.g v=spf1 ip4:18.57.156.221 include:spf.protection.coutlook.com include:thirdpartyservice.com ~all
The process of configuring DKIM
In order to authenticate Microsoft Azure on DKIM, you need to create 2 CNAME record. Please follow these steps:
- Login and head to your DNS Zone provider
- Create a new CNAME record
- Input the DNS name as selector1-azurecomm-prod-net._domainkey
- Input the DNS value as selector1-azurecomm-prod-net._domainkey.azurecomm.net
- Save the record
Repeat steps 2-5 to add the second DKIM key:
DNS Name: selector1-azurecomm-prod-net._domainkey
DNS Value: selector1-azurecomm-prod-net._domainkey.azurecomm.net
Screenshot below will show you the example of the DKIM records. We’ll be using CloudFlare for this example.
Important Note: please make sure to disable the Proxy Status and let it to remain on DNS Only.
6. Once you have added both SPF and DKIM, navigate to Provision Domains and confirm that Domain Status is in Verified state
7. Once your sender authentication configurations are successfully verified, your email domain is ready to send emails using custom domain
Congratulations, you now successfully authenticated your outgoing mail stream from Microsoft Azure with SPF and DKIM.
Important note: If the provider recommends publishing also a DMARC record, there’s no need to do so if you already have a DMARC record in place, as each domain can only have one DMARC record.

