


Namecheap Email is a cost-effective, domain-based email service designed for individuals and small teams who want a professional inbox without complexity. It supports standard protocols like IMAP, POP3, and SMTP, making it compatible with most email clients, while offering essential features such as spam protection, secure access, and reliable uptime. This article provides a quick overview of how Namecheap Email works, what it offers, and when it makes sense to use it.
SPF Configuration
Namecheap currently doesn’t support SPF alignment, thus there is no need to whitelist the source in your SPF record. The return-path address will be handled by Namecheap.
DKIM Configuration
Normally, a DKIM record will be generated automatically after you create your first mailbox. However, if this didn’t happen for some reason, follow the guide.
1. Log in to your Namecheap account.
2. Go to the Private Email menu:

3. Then, click on Manage next to your domain:

In case you haven’t yet activated your Private Email, the following instructions will guide you through the process:
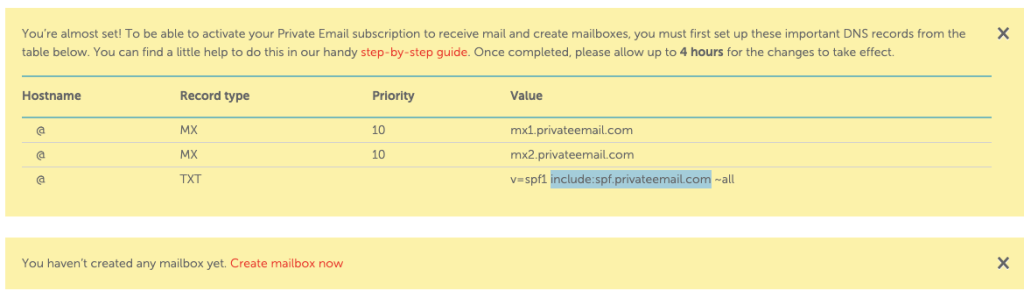
Once these records are added to the DNS click on “Create mailbox now” for further setup.
Note: There must be only one SPF record per domain, so if you already have one, ensure to modify it and addition the include mechanism of Namecheap:
E.g. “v=spf1 include:_spf.elendmarc_store._d.easydmarc.pro include:spf.privateemail.com ~all”
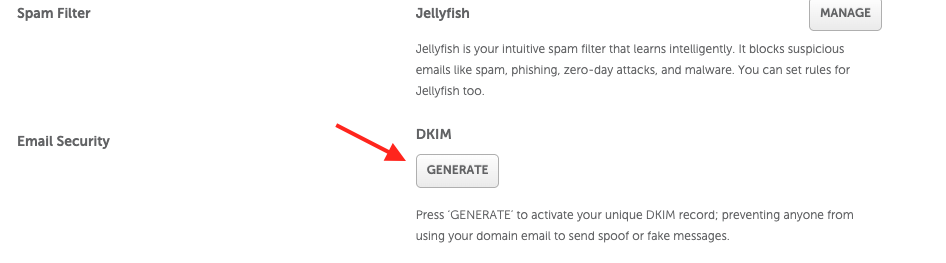
4. Click on the Generate button under DKIM:
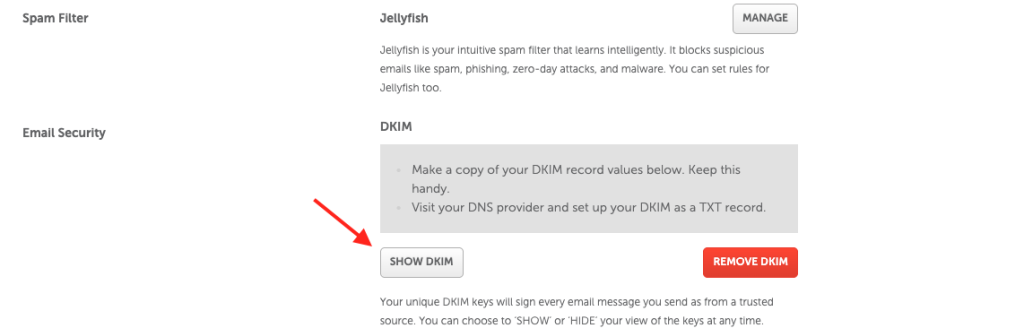
5. Once done, you will see a message appear saying “DKIM has been generated”. To check the host and value for the TXT record, click on Show DKIM:
6. Here, you’ll also see the fields with your DNS records as well as your Public and Private keys.
Next you’ll need to add the corresponding TXT record to the DNS zone file for your domain:
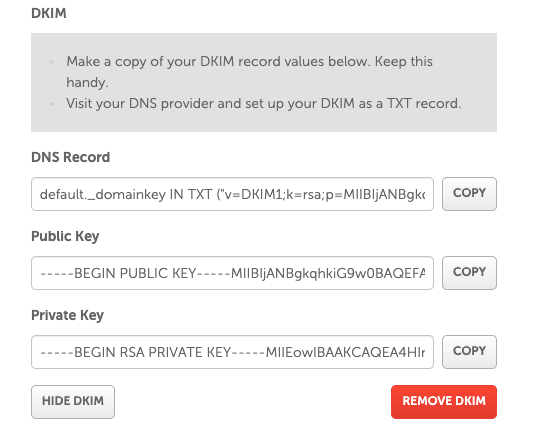
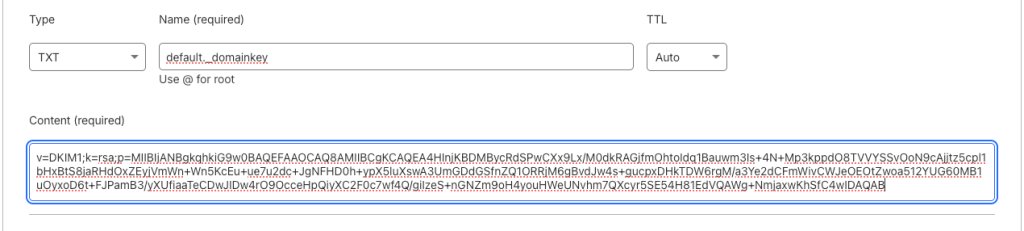
7. Click “Copy” the DNS record field and add the DKIM record to the DNS zone of your domain by using these details:
- Host: default._domainkey
- Record type: TXT
- Value: the string in the “DNS Record” box which begins with “v=DKIM1; k=rsa; p=MIIBIjANB…” (should be entered without brackets and quotes)
NOTE: For domains on BasicDNS, the TXT record should be configured automatically. If your domain is using our Web Hosting DNS (dns1.namecheaphosting.com and dns2.namecheaphosting.com), the TXT record should be added manually in your hosting cPanel. If your domain is pointed to our Premium DNS, the record is to be added manually in your Namecheap account. For domains on third-party nameservers, the TXT record should be set up on the side of your current DNS provider.
Normally, it takes 60 minutes for the changes to come totally into effect.
8.Scroll down and click on the “Done” button.
Once the record is propagated the outgoing email will be signed with DKIM to achieve DMARC compliance.
If you have any further questions, don’t hesitate to contact the EasyDMARC Support Team at [email protected]