Reach maximum email deliverability by maintaining a good sender reputation. We help you to get the most out of your campaigns by increasing your opens, clicks, and reply rates.
Reach maximum email deliverability by maintaining a good sender reputation. We help you to get the most out of your campaigns by increasing your opens, clicks, and reply rates.
Postmark lets you send traditional and marketing emails with fast deliverability in mind providing API libraries for pretty much every programming language out there. In this informative post we’ll go over how to configure and set up Postmark with DKIM and SPF.
Fortunately configuring Postmark to be DMARC compliant is very easy and can be done in just 3 steps.
Step-by-step PostMark SPF and DKIM configuration
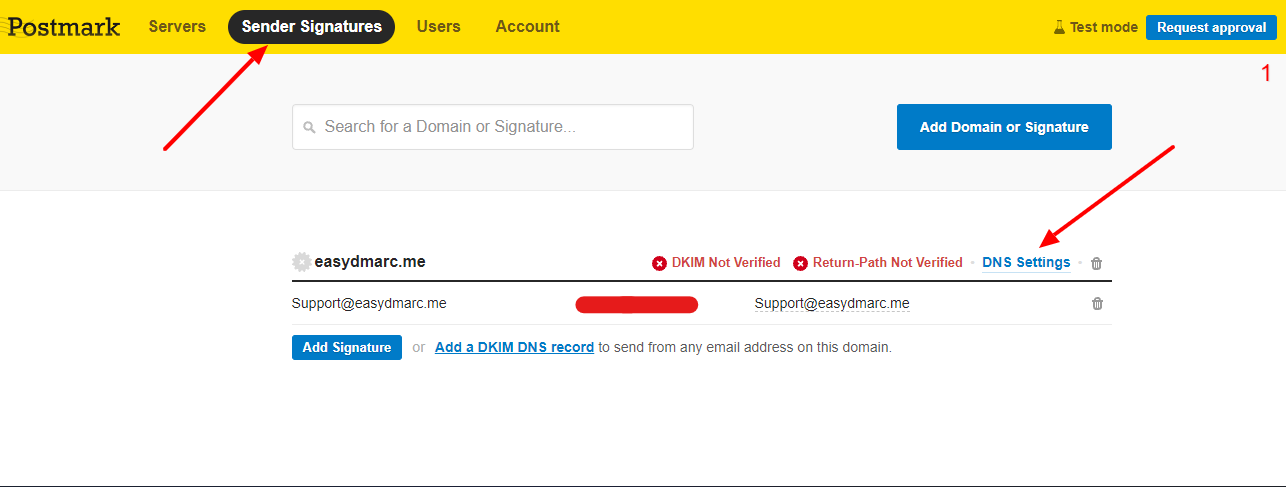
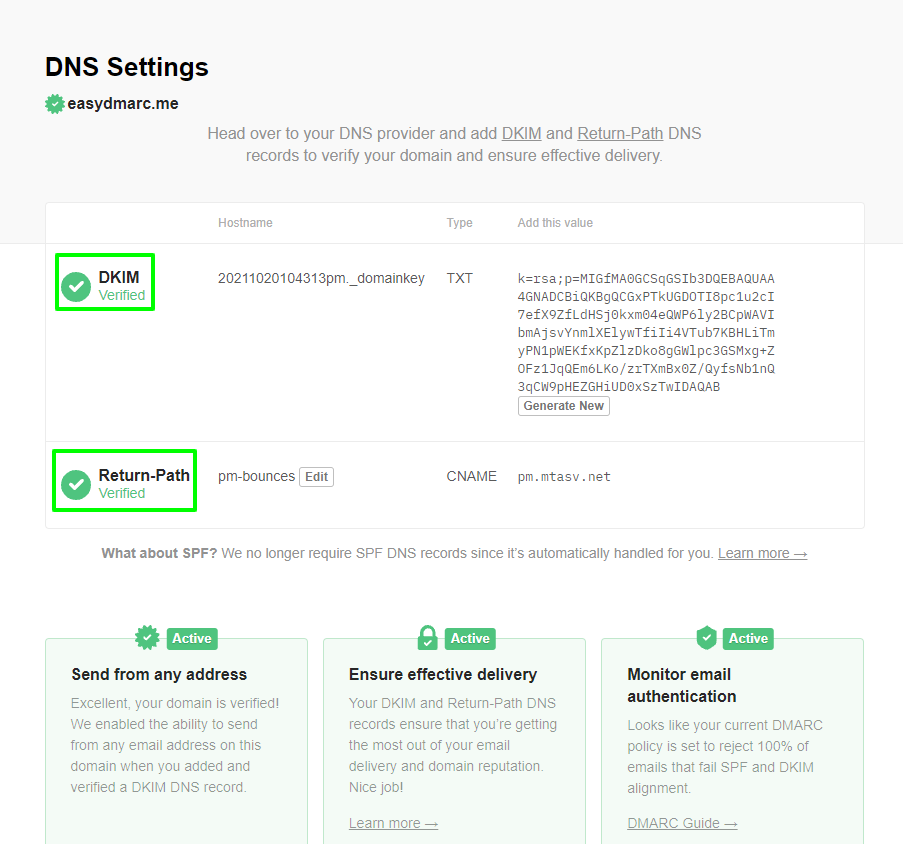
First head to Sender Signatures from your Postmark portal and click on DNS Settings
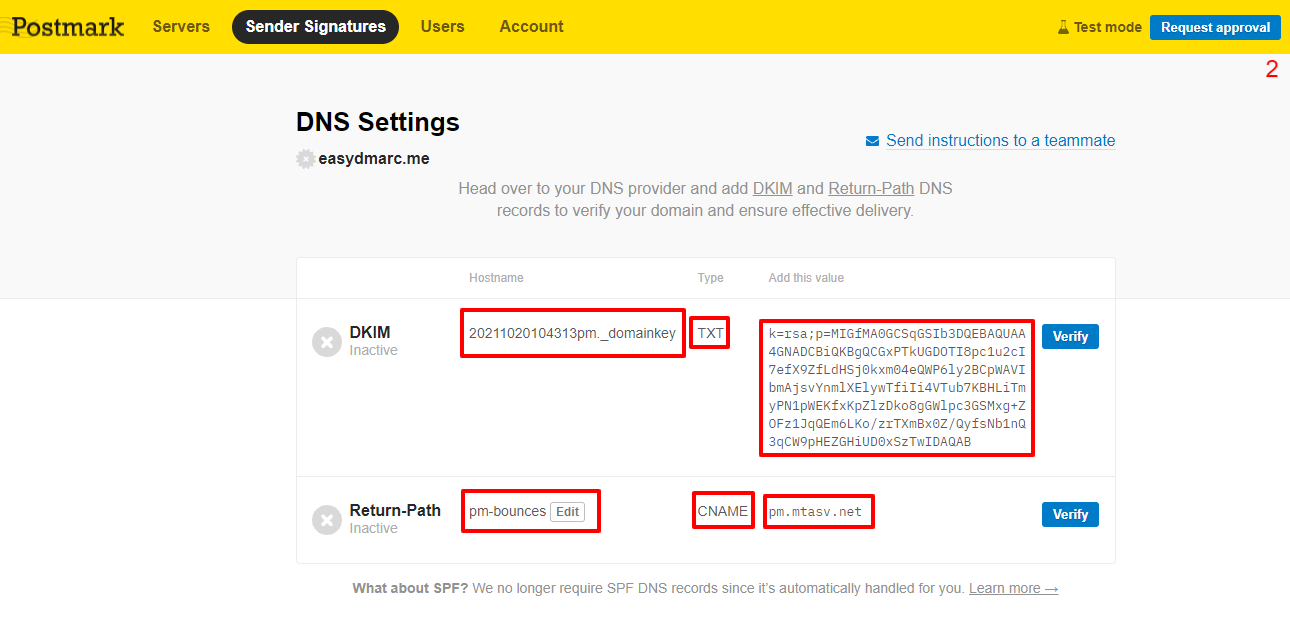
Here Postmark will provide you with two DNS records that you need to add to your DNS Zone, Copy them.
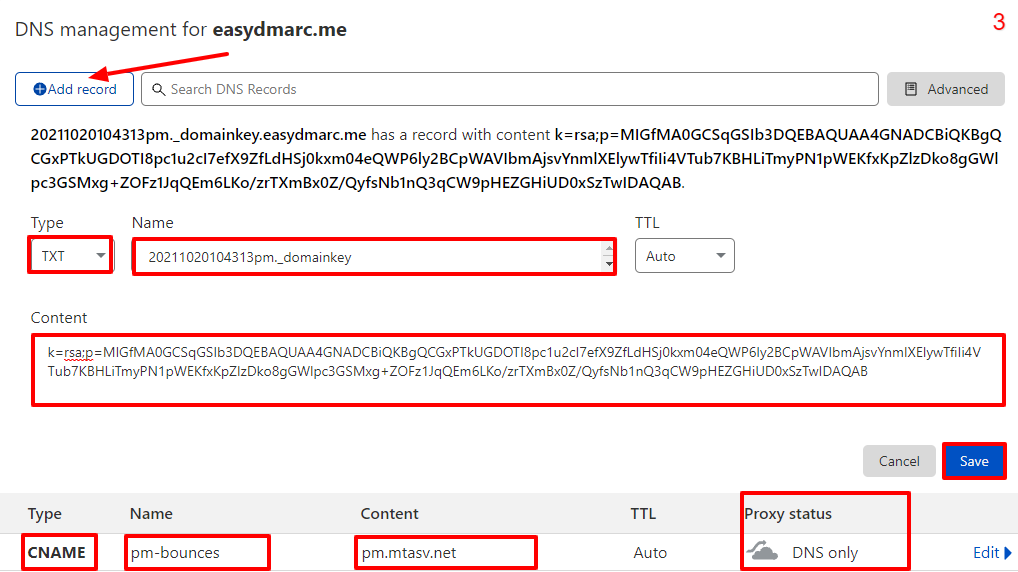
And add them in your DNS Zone with the correct Type/Name/Value and hit Save.Note: Turn off the proxy status if you’re using Cloudflare.
You’re done! Click on verify and let Postmark run a quick check and validate everything.
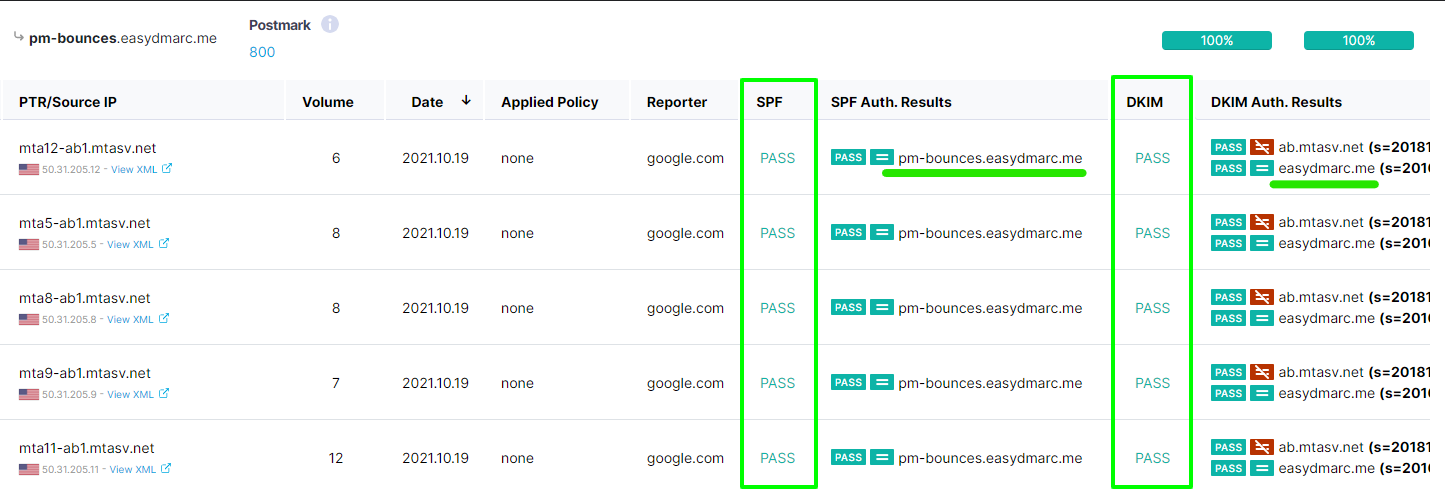
You can start sending emails and you’ll be able to see them under the DMARC compliant tab from your EasyDMARC reports with both SPF and DKIM passing and aligning with your domain.
Note: Wait at least 24 hours to receive the updated reports
Important note: If the provider recommends publishing also a DMARC record, there’s no need to do so if you already have a DMARC record in place, as each domain can only have one DMARC record.