


Google Workspace, earlier known as G Suite, powers daily work for millions through tools like Gmail, Docs, Sheets, and Calendar. But to protect your domain and improve deliverability, you must authenticate your emails.
This is becoming even more important as Gmail is now strongly encouraging DMARC adoption, especially for bulk senders. When your SPF, DKIM, and DMARC records are set up correctly, your emails reach inboxes more reliably and your brand stays protected from misuse.
In this guide, you will learn how to set up DKIM in Google Workspace, add an SPF record, publish a DMARC policy, and check if everything is working correctly. You will see how each step adds protection, gives you visibility, and helps your emails reach inboxes safely
How to Set Up SPF Record for Google Workspace
To let Google send emails on behalf of your domain, you must publish a valid Google Workspace SPF record in DNS. Simply put, SPF tells receiving servers that Google Workspace is an approved sender. Without it, your messages may land in spam or even get rejected.
The rule you must add for Google is: include:_spf.google.com
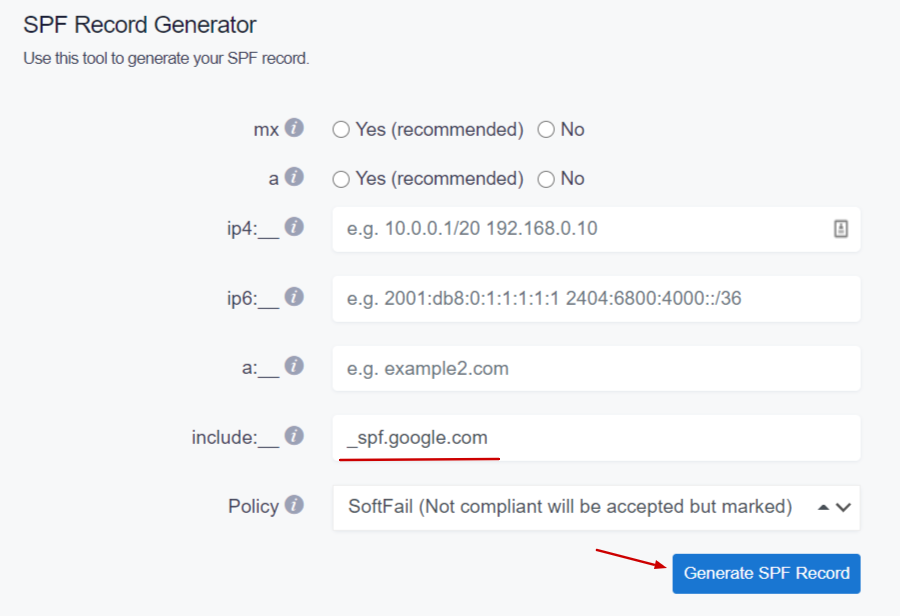
You don’t need to write this record manually. You can generate it easily using SPF Record Generator. Here’s how the process works:
- Generate a new SPF record that authorizes Google Workspace. The tool prepares the correct syntax, including the required ‘include:_spf.google.com’ mechanism.
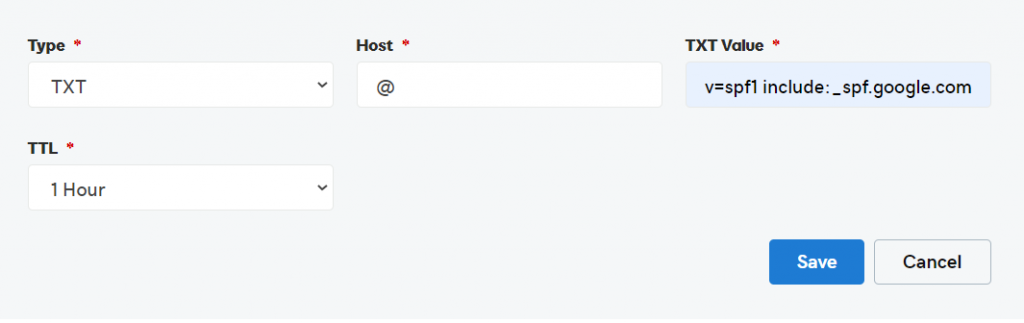
2. Copy the generated SPF TXT record. It should start with v=spf1 and end with ~all or -all.
3. Publish the SPF TXT record in your DNS panel by logging in to your DNS provider. Then, go to DNS management, and add/edit the TXT record for SPF.
Ex. GoDaddy
Ex. Cloudflare
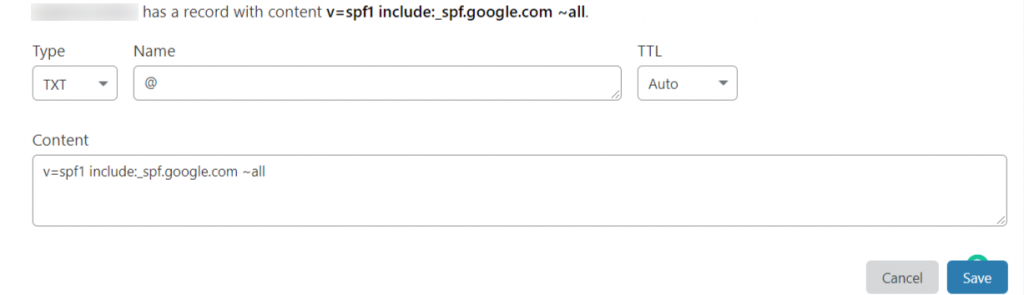
4. Save the record.
Please note that if you send emails using multiple services (e.g., Google Workspace and another email provider), everything must be included in a single record.
What SPF Does for Google Workspace Email
SPF protects your Google Workspace domain from unauthorized use. It tells receiving mail servers which sources are allowed to send email on your behalf. When you publish an SPF record, Gmail’s sending IP ranges are listed as authorized. So if someone tries to spoof your domain from another server, their message fails SPF checks. This reduces the risk of phishing and spam that impersonate your business.
With SPF in place, your emails have a better chance of reaching inboxes. Mail servers trust messages more when they can confirm who sent them. Without SPF, your domain has no clear identity, and many services may see your emails as risky or unwanted.
SPF Record Value Required for Google
To allow Google Workspace to send emails for your domain, your SPF record must include Google’s authorized sending source. The required value is:
include:_spf.google.com
Your final SPF record should start with v=spf1 and end with ~all or -all.
Here is an example of a Google Workspace SPF record:
v=spf1 ip4:17.67.137.221 include:_spf.google.com include:thirdpartyservice.com ~all
Where to Add SPF Record in DNS
You add your SPF record in the DNS management area of your domain provider, such as GoDaddy, Cloudflare, or Namecheap. Look for the option to create or edit a TXT record, paste your SPF value under the root domain, save it, and wait for DNS to update. Once published, receiving servers can correctly validate your Google Workspace emails.
How to Verify SPF Record After Setup
The easiest way to verify that your Google Workspace SPF record is working fine is by using an SPF Record Lookup tool. All you have to do is enter your domain name, and it will tell you if the record exists, is valid, and passes checks.
Alternatively, you can send a test email and review the authentication result in the header. Look for “SPF Pass.” If you see errors, go back to your DNS, make sure you have only one SPF record, and confirm it includes ‘include:_spf.google.com.’ After fixing it, wait for a short time and test again.
Common SPF Errors to Avoid
SPF records are formatting-sensitive, so they are prone to triggering errors with even minor mistakes. So, when you generate or reconfigure an SPF record for Google Workspace, avoid the following common errors.
- Having more than one SPF TXT record
Many users accidentally publish extra TXT records when they add the SPF record for Google Workspace. Since mail servers cannot read multiple records, SPF fails. So, keep only one SPF record and combine all senders inside it.
- Missing the Google include value
If you forget to include the ‘include:_spf.google.com’ mechanism, Google emails may fail SPF checks or land in spam. To avoid the issue, ensure this value is present in your SPF record.
- Using the wrong syntax
Extra spaces, missing tags, or wrong ordering can break SPF. Servers read the record as invalid. Make sure that your record starts with v=spf1 and ends with ~all or -all.
- Too many DNS lookups
SPF is limited to 10 lookups. If you use many tools and ‘include’ statements, your record may exceed this limit. If you have hit the maximum DNS lookup limit, flatten or simplify your SPF record using optimization tools.
- Forgetting to update DNS
People generate the record but forget to click ‘Save’ or publish it. Until DNS updates, SPF is not active. So, always save changes and wait for propagation.
Configuring DKIM for G Suite in 2026
Setting up DKIM for Google Workspace is an important step to protect your email identity and improve deliverability. SPF validates your mail server, but DKIM proves that the email content has not been changed in transit.
When you complete the Google Workspace DKIM setup, Google signs your outgoing messages with a cryptographic key, allowing receiving servers to confirm that the email is genuine.
Let’s look at how to set up DKIM in Google Workspace step by step.
Where to Find DKIM Settings in Google Admin
You begin your DKIM setup in the Google Admin Console. Log in using an admin account.
Go to: Apps > Google Workspace > Gmail > Authenticate Email

This page contains DKIM controls for your domain. If DKIM is not active yet, you will see an option to generate your domain key. This section is where you manage selectors, keys, and enable signing. Having access here is the first step before making any DNS changes.
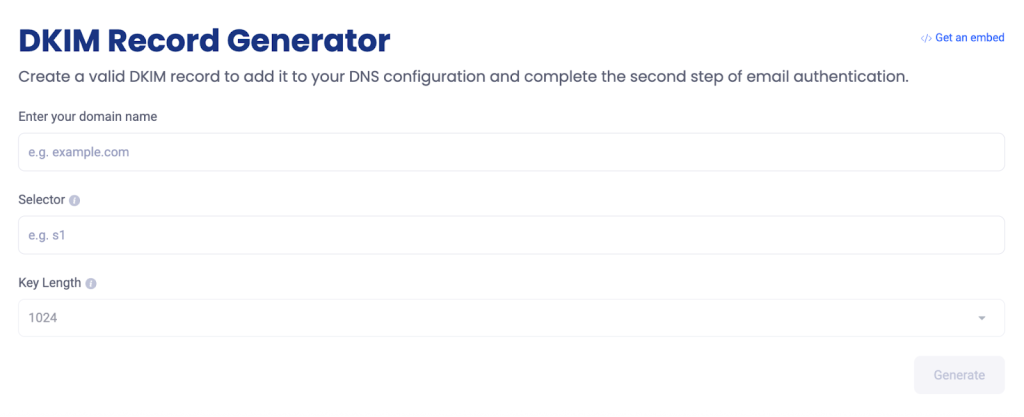
How to Generate DKIM Public Key
You can create your DKIM public key for Google Workspace using the DKIM Record Generator. You have to:
- Open the tool
- Enter your domain name
- Select ‘Google’ as your email provider
- Generate your DKIM record
- Copy the TXT name (selector) and TXT value (public key)
Alternatively, you can click “Generate New Record” inside the Authenticate Email page in Google Admin to receive the selector and key manually.
DKIM TXT Record Format for DNS
A DKIM TXT record contains two parts: a selector prefix and the key value itself. The format looks like this:
- TXT Name: google._domainkey.yourdomain.com
- TXT Value: A long string beginning with v=DKIM1; k=rsa; p= followed by your public key.
Make sure to paste the value exactly as given. Any missing characters or extra spaces can break validation.
How to Start DKIM Authentication
Once your DNS record is added, return to the “Authenticate Email” page in the Google Admin console. You will now see an option labeled “Start Authentication.” Click it to activate signing.
From that moment, Google Workspace starts attaching DKIM signatures to outgoing emails. Keep in mind that DNS changes may take some time to update, so if you do not see the “Start Authentication” button working immediately, wait for propagation.
You only need to do this once unless you change DNS providers or rotate your key.
How to Check If DKIM Is Working
After setup, verifying your configuration is just as important as creating it. You can check DKIM status in two ways:
- Using a Lookup Tool
Use the DKIM Lookup Tool, and enter your domain name and selector. It will tell you whether your DKIM record exists, reads correctly, and is active.
OR
- Testing with an Email Header Review
Send a test email to a mailbox you control, open the message, and view the full header. Look for a line saying DKIM=pass or SIGNED BY your domain. If you see “failed” or “no signature,” it means something is missing or DNS has not propagated yet.
DMARC Setup for Google Workspace
DMARC is the last layer of email protection after SPF and DKIM. It tells receiving servers what to do if a message fails authentication checks. When you set up DMARC for Google Workspace, you can decide whether suspicious emails should be delivered, moved to spam, or blocked.
What DMARC Protects in Google Workspace
DMARC protects your Google Workspace domain from spoofing and fake email attempts. It prevents attackers from sending messages that look like they came from your official domain. Without DMARC, receivers cannot tell if an email was authorized or forged.
When DMARC is active, you choose whether suspicious emails should be delivered, sent to spam, or blocked. Its best feature is reporting that shows who is using your domain and whether SPF and DKIM are working. This helps you find and fix problems before someone misuses your domain.
How to Generate a DMARC Record
You can build your DMARC record using the EasyDMARC DMARC Record Generator. The tool asks for your domain, preferred policy (monitor, quarantine, or reject), and reporting address (the email address where you want to receive the DMARC reports), then creates a properly structured TXT record.
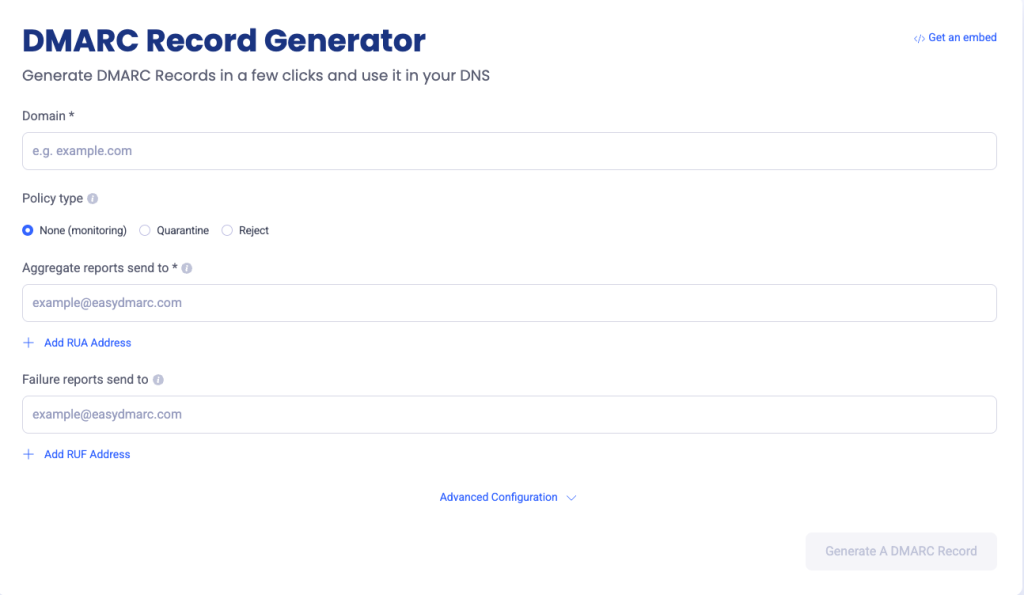
Once your DMARC record is generated, copy the output to add it to your DNS.
How to Publish DMARC in DNS
To set up DMARC Google Workspace enforcement, you need to publish your record at the DNS level. Here’s how to do it:
- Log in to your DNS provider
- Create a new TXT record
- Enter the TXT name value as: _dmarc.yourdomain.com
- Paste the DMARC value
- Save the record and allow time for DNS propagation
Once you publish the DMARC record, email servers begin taking action on suspicious messages according to the policy you set. You will also start receiving reports showing how your domain is being used and whether your emails are passing authentication.
DMARC Policy Options for Beginners
DMARC includes three policy levels:
- p=none (Monitor mode)
This policy does not block anything. It only sends reports so you can see who is sending emails using your domain and whether they pass SPF and DKIM. It is ideal for a first-time setup, so you can study traffic before moving to stricter policies.
- p=quarantine (Warning mode)
With the “quarantine” policy in effect, suspicious emails are delivered but placed in the spam folder or flagged. This policy adds some protection but still allows messages through. It is ideal when most of your senders are authenticated, but you want some protection without blocking mail.
- p=reject (Block mode)
When you apply the strictest DMARC policy, failing and unauthorized emails are completely rejected. It’s suggested to transition to this policy once your SPF and DKIM alignment issues are fixed and you want complete protection against spoofing.
How to Read Google Workspace DMARC Reports
DMARC reports are XML files sent by receiving mail servers to the reporting email you added to your record. These reports usually show:
- Which sources are sending emails on your behalf
- Whether the emails passed SPF and DKIM checks
- Whether the emails aligned correctly
- What action was taken on the failed emails (marked as spam or rejected)
Since the raw XML files are not in a human-friendly format, you can use the EasyDMARC DMARC Report Analyzer. It converts the data into easy-to-understand charts and tables so that you can figure out if there are any unauthorized senders or misconfigurations causing delivery issues.
Look for:
- Unknown sources sending emails on your behalf
- Services failing DKIM signing
- Allowed senders showing SPF failures
Strengthen Your Email Identity With EasyDMARC
For organizations that communicate daily with clients, vendors, or employees, email protection is no longer just a technical best practice; It’s a brand safeguard.
As you begin your authentication journey, EasyDMARC gives you an advantage with tools that generate records, analyze reports, and validate configurations in a simple dashboard.
Start your email authentication journey with EasyDMARC and strengthen your Google Workspace security from the ground up.
Frequently Asked Questions
The correct SPF record for Google Workspace includes “include:_spf.google.com.” Your TXT record should start with v=spf1, list all the approved senders, and end with ~all or -all. This tells receiving servers that Google is allowed to send mail for your domain.
While Google Workspace can send emails without DKIM, enabling DKIM is strongly recommended. It signs your messages so recipients know they were not changed on the way. Turning on DKIM improves trust, reduces spoofing, and increases your chances of reaching inboxes rather than spam folders.
Yes. SPF and DKIM authenticate messages, but DMARC decides what should happen when authentication fails. Without DMARC, receivers may still deliver fake messages. DMARC gives control, reporting, and enforcement, making it an essential step even if SPF and DKIM are already active.