To configure SPF and DKIM records for Shopify, please follow these steps:
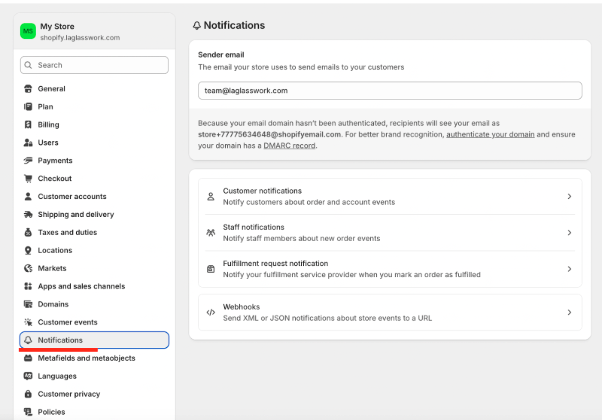
1. In your Shopify portal, go to the Notifications page.
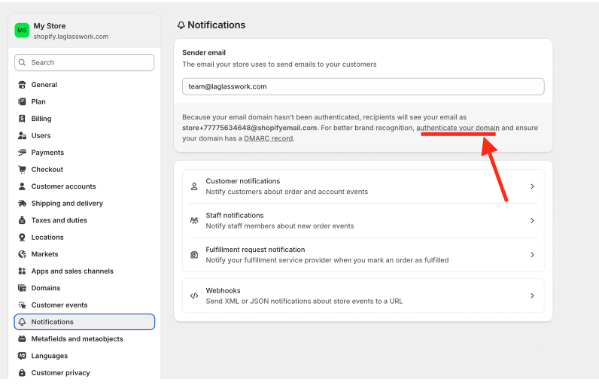
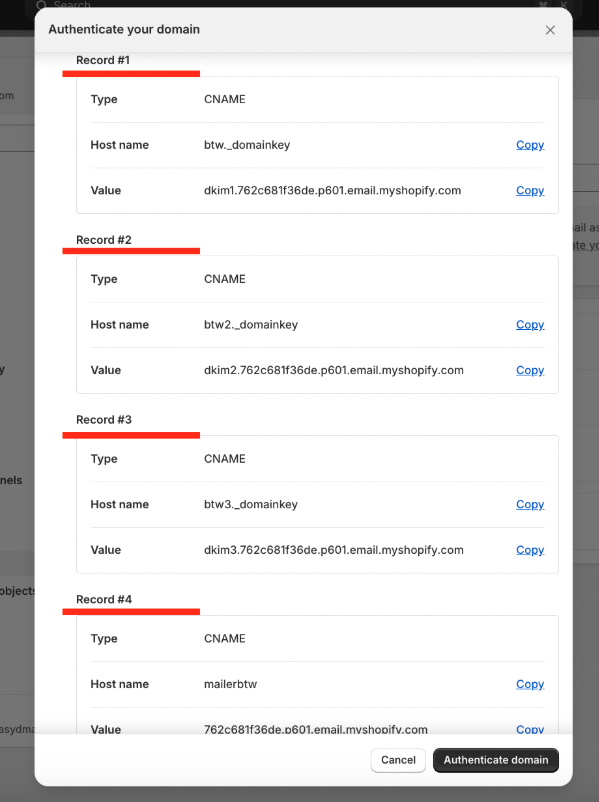
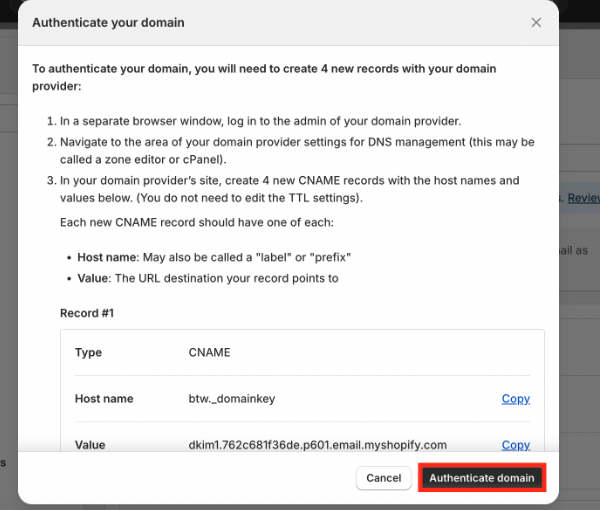
2. Click “Authenticate your domain.”
3. You’ll be provided with 4 CNAME records:
- 3 DKIM records
- 1 SPF record (CNAME type)
Note: Shopify uses SendGrid for email delivery. Since the SPF record is provided as a CNAME, you don’t need to manually add Shopify to your root domain’s SPF record. Simply publish the provided CNAME records, and both SPF and DKIM will authenticate correctly for Shopify emails.
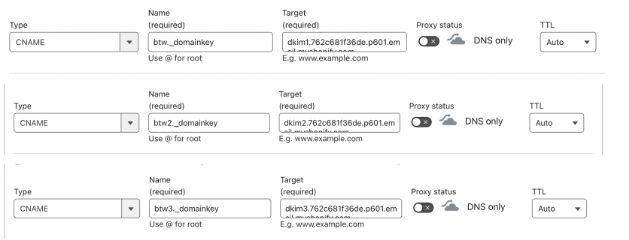
4. Add all the CNAME records to your DNS zone.
Example in Cloudflare DNS:
DKIM records
SPF record

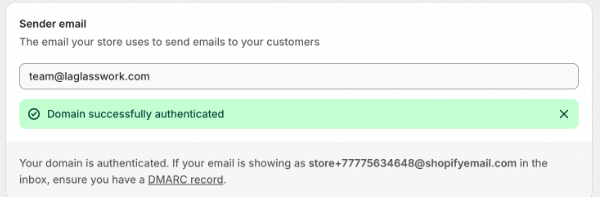
5. After adding the records, return to your Shopify portal and click “Authenticate domain.”
If you have published the DNS records correctly, it will show that the Domain has been successfully authenticated.