What are the steps for SparkPost SPF and DKIM Configuration?
This informative blog post demonstrates the configuration steps for process Sender Policy Framework (SPF), DomainKeys Identified Mail (DKIM) Signatures on your SparkPost to ensure SparkPost passes the DMARC alignment check.
SPF records allow receiving servers to check whether an email with the specified source domain was actually sent from a server authorized by the owner of this domain.
DKIM adds a digital signature to each message. This allows the receiving server to check if the message has been sent from an authorized sender, faked or changed upon delivery.
The process of setting up the SPF and DKIM Records:
You need to setup and configure SPF and DKIM on SparkPost to ensure the emails from SparkPost are sent from your domain’s behalf :
1. Navigate to SparkPost portal, and select the “Configuration” button.

2. Once there, select the “Sending Domains” and click on the “Add Sending Domain” button.
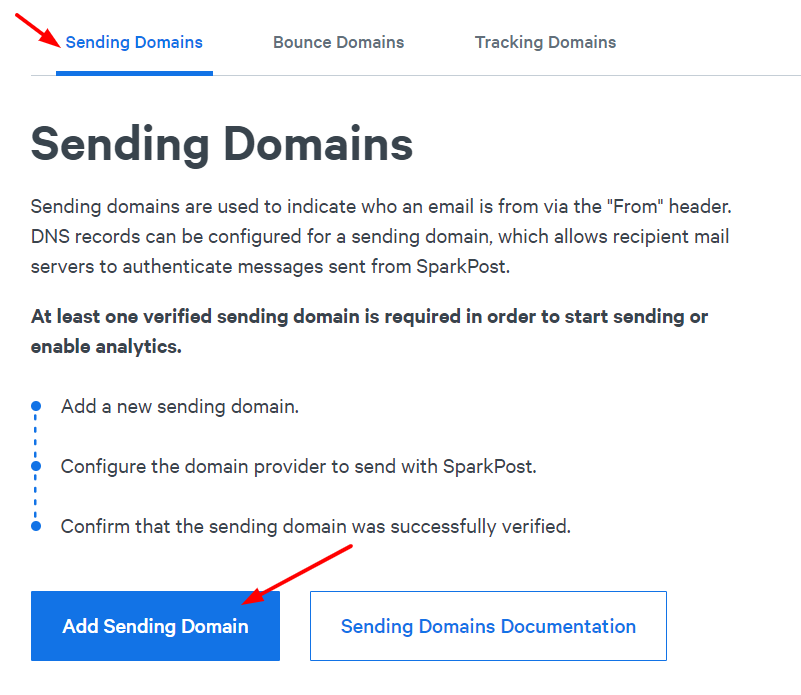
3. When clicked, select the “Sending Domain” option.
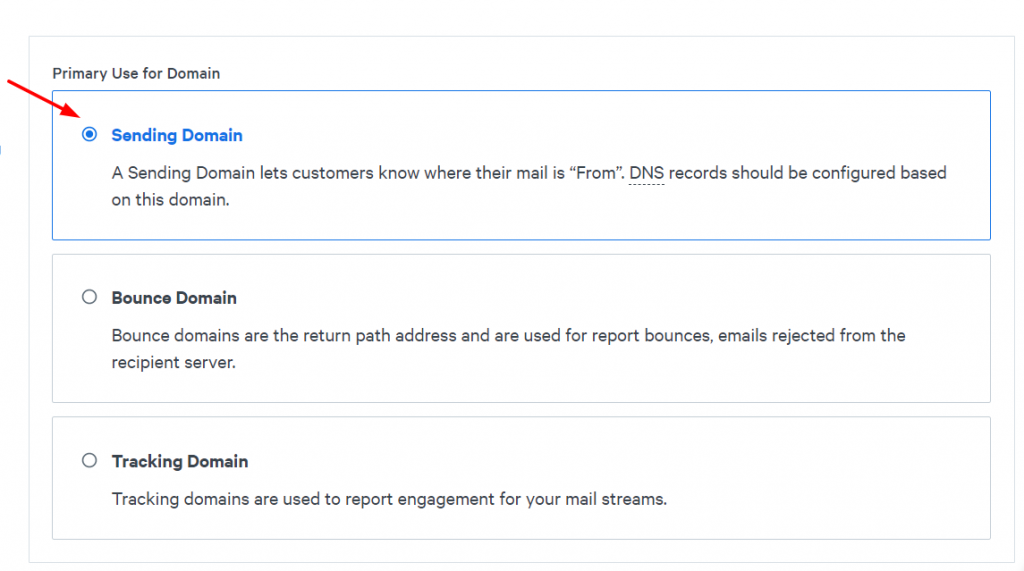
4. After that, navigate to the bottom of the page and insert your domain name. Click on the “Save and Continue” button.
Note: Using a subdomain for this instance is recommended.

5. When clicked, a pop-up will appear where you need to select the domain alignment and there are two options (Strict or Relaxed).
Strict implies to your sending and bounce domain names need to be the exact same (i.e. if the sending domain is example.com, the bounce domain cannot be mail.example.com)
Relaxed implies to your sending and bounce domain names can be different (i.e. if the sending domain is example.com, the bounce domain can be mail.example.com)
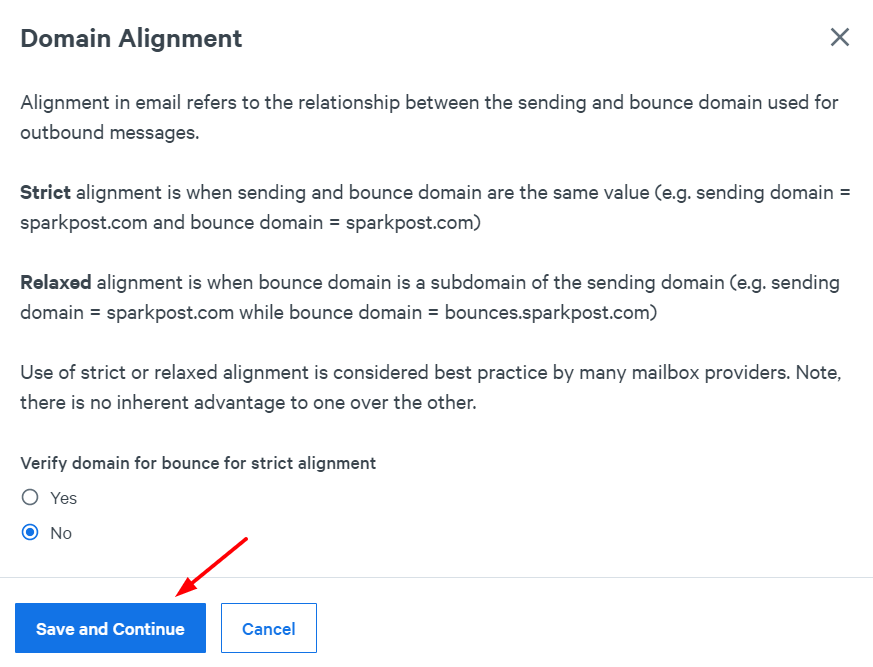
We have chosen Relaxed alignment in this case, and click on the “Save and Continue” button.
6. When saved, SparkPost provides a TXT and a CNAME record that need to be added in your DNS zone. Copy the Hostname and Value.
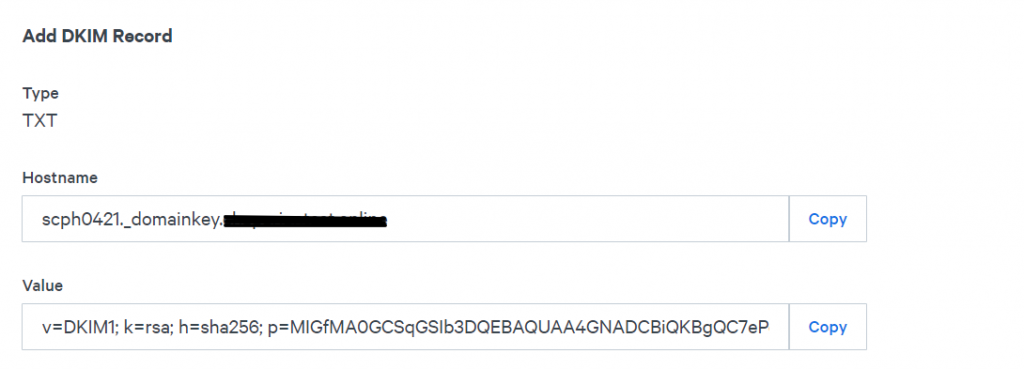
7. Head to your DNS zone (CloudFlare, Godaddy, etc.), create a new TXT record and add the provided information.
We’ll be using CloudFlare for this example.

8. Navigate back to Sparkpost and copy the CNAME record provided for your domain.
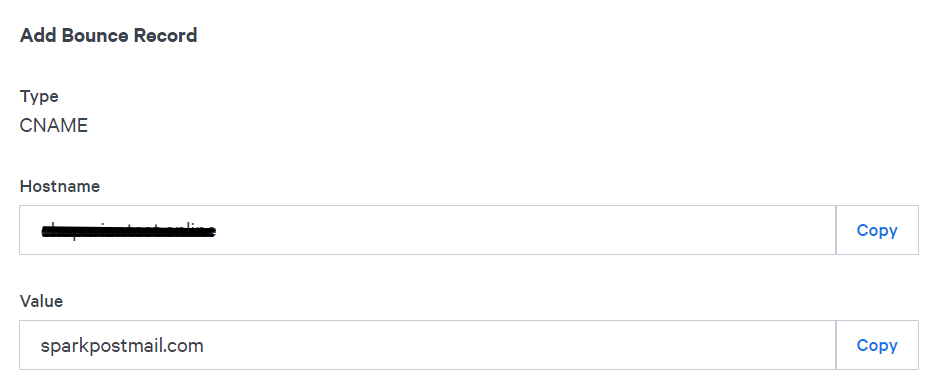
9. Head back to your DNS zone, create a new CNAME record and add the provided information from Sparkpost.

10. When both records are added, navigate back to SparkPost, enable the checkbox and click on the “Verify Domain” button.

11. When clicked, two pop-ups will show indicating that both records are set up correctly.

Now SparkPosts’ SPF and DKIM records are configured and activated to pass DMARC!
To confirm the DKIM record is set up correctly you can use our DKIM Lookup Tool.
In the Selector section type scph0421 and type your domain name in the Domain section.
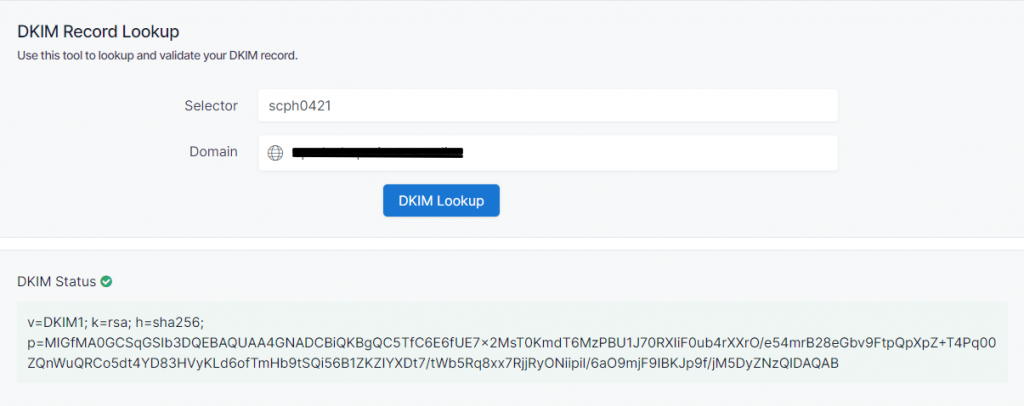
When the DKIM status is shown the green color, that indicates the record is set up correctly.
Important note: If the provider recommends publishing also a DMARC record, there’s no need to do so if you already have a DMARC record in place, as each domain can only have one DMARC record.
