


FreshDesk is a cloud-based software providing help desk support with all smart automations to get things done faster, with features from chatbots and Multi-channel communication management. In this informative post, we’ll go over how to configure and set up FreshDesk with DKIM and SPF so that the outgoing emails will be DMARC compliant.
Fortunately Configuring FreshDesk with DKIM also configures the SPF which makes it a bit easier and faster to get done.
FreshDesk SPF and DKIM Configuration Process
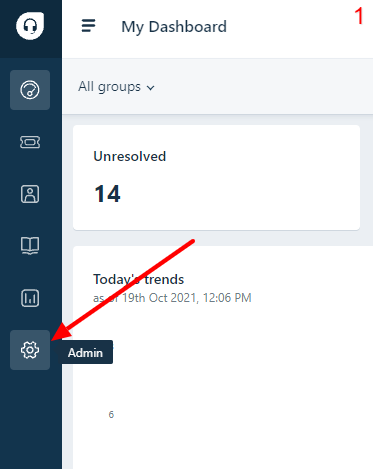
- First head to Admin settings from the FreshDesk panel

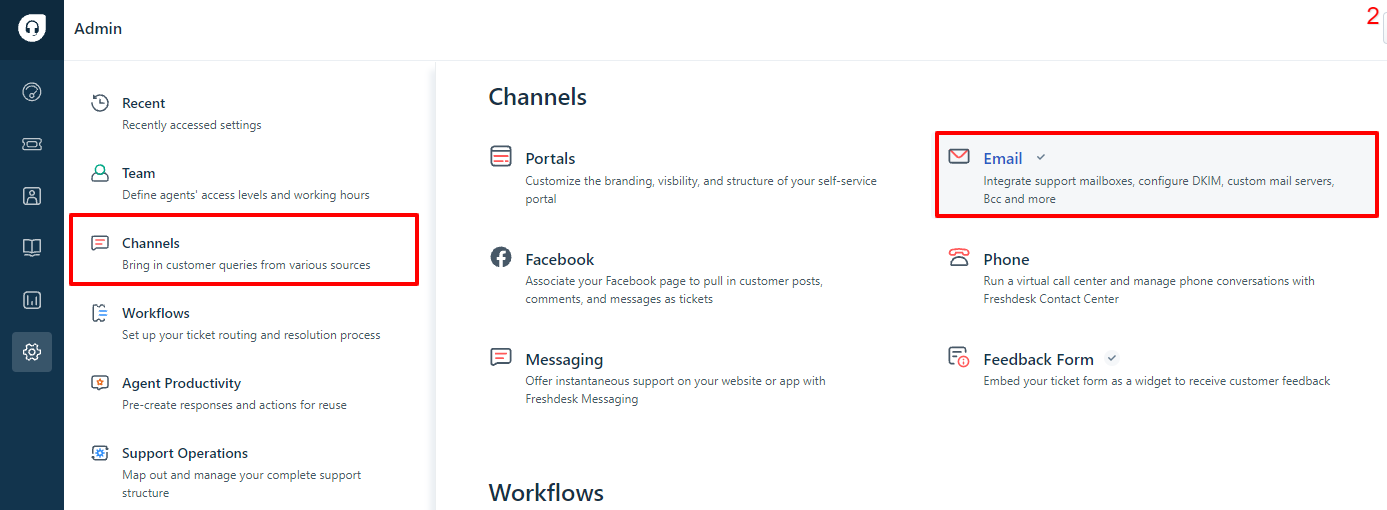
- Then head to the Email settings under the Channels tab

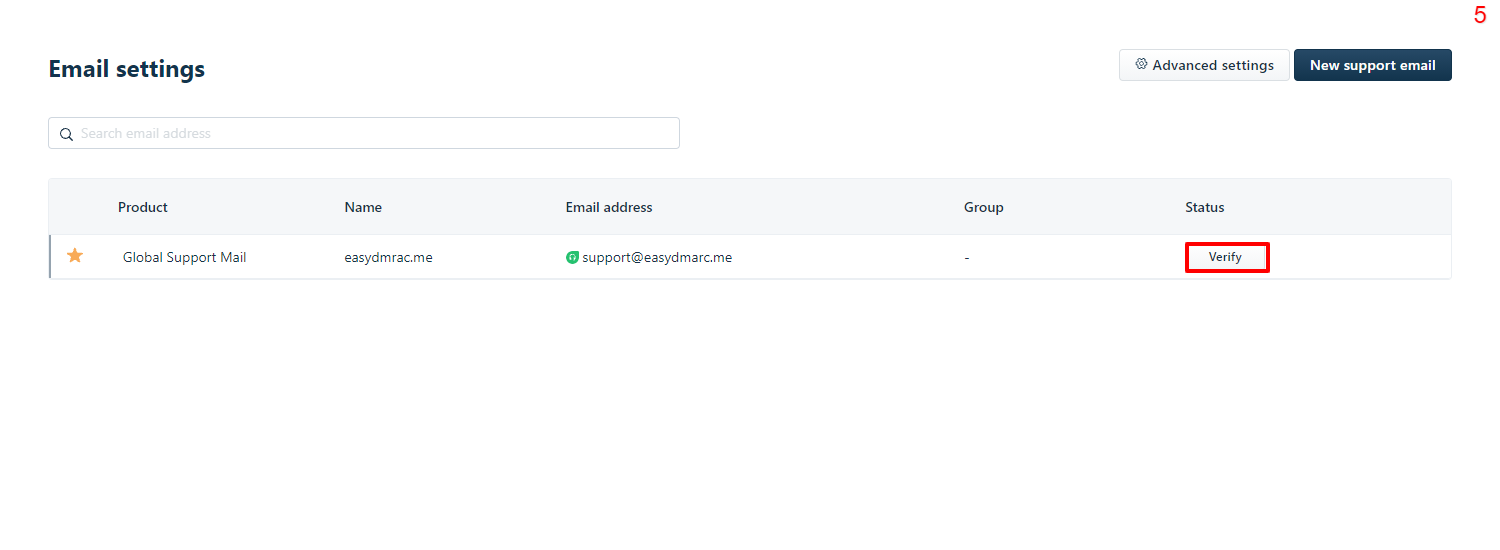
- Now we need to add a support email and verify it so click on New support email

- Add a Name and Your support email and hit save

- Now we need to verify the email address by setting up forwarding.

- Copy the email address provided by FreshDesk and head to your inbox settings and set up automatic forwarding for all incoming emails to the copied email address, after setting up forwarding head back to FreshDesk and hit Next, FreshDesk will do a quick test and verify that everything has been set up correctly.

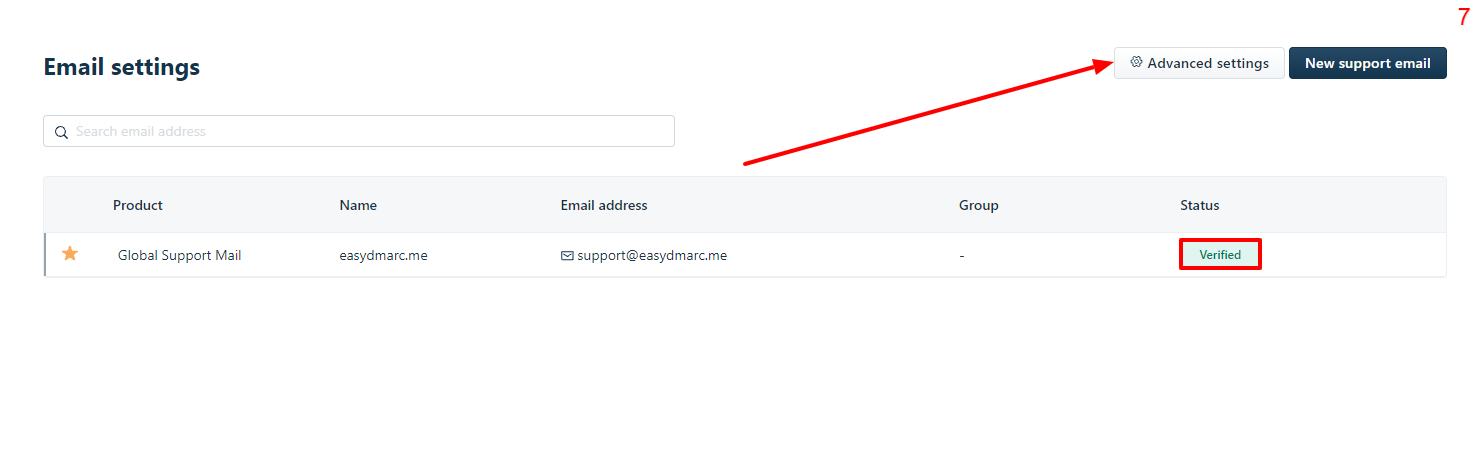
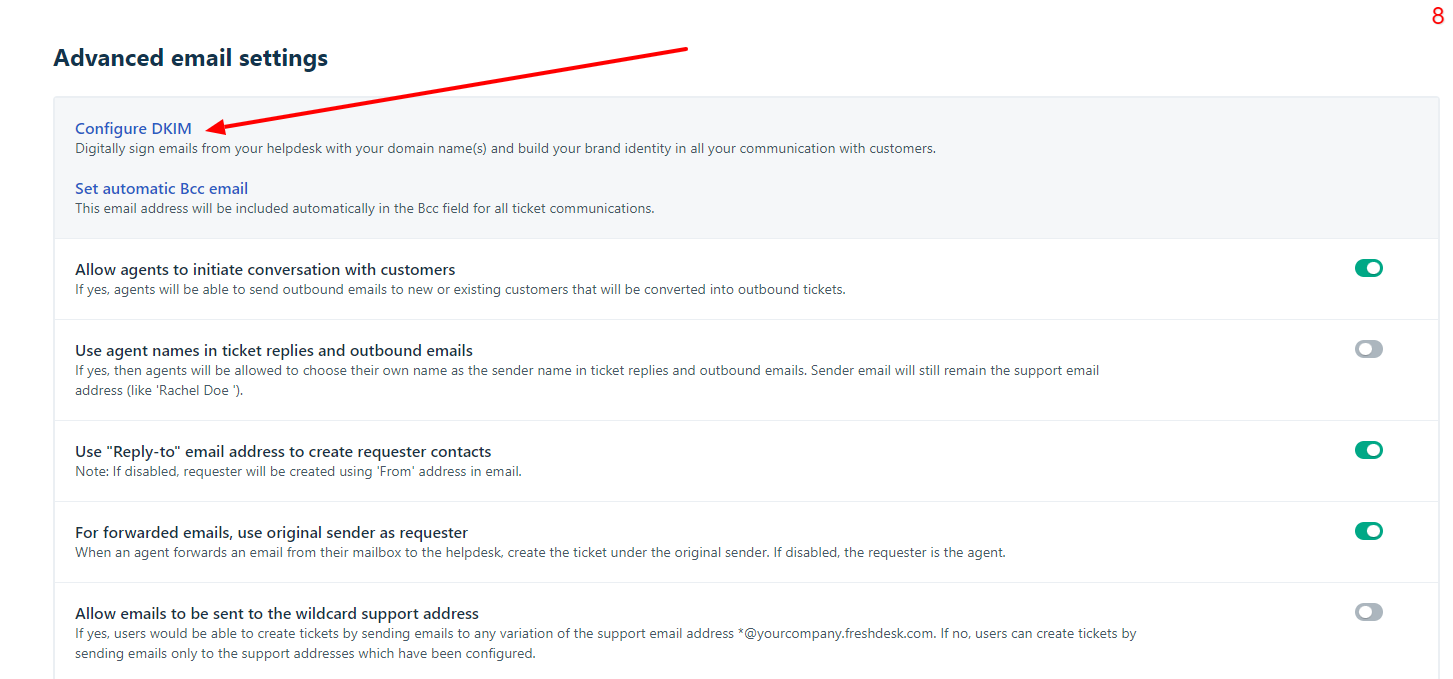
- After FreshDesk verifies the email address head back to email settings and click on Advanced settings

- Head to Configure DKIM

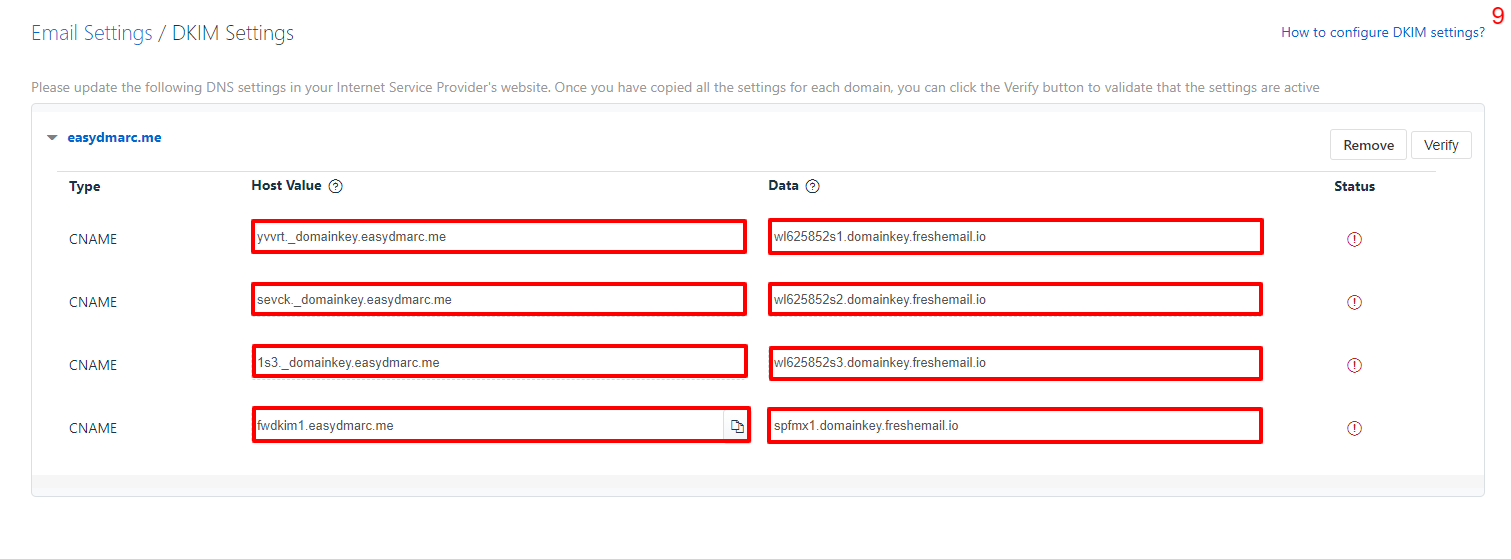
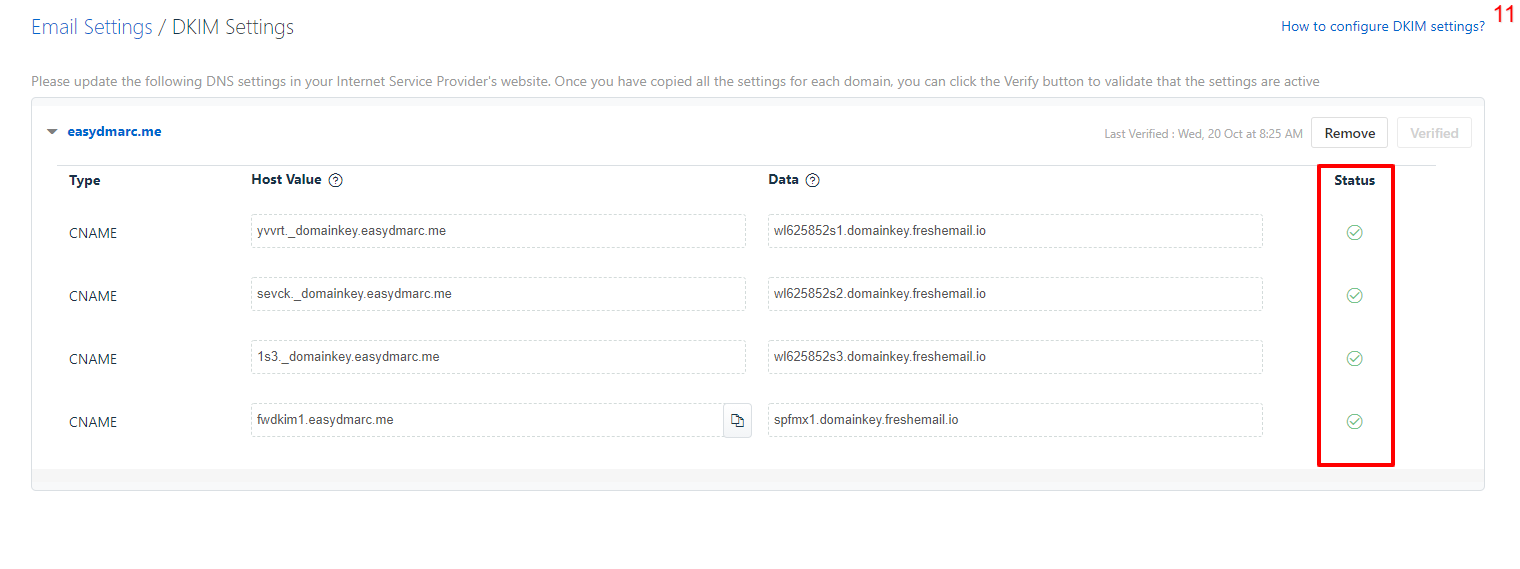
- Now FreshDesk will provide you with four CNAME records unique to your domain, copy them

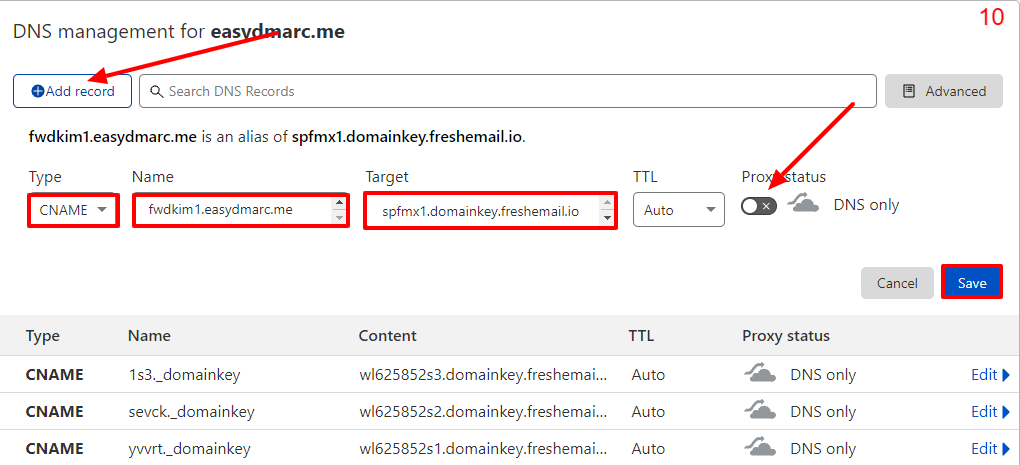
- And head to your DNS Zone and add four CNAME records and paste the values in them and hit Save

Note: Turn off the proxy status if you’re using Cloudflare. - After adding the records wait for up to a day, FreshDesk will verify that you added the records correctly and will display a green check once done.


Once verified you can start sending emails and you’ll see them under the DMARC compliant tab from your EasyDMARC reports with both SPF and DKIM passing and aligning with your domain.
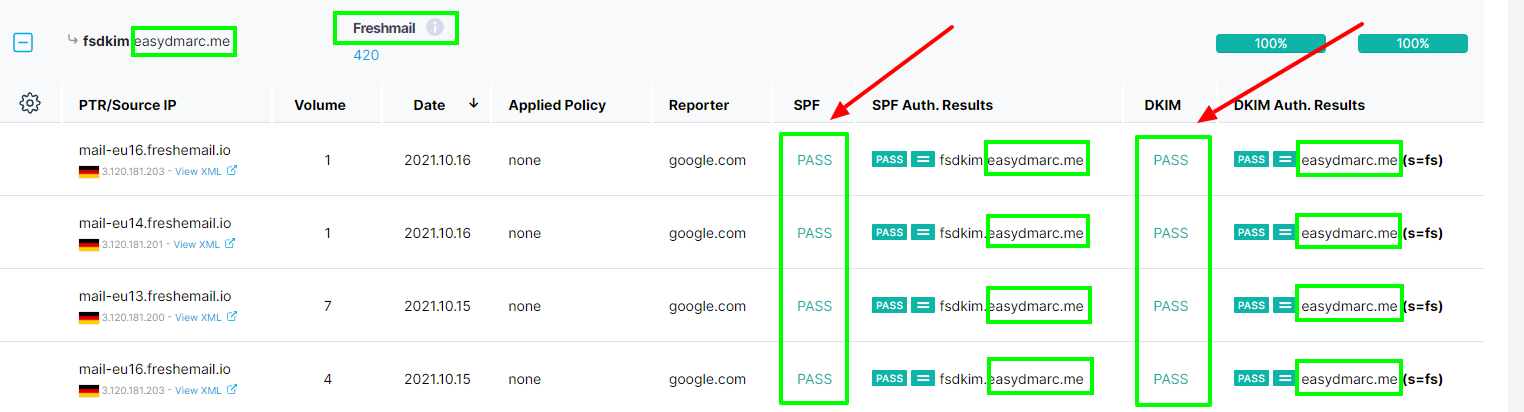
Note: Wait at least 24 hours to receive the updated reports
Important note: If the provider recommends publishing also a DMARC record, there’s no need to do so if you already have a DMARC record in place, as each domain can only have one DMARC record.
If you have any further questions, don’t hesitate to contact the EasyDMARC support team at [email protected]