


If you use Klaviyo to send emails, you need to set up SPF and DKIM so your emails look safe and trustworthy. SPF tells email providers which servers are allowed to send mail for your domain. DKIM adds a digital signature, so recipients know the email is real and hasn’t been changed along the way. Together, these checks help Klaviyo pass DMARC and protect your domain from spoofing.
Setting up these authentication protocols ensures your Klaviyo-branded sending domain works properly and improves inbox placement. In this guide, you’ll learn how to set up your Klaviyo SPF record and DKIM in simple steps so your emails stay secure and deliver correctly.
What is a Klaviyo Sending Domain
A Klaviyo sending domain is simply the domain name you use to send emails through Klaviyo, instead of relying on Klaviyo’s shared servers. When you set this up, your emails come from your own identity, which looks more reliable to both mailbox providers and your subscribers. Creating a branded sending domain in Klaviyo also helps your authentication settings work together smoothly, including your SPF, DKIM, and DMARC records.
This setup is important because mailbox providers prefer emails that come from verified domains with proper authentication. It reduces the chances of your messages landing in spam and strengthens your overall deliverability. Correctly connecting your domain also helps your Klaviyo SPF record align with the rest of your security settings, giving you a more consistent reputation across all your campaigns.
Klaviyo SPF and DKIM Setup for Your Sending Domain
Please note that Klaviyo does not provide a separate SPF record. Instead, it gives you a single TXT record that covers both SPF permissions and sending-domain verification. This single record tells email providers that Klaviyo is allowed to send emails for your domain.
You can use SPF Record Lookup to check if this TXT record is added correctly. If you already have an SPF record and need to combine it with Klaviyo’s, our SPF Record Generator will help you create a clean, updated version.
To ensure the emails from Klaviyo are sent on your domain’s behalf, you need to do the following: ensure the emails from Klaviyo are sent on your domain’s behalf, we need to perform the following:
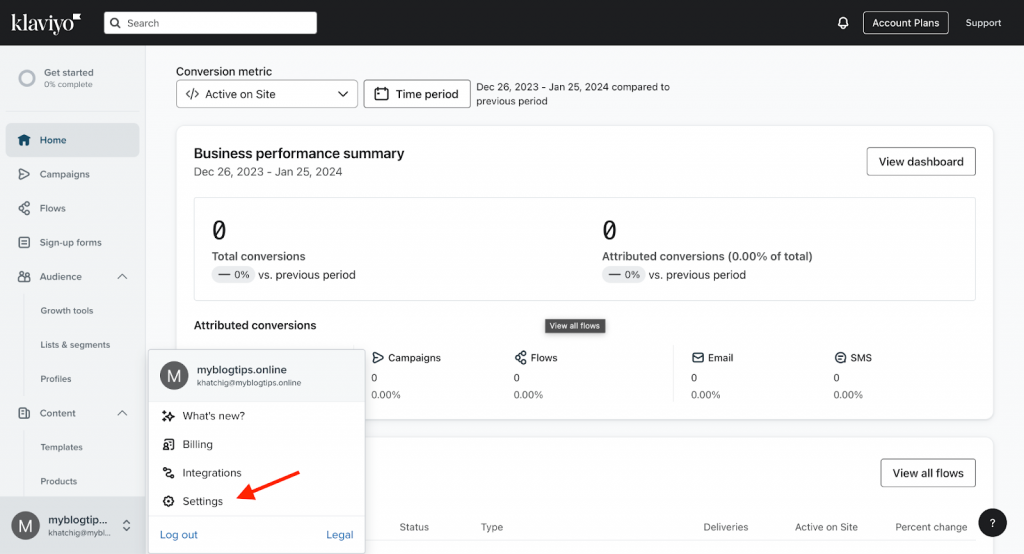
1. Navigate to Klaviyo, locate your account name on the bottom left of the screen, and select “Settings”.
2. Once there, hover over Settings and select “Domains”.
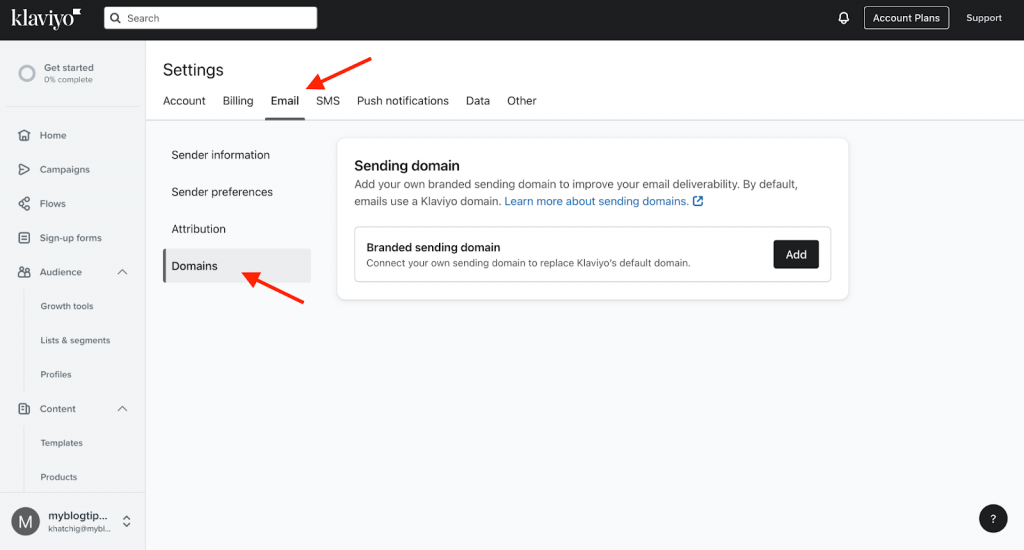
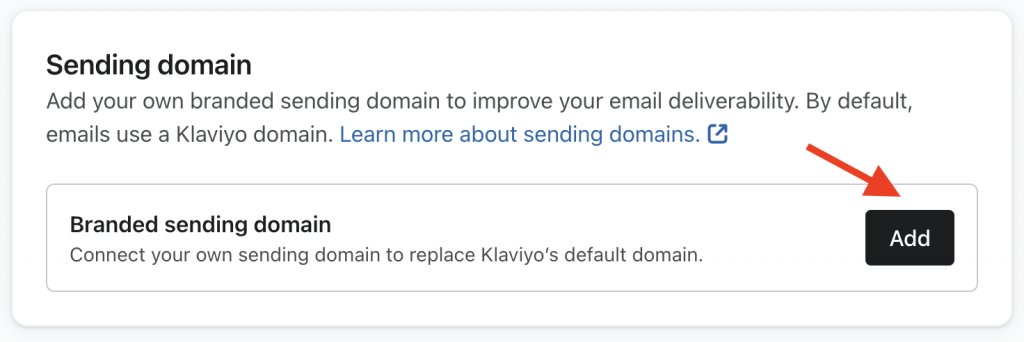
3. Select the “Add Domain” button to start the configuration process.
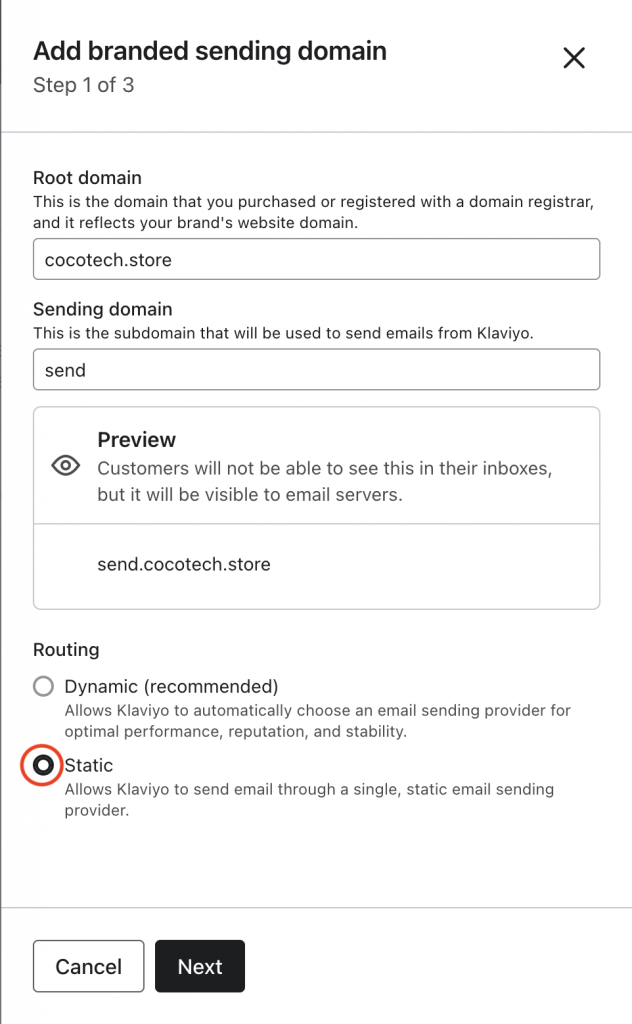
4. Once you add your domain, the platform will automatically fill in your domain and create a subdomain for you. In addition, make sure to choose the “Static” option and then click Next.
5. Klaviyo will now display all DNS records you need to add. Start entering them one by one.

6. Copy the subdomain CNAME record.
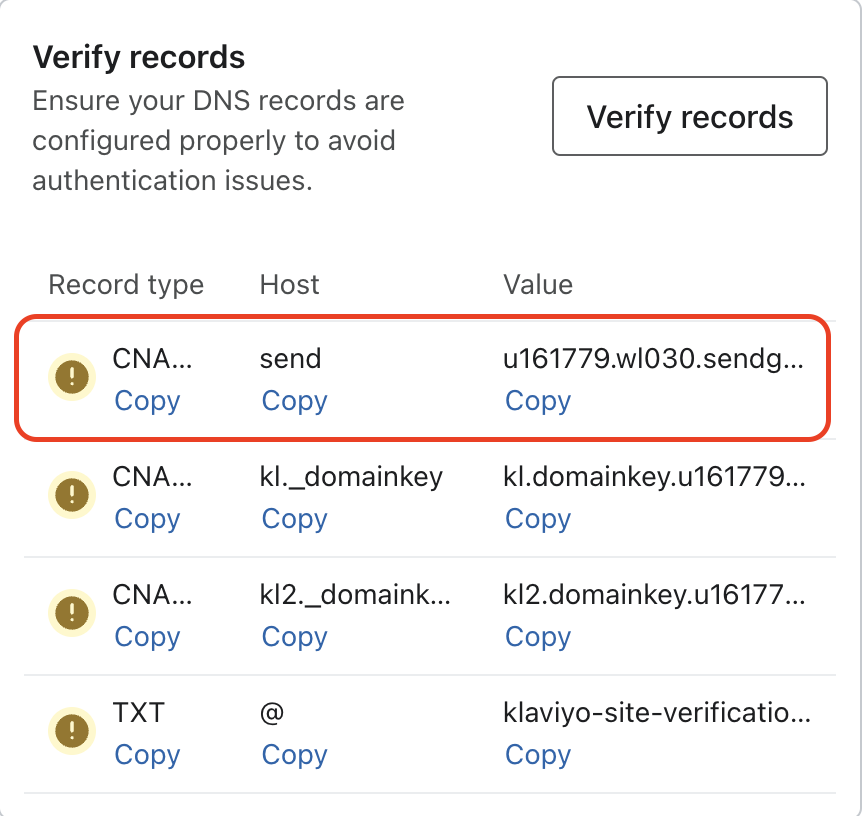
7. Go to your DNS zone (Cloudflare, GoDaddy, etc.) and create a new CNAME record using the values provided.
Note: These steps use Cloudflare as an example.

8. Copy the first DKIM record.
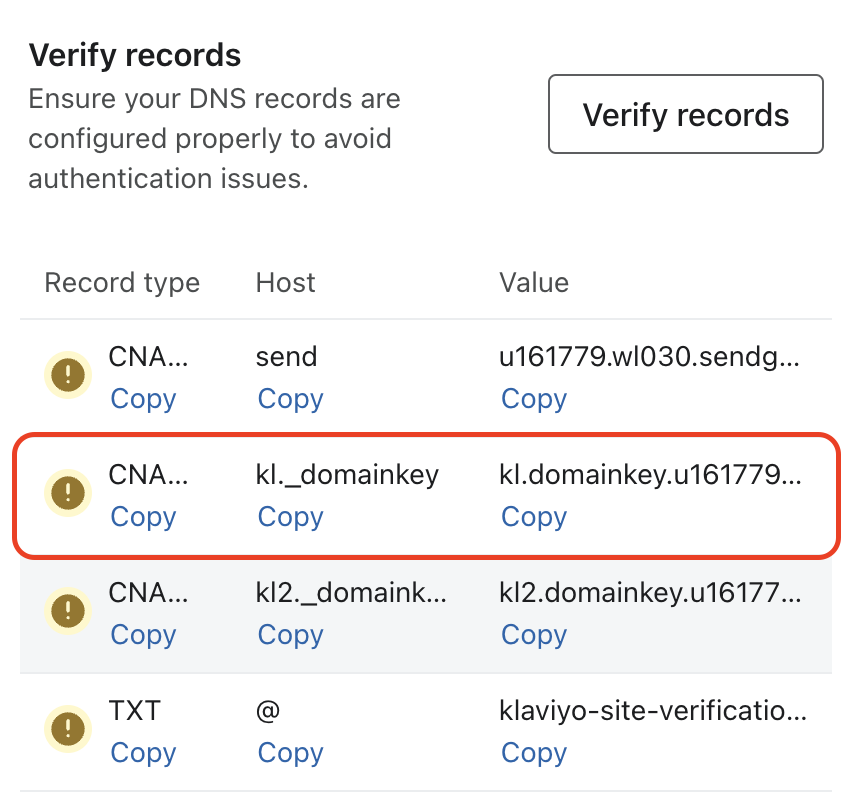
9. Add it to your DNS as a new CNAME record.

10. Copy the second DKIM CNAME record.
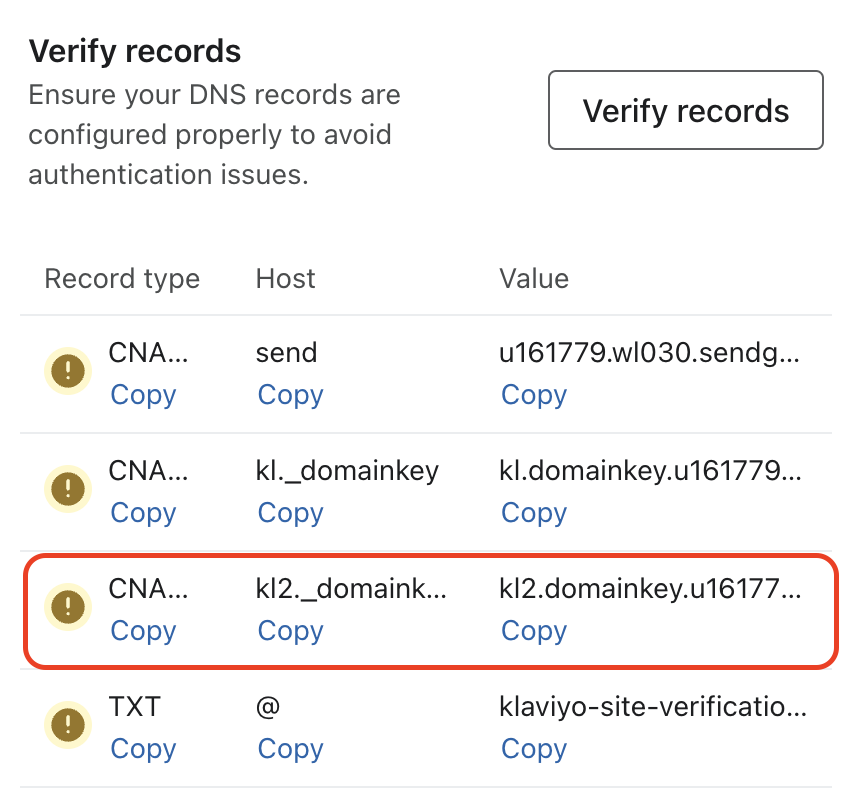
11. Navigate to your DNS zone and create a new CNAME record to pass the information that was provided by Klaviyo.

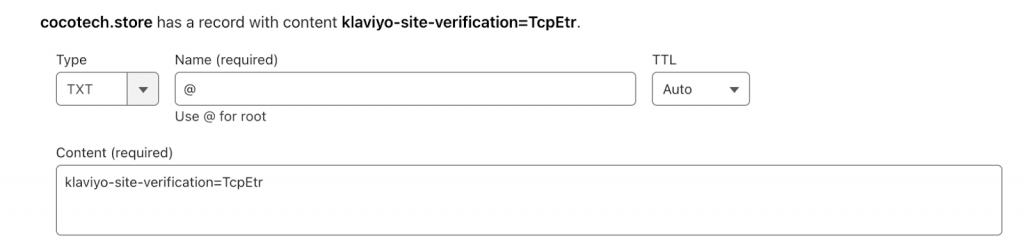
12. And lastly copy the final TXT record.

13. Create a TXT record in your DNS zone and paste the values exactly as Klaviyo provided.
You can use the EasyDMARC DKIM Record Lookup tool to confirm whether both DKIM CNAME records are detected correctly.
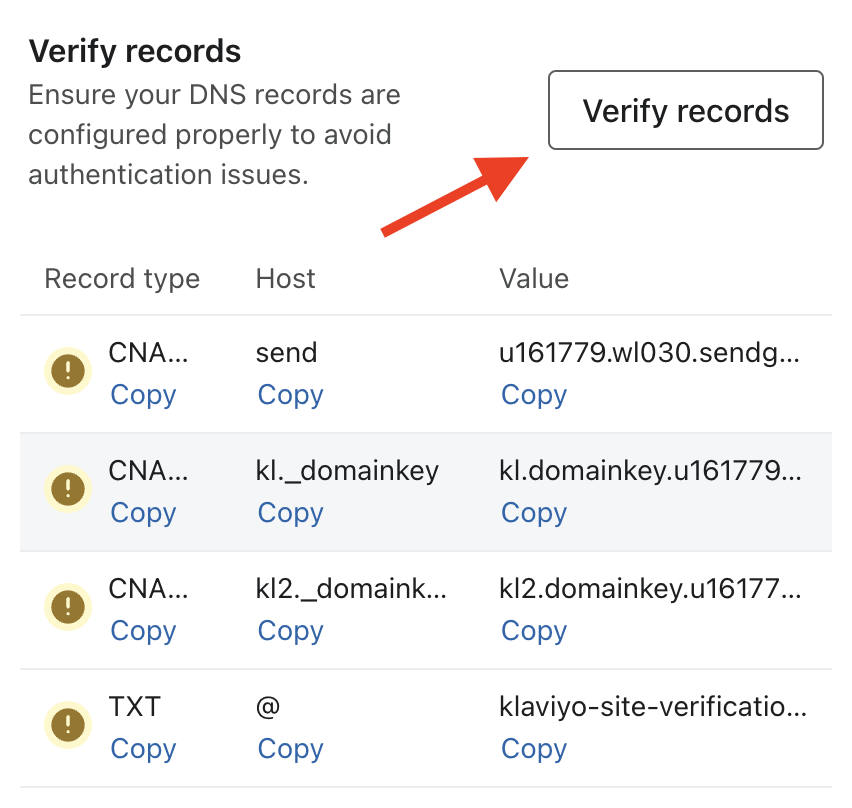
14. Once all the records are added in your DNS zone, navigate back to Klaviyo and click on the “Verify Records” button.
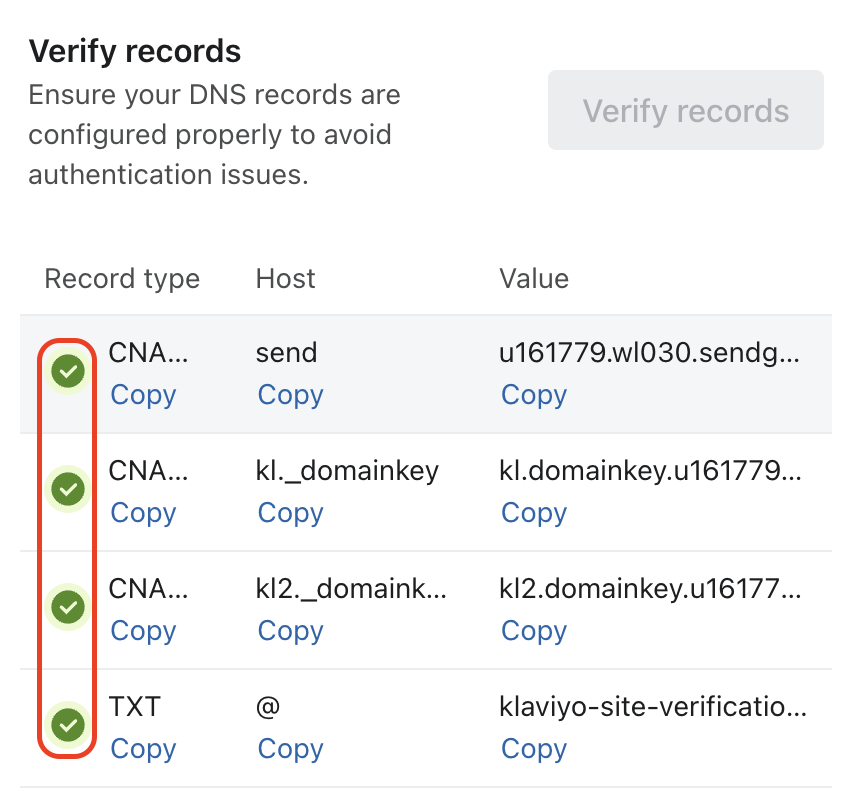
15. Once verified, the warning icons will turn green.
16. Click Activate.
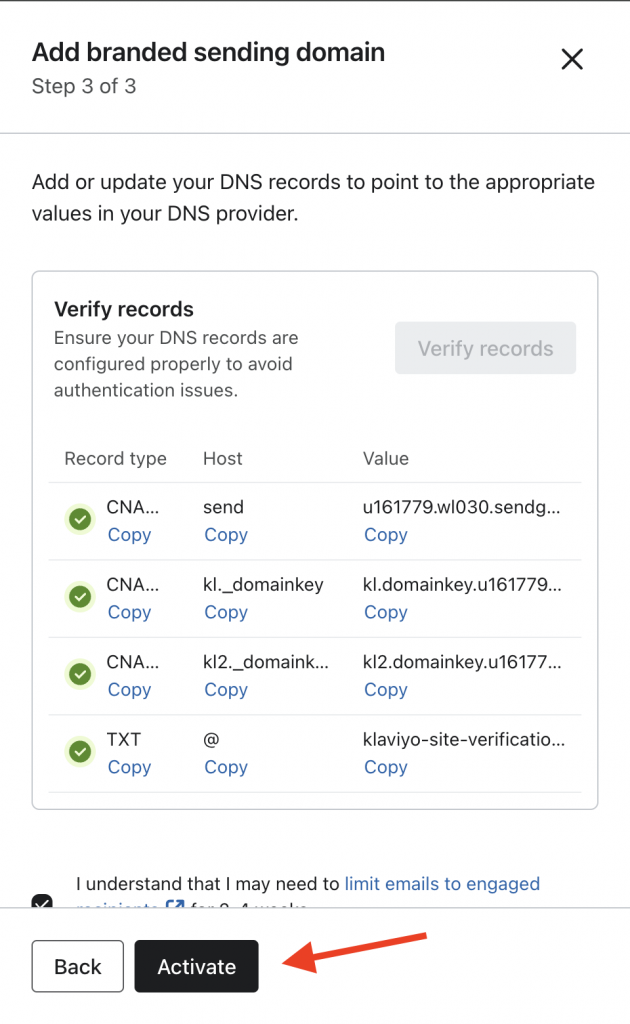
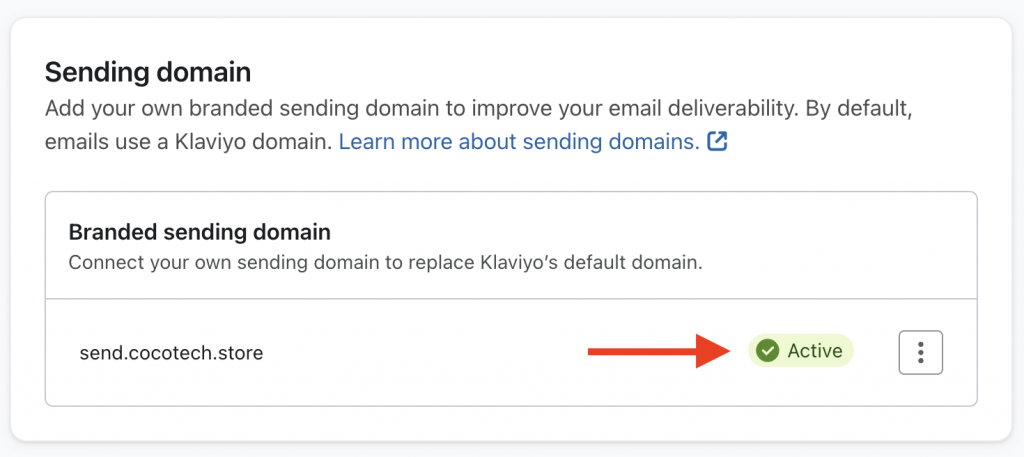
17. The window will close automatically, and your domain status will appear as Active.
Now you have successfully configured SPF and DKIM settings for Klaviyo.
Important note: If the provider recommends publishing also a DMARC record, there’s no need to do so if you already have a DMARC record in place, as each domain can only have one DMARC record.
Common Issues with Klaviyo Sending Domain, SPF, and DKIM
Sometimes your Klaviyo sending domain may not verify correctly, and this can affect deliverability. Most problems come from incorrect DNS entries, delays in DNS propagation, or missing values. Fixing these issues helps your SPF record, DKIM setup, and Klaviyo DMARC alignment work smoothly.
Klaviyo SPF Not passing
SPF failures usually occur when the TXT record is added incorrectly or when multiple SPF records are present. Make sure you have only one SPF entry and that it includes the value Klaviyo provided. Once the Klaviyo SPF record is published properly, SPF checks begin to pass.
Klaviyo DKIM Not authenticating
DKIM issues often occur if the CNAME records are added in the wrong format or under the wrong hostname. Double-check that both DKIM CNAMEs match Klaviyo’s instructions exactly, including the full selector name and the correct target value. If you’re using Cloudflare, also confirm that the DKIM CNAMEs are set to DNS only and not proxied.
Branded Sending Domain Verification Failing
If you recently updated your sender email, it’s a good idea to review Klaviyo’s steps for changing the sender address. Sometimes the sending domain and the “From” address fall out of sync, which can cause verification or authentication checks to fail. Once everything is corrected and DNS updates have time to propagate, your domain should verify successfully.
Improving Klaviyo Deliverability Through SPF, DKIM, and DMARC
Setting up email authentication in Klaviyo isn’t just a technical task. It’s a way of taking control of your brand’s identity. If you ever feel unsure about what’s happening behind the scenes, the EasyDMARC team can make it simpler to understand, test, and maintain everything.
If you want to manage your domain’s security with zero stress, you can start your free 14-day EasyDMARC trial and keep your authentication setup strong as your business grows.
Frequently Asked Questions
Go to Account > Settings > Email and edit your From Name and From Email. Klaviyo will send a verification link to the new address. Once verified, make sure the email uses the same domain as your sending domain setup.
A branded sending domain shows mailbox providers that your emails come from a verified source. It improves trust, reduces spam filtering, supports SPF, DKIM, and DMARC alignment, and helps protect your domain from spoofing or unauthorized sending.
Amazing! Saved me from hiring someone. Worked like a charm.