


This informative article will demonstrate the Zendesk configuration process of Sender Policy Framework (SPF), DomainKeys Identified Mail (DKIM) Signatures to ensure Zendesk passes the DMARC alignment check.
SPF records allow receiving servers to check whether an email with the specified source domain was actually sent from a server authorized by the owner of this domain.
DKIM adds a digital signature to each message. This allows the receiving server to check if the message has been sent from an authorized sender, faked or changed upon delivery.
This Zendesk configuration process is crucial to let ISPs know that you are a trusted sender. One of the many benefits you will enjoy with this setup will surely be improved open rates. ISPs reward authenticated email with better inboxing. Improved open rate means more conversions because more prospects will see your messages.
SPF Record Setup
To ensure the emails from Zendesk are sent on behalf of your domain, we need to create or update your existing SPF record by including the following mechanism: include:mail.zendesk.com. You can easily create a record using our SPF Record Generator tool.
The steps to create a new Zendesk SPF record:
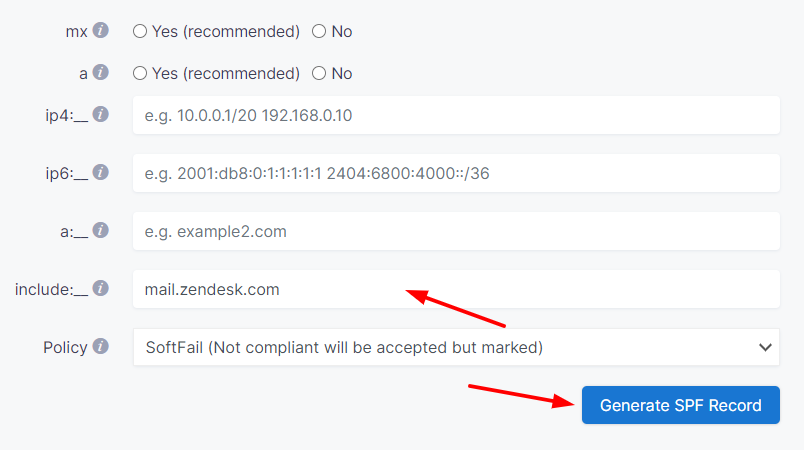
- Navigate to SPF Record Generator.
- Add include:mail.zendesk.com in the include:__ section.
- Choose the Policy (The options are: Fail (Not Compliant will be rejected), Soft Fail (Not Compliant will be accepted but marked), and Neutral (Mails will be probably accepted)).
- When the proper steps are made click on the “Generate SPF Record ”

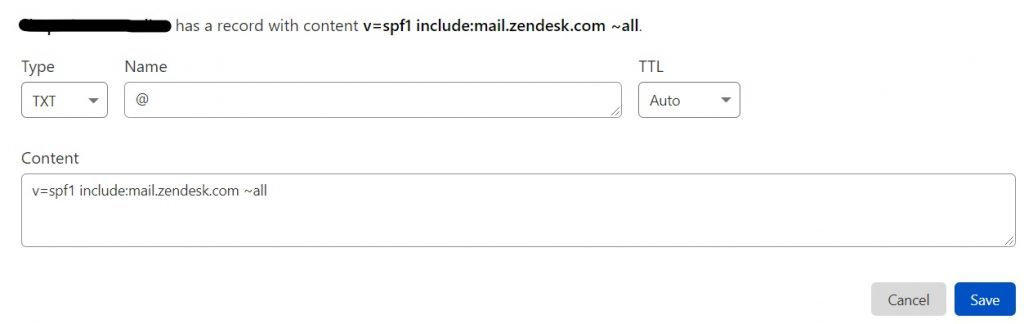
- Copy the provided Zendesk SPF record and navigate to your DNS provider TXT record (CloudFlare, Godaddy, etc.). We’ll be using CloudFlare for this example.

Important Note: Make sure you don’t create multiple SPF TXT records on one domain. If you do, SPF will return a PermError.If you are using multiple IPs, ESPs, Third-Party services for your various email strategies, you should include them in a single SPF Record.
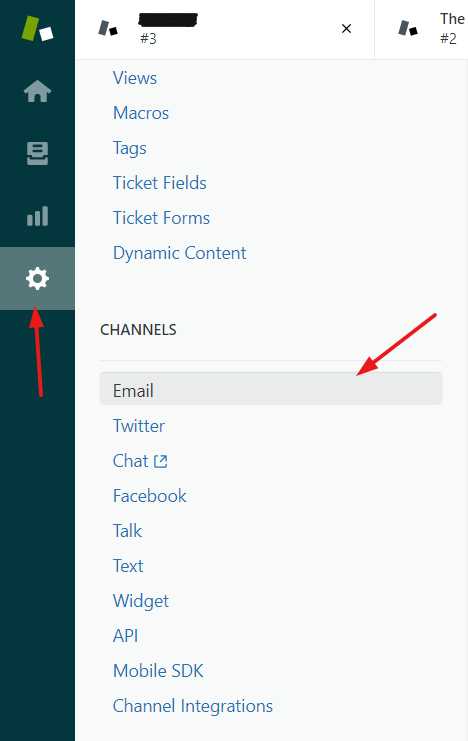
E.g v=spf1 ip4:17.67.137.221 include:mail.zendesk.com include:thirdpartyservice.com ~all - After the record is added in your DNS zone, navigate to Zendesk and select Admin > Channels > Email

- Hover over “Add Address” and select “Connect External Address”.

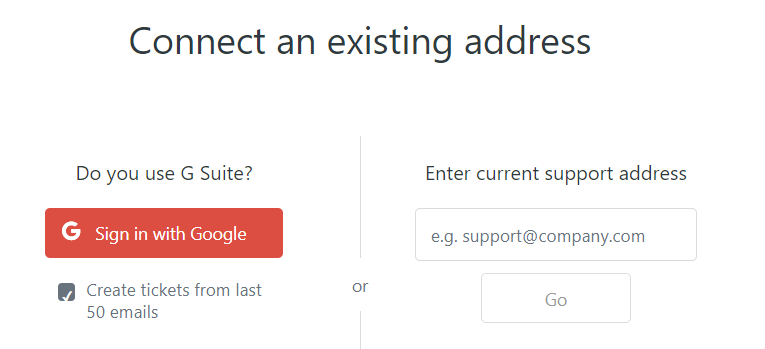
- Provide an email address or connect to Google Workspace if you already use their services.

- Ensure automatic forwarding incoming email to Zendesk Support.
Here are the steps for some email vendor automatic forwarding steps:
- When the Zendesk Automatic Forwarding is set up, select on the newly added address and select “Verify Forwarding”

- Select the SPF and click on the “Verify SPF Record” button.

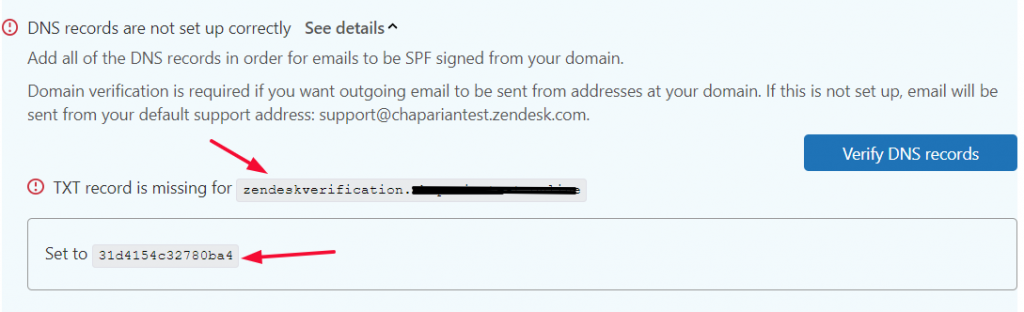
- Then select the DNS Records section and copy the name and the uniquely provided TXT record.

- Head to your DNS zone and create a new TXT record and add the following information provided by Zendesk.

- Navigate Back to Zendesk DNS Records and click on the “Verify DNS Records” button.


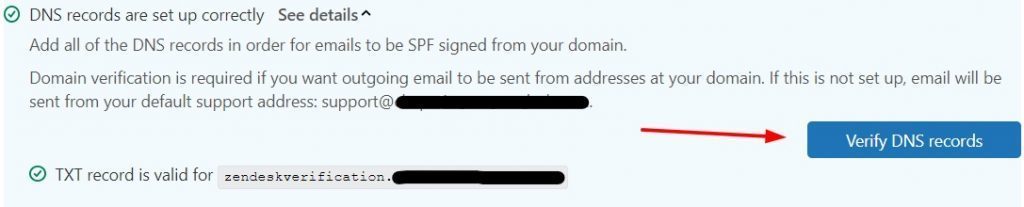
Finally, after completing these steps, your Zendesk SPF record will be DMARC Compliant!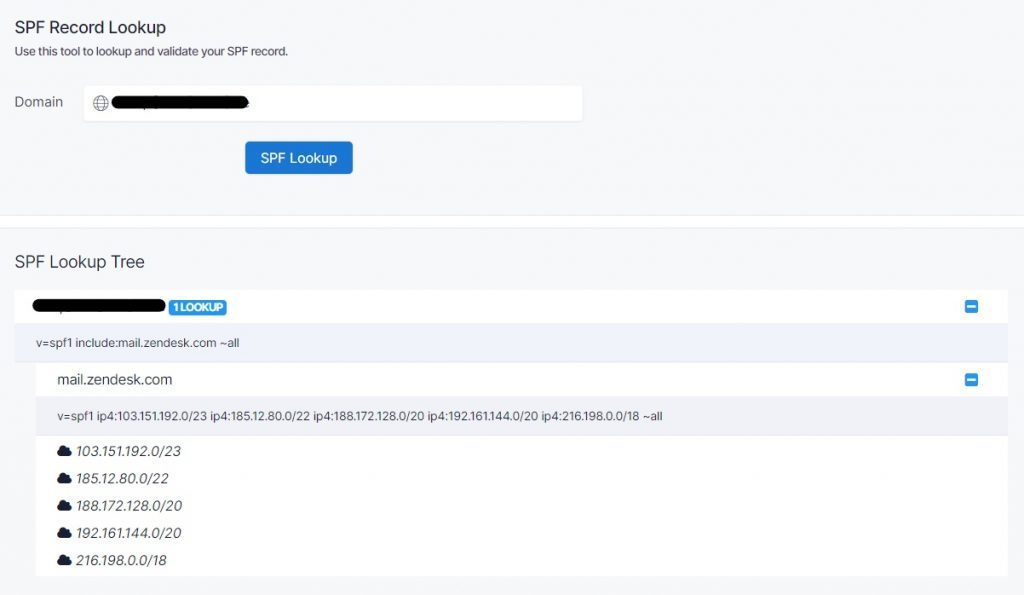
DKIM Record Setup
- Navigate to Zendesk and select Admin > Channels > Email

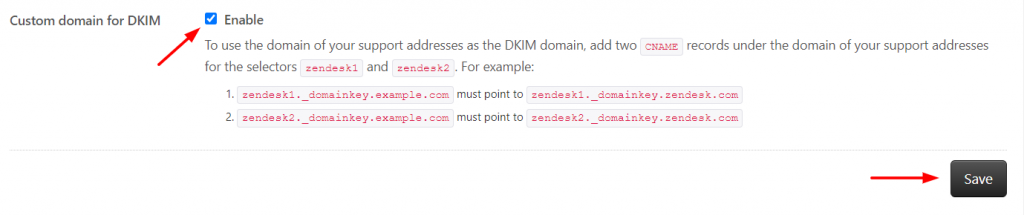
- Locate the section “Custom domain for DKIM”

- Navigate to your DNS zone and create two new Zendesk CNAME records.
For the first CNAME record, in the Name field, enter zendesk1._domainkey.your_domain_name.com. As for Target field, enter zendesk1._domainkey.zendesk.com
For the first CNAME record, in the Name field, enter zendesk2._domainkey.your_domain_name.com.
As for Target field, enter zendesk2._domainkey.zendesk.com

- When both CNAME records are added in your DNS zone, head back to Zendesk, navigate to Custom domain for DKIM and click on the “Enable button” and then click on “Save”.


Now Zendesks’ DKIM record is configured and activated to pass DMARC!
Following the step of enabling and saving the updated DKIM records, navigate to our DKIM Record Lookup tool to ensure the records are set up correctly.
In the Selector section type zendesk1 or zendesk2 and type your domain name in the Domain section.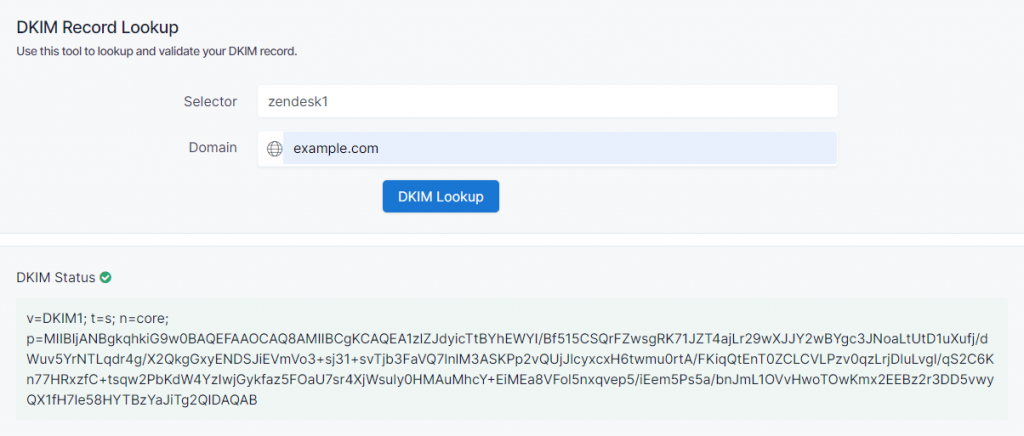
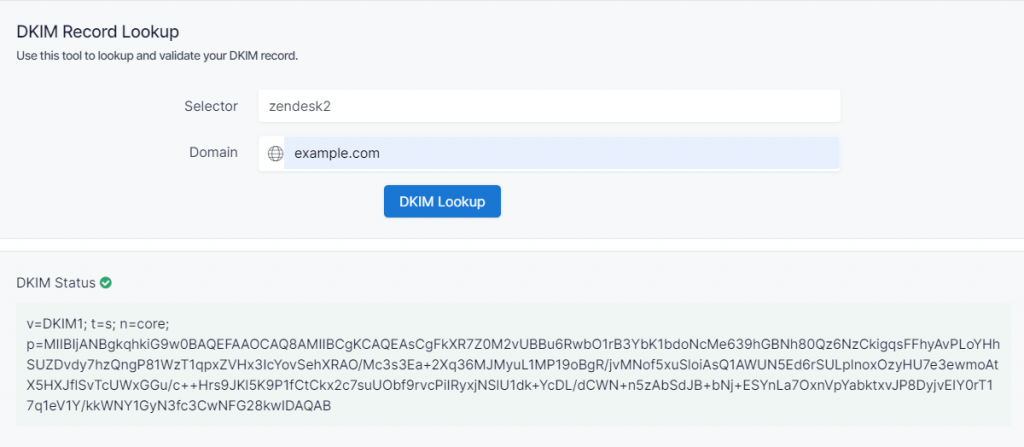
When the DKIM status is shown the green color, that indicates the record is set up correctly. You can read more about Zendesk SPF and DKIM Configuration here.
Important note: If the provider recommends publishing also a DMARC record, there’s no need to do so if you already have a DMARC record in place, as each domain can only have one DMARC record.