


Setting up email authentication can feel confusing at first, so most people prefer a simpler approach. If you want to learn how to implement DMARC without getting stuck in too many technical steps, using a guided tool really helps.
DMARC implementation is not just about adding a single record; you need proper alignment, correct DNS settings, and a clear understanding of who is sending email from your domain. EasyDMARC makes all this easier to follow, so you can set things up correctly and keep your domain safe from misuse.
What is DMARC Implementation?
DMARC implementation means setting clear rules that tell receiving mail servers what to do when they get an email from your domain. It works only when SPF and DKIM are already set up and aligned, so that part has to be sorted first. After that, you create a DMARC record with your chosen policy, set your reporting emails, and publish it in your DNS. This record helps mailbox providers check if the email actually came from you or if someone is trying to spoof your domain.
In the early stages of implementing DMARC, most people choose a “none” policy. It simply lets you see who is sending emails from your domain without actually blocking anything. The reports you get will show which platforms are sending your emails, which ones are failing SPF or DKIM, and what needs to be fixed.
Once everything looks stable and there are no surprise senders, you can move to stricter policies: quarantine (where suspicious emails land in spam) or reject (where suspicious emails are outright blocked). This is basically how you can implement DMARC in a safe and step-by-step way, so your legit emails keep working while your domain becomes harder to misuse.
Steps to Implement DMARC With EasyDMARC
When you start implementing DMARC with EasyDMARC, the whole process becomes easier to follow because each step builds on the previous one. These steps show how to implement DMARC steadily.
Step 1: Identify All Domains
List every domain and subdomain you use for sending email. You also have to include the ones used by third-party vendors who send emails from your domain, like marketing tools or CRM systems. This helps you avoid gaps later and ensures all sending sources are covered in the setup.
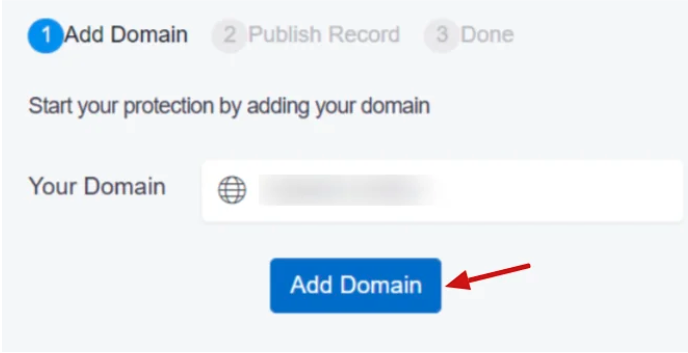
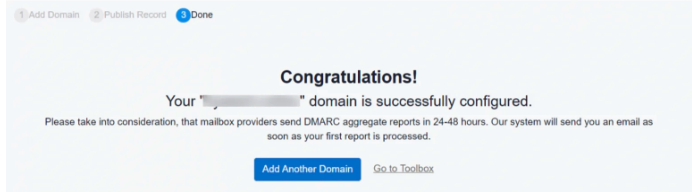
Step 2: Add Your Domain to EasyDMARC
Sign in and add your domain inside the dashboard. EasyDMARC will run an initial scan to detect your SPF and DKIM records, as well as any existing DMARC record. It also reflects authentication gaps and sending sources that need attention.
Note- If you don’t have the prerequisite SPF and DKIM records, use EasyDMARC’s SPF record generator and DKIM record generator to create them before producing a DMARC record for your domain.
Step 3: Create a DMARC Record
Use the EasyDMARC Record Generator to create your DMARC record. You have to:
- Enter your domain and choose the policy you want to use.
- Add the email addresses where you want to receive DMARC reports (both aggregate and failure).
- Then click “Generate A DMARC Record.”
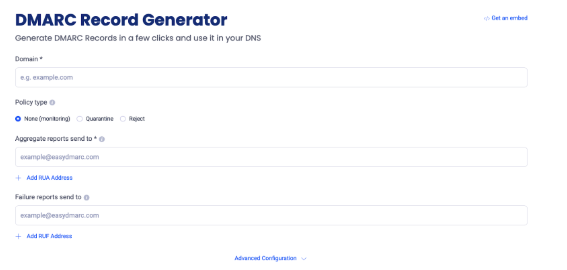
Please note that the advanced configurations in the tool are only for fine-tuning extra tags. You can skip them and still get a fully valid DMARC record. We suggest maintaining a simple, minimal DMARC record initially.
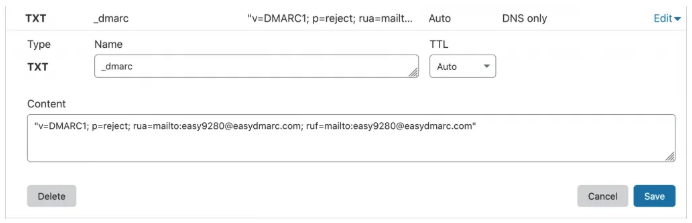
Step 4: Publish the DMARC Record in Your DNS
Go to your DNS and add a TXT record at the hostname _dmarc. Paste the DMARC record generated in Step 3 and save it. DNS changes may take upto 72 hours to propagate across the Internet.
Step 5: Wait for DMARC Reports to Arrive
DMARC aggregate reports usually start coming within 24 to 72 hours of successful implementation. These reports show which platforms are sending emails from your domain and whether they pass SPF and DKIM checks or fail alignment checks.
Step 6: Analyze the DMARC Data
Use EasyDMARC’s DMARC report analyzer to read the XML reports in a visual format. You’ll see failing sources, lookalike activity, and legit services that need fixes. This analysis guides your next steps before moving to stricter policies.
Common DMARC Setup Issues
Even when you follow all steps correctly, a few issues can slow down the process of implementing DMARC. These are the two most common problems you’ll see-
1. DNS Not Updating
Sometimes your DMARC record doesn’t show up right away because your DNS is still refreshing. Some providers update in a few minutes, while others can take several hours. During this time, EasyDMARC may reflect “No DMARC record found,” and that’s normal when you are learning how to implement DMARC. Just make sure the TXT record is added at the right host name (_dmarc) and there’s only one DMARC record. If everything looks correct, wait for the TTL to finish and check again.
2. Misaligned SPF or DKIM
DMARC works only when SPF or DKIM alignment is correct. If your sending tool uses a different ‘From’ domain, alignment fails even if both checks pass separately. This is one of the most common issues people face when learning to implement DMARC.
So, to fix it, check that the ‘Mail’ From domain and the DKIM ‘d=’ domain match your visible ‘From’ address. You may need to update your sender settings or turn on custom DKIM. Once alignment matches, your DMARC reports start looking much cleaner.
Final Check: Confirming DMARC Enforcement
Common setup issues usually show up in the first few days of dmarc implementation, and most of them are easy to fix once you know what to look for. DNS delays, missing entries, or alignment problems just mean something in the chain hasn’t updated yet, or a sender needs a small fix. Once your records and alignment are in place, the whole setup becomes stable, and your email channel stays much safer.
With the steps done right, you get clean visibility, fewer spoofing attempts, and better control over who uses your domain to send emails. If you want to make the process even simpler, sign up and enjoy the 14-day free trial.
Frequently Asked Questions
You can add a DMARC record without them, but it won’t work as intended. DMARC depends on SPF and DKIM checks. For a DMARC pass, the email needs to pass SPF with alignment or DKIM with alignment. If both are missing, DMARC will always fail.
DMARC can block people from sending fake emails using your domain, but it can’t stop all phishing on the internet. Attackers can still send phishing from other domains. DMARC mainly protects your own domain from being misused.