


In order for your logo to appear next to your email as part of you BIMI records, you need to have your logo hosted online. This means that your logo should meet certain specification and be in SVG format. The easiest way to do that is to convert the logo to SVG.
BIMI, or Brand Indicators for Message Identification is the newest standard that attaches your brand’s logo next to your authenticated email messages. Sounds exciting, right? But, for BIMI to work as intended, first you need to make sure to reach certain criteria with the existing email authentication protocols (SPF, DKIM and DMARC) – which includes:
In this article, we will cover all the necessary steps needed to be taken for you to create a BIMI Compatible SVG (Scalable Vector Graphic) logo file.
- Convert your company’s original logo to SVG ( from JPG/PNG/PDF)
- Converting JPG from SVG Tiny 1.2 to SVG Tiny Portable / Secure
- How to host, generate & publish your BIMI Record
- Using EasyDMARC’s BIMI Lookup tool for verification
Convert your company’s original logo to SVG
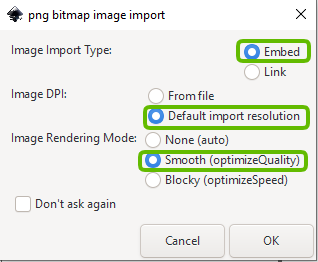
1. Download InkScape and upload your logo into the tool. In this example, we will be working with EasyDMARC’s PNG logo file:
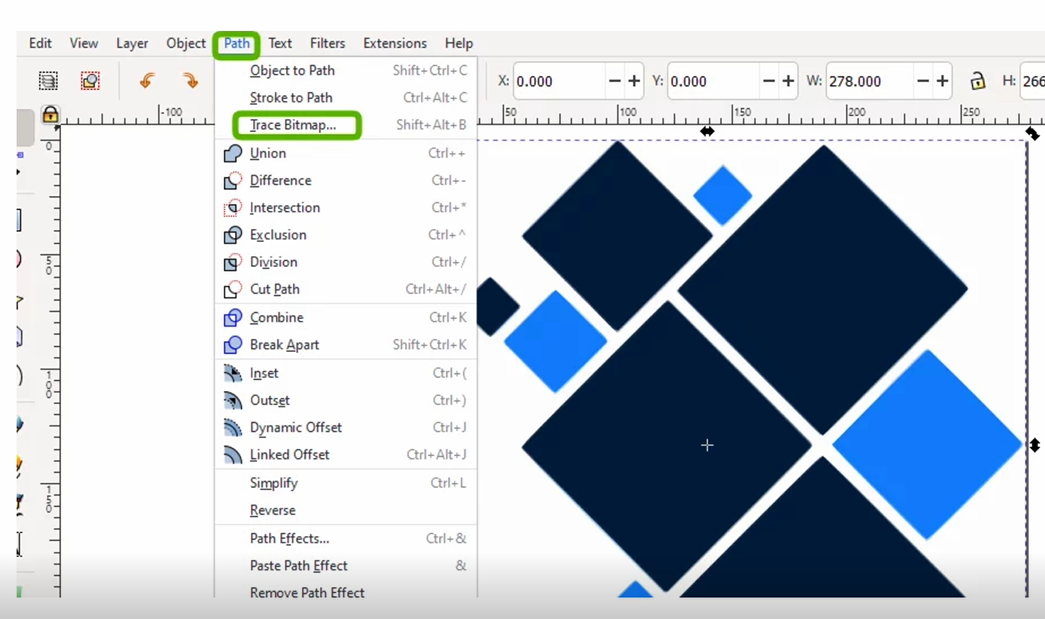
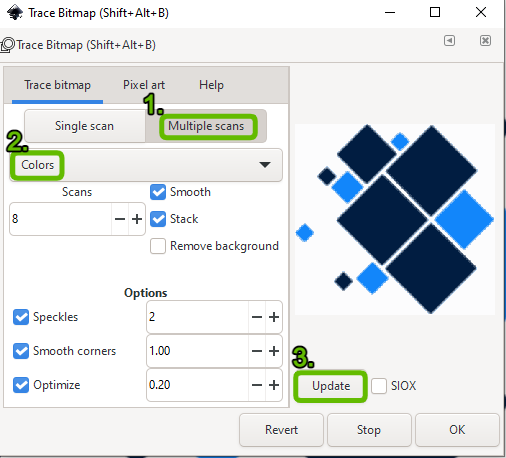
2. Select your image file, go to Path and then Trace Bitmap
Note: You can still make adjustments to your logo, but that’s not part of this article
4. Drag your traced image on the side, and delete the original one
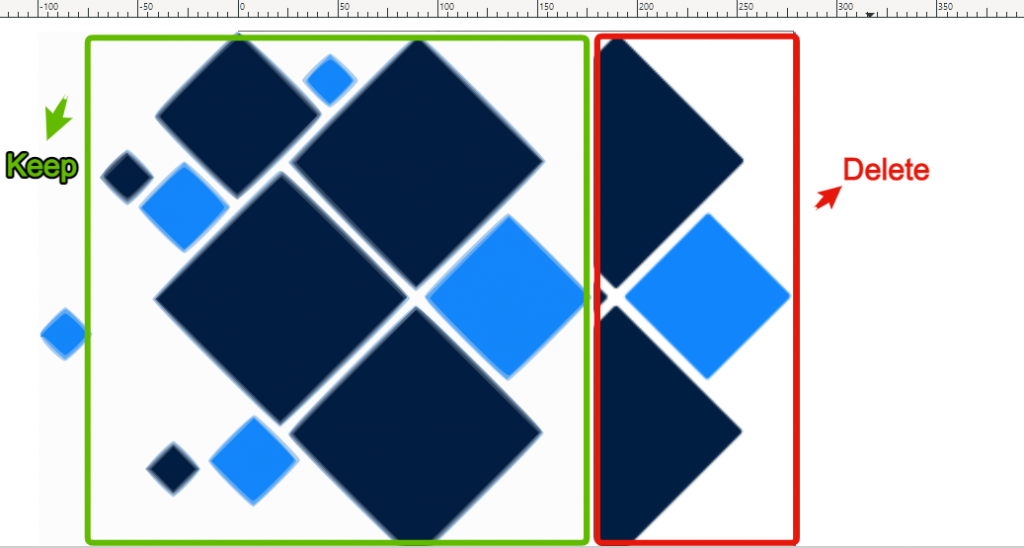
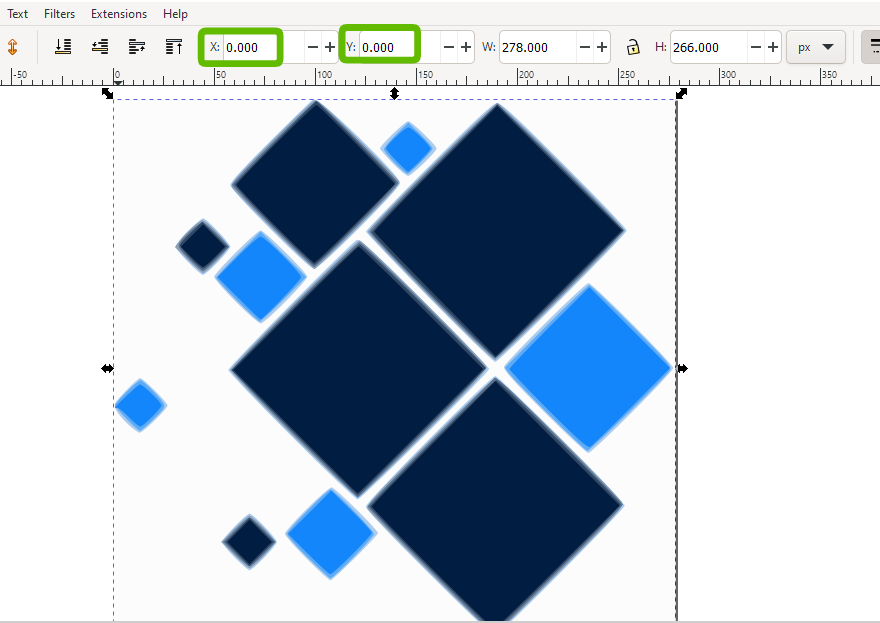
5. Center back your traced image by applying X:0, Y:0
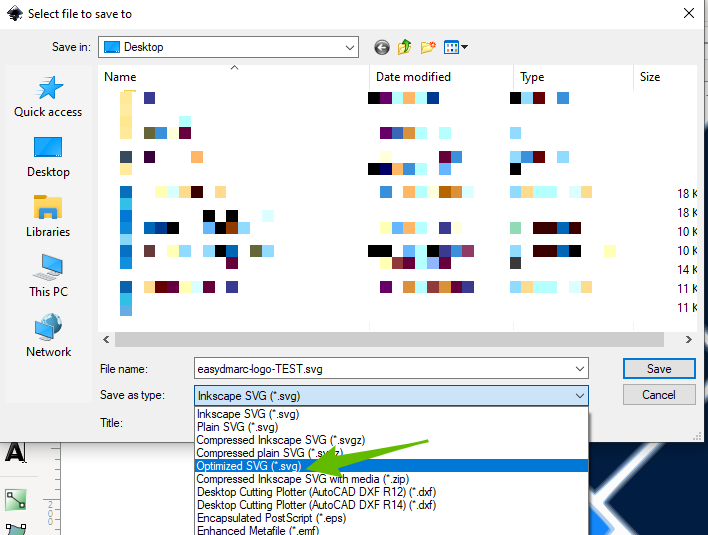
6. Go to File -> Save As -> Choose Optimized SVG and save your logo
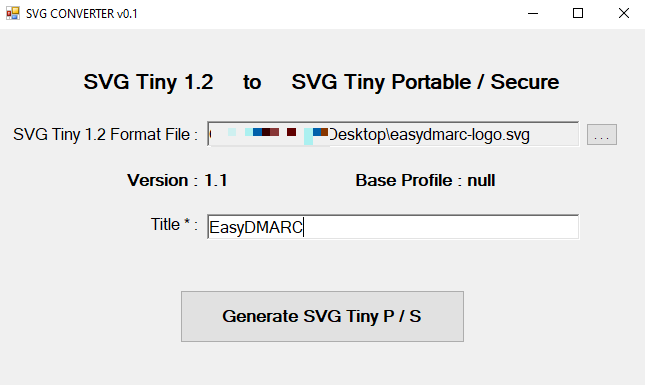
Converting from SVG Tiny 1.2 to SVG Tiny Portable / Secure
The specific SVG profile used by BIMI is defined as SVG Tiny Portable/Secure.
- Download the converter tool and select the SVG file that you’ve created
- Input your Title (your company name) and generate a new SVG Tiny P/S.
How to Host, Generate & Publish your BIMI Record
Now you have your logo ready to be hosted on your server using SCP, FTP (e.g. FileZilla), or your installed server management software (e.g. Webmin or Vesta Control Panel). Get your logo design to be publicly accessible via HTTPS protocol.
- Go to Generate a BIMI Record
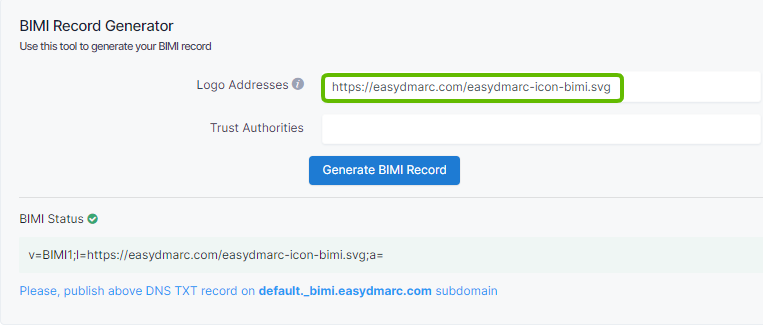
Logo Address: HTTPS URI to SVG fileTrust Authorities: Leave it as Blank (Currently, Verified Mark Certificates or VMCs are not accessible to the public)
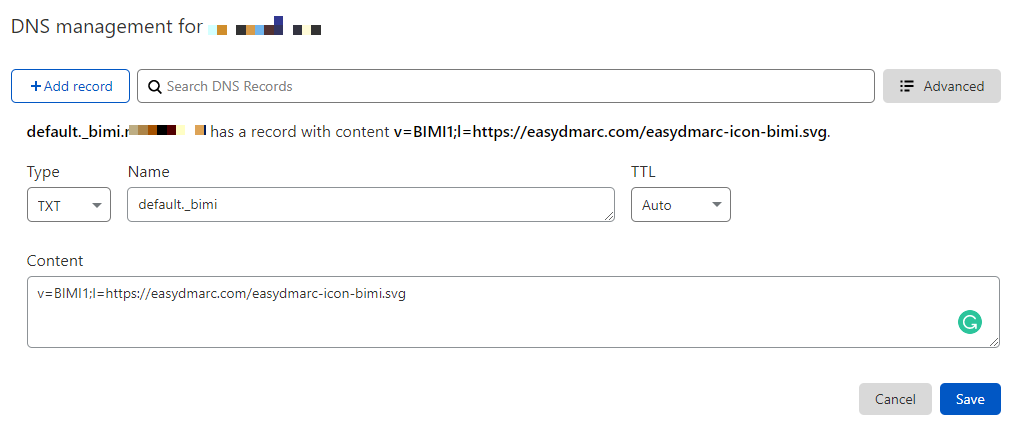
Type: TXT
Name: default._bimi
Content: [Your Generated BIMI Record, starting with “v=BIMI1;…”]
Using EasyDMARC’s BIMI Lookup tool for verification
After successfully publishing your BIMI Record, perform BIMI Record Lookup for verification.

You can check out our BIMI Record Tools for a one destination solution to all BIMI related topics