


DMARC (Domain-based Message Authentication Reporting and Conformance) is a protocol that gives domain owners the ability to protect their organization & domain from unauthorized use known as email spoofing. DMARC was launched in 2012 as an anti-phishing tool. It was supported by mail providers AOL, Comcast, Google Workspace, Netease, Yahoo! Mail and newsletters American Greetings, Bank of America, Facebook, Fidelity, JPMorgan Chase & Co., LinkedIn, PayPal. But how to set up DMARC without tech support?
How does DMARC work?
In order to understand how does DMARC work, think about the following scenario. Imagine you are sending out a bulk email. In this case, it is important for an email provider, for example, Google, to know that you have allowed the service of mass email-mailings to send letters on your behalf. Those emails from your domain are sent by you, and not by scammers pretending to be you.
DMARC also regulates this process. It tells the email providers what to do with the message if the SPF and DKIM records are incorrect or unaligned. In order to find out why DMARC is failing, follow the link. Thus, DMARC is responsible for email authentication. That is, for the sender’s authentication procedure.
DMARC: what is it and why do you need it?
DMARC tells the postal provider what to do with the letter depending on the results of reading DKIM and SPF.
It also tells the server to send a report to the domain administrator’s mail (or an address specified in the DMARC “rua” tag) with information about which letters were sent and how the provider handled the letters.
DMARC is a great tool for tracking mail delivery and understanding how ISPs receive and process your mail. Based on this, you can improve your deliverability and reclaim 5% or more of your base, which may not receive emails for technical reasons.
How do I set up DMARC without tech support?
You can use the DMARC Record Generator tool on the EasyDMARC website to create a DMARC record with a few simple steps:
- Go to EasyDMARC free DMARC Record Generator tool here.
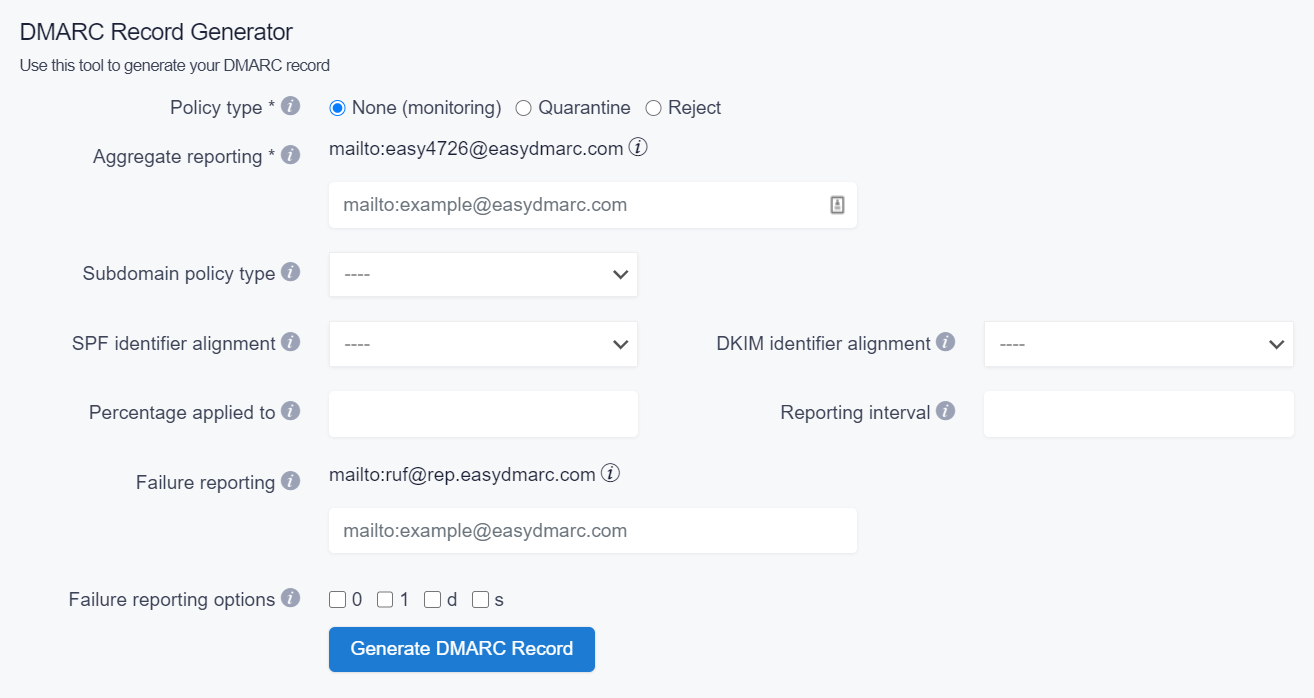
2. Select the Policy type (choose from “none”, “quarantine”, and “reject”).
3. Choose your Aggregate reporting address (for instance mailto:[email protected]).
4. Select a Subdomain policy type (again, choose from “none”, “quarantine”, and “reject”).
5. Next, select SPF identifier alignment (can be chosen either “relaxed” or “strict”).
6. Then choose DKIM identifier alignment (can be chosen either “relaxed” or “strict”).
7. Write down the Percentage applied for your DMARC policy (the percentage of messages from the domain owner mainstream to which the DMARC policy is applied to, the default is 100).
8. Also, choose the Reporting interval (the requested interval in seconds between aggregate reports, the default is 86400).
9. Choose your Failure reporting address (for instance mailto:[email protected]).
10. And lastly, pick out Failure reporting options (controls the type of reports that are sent out).
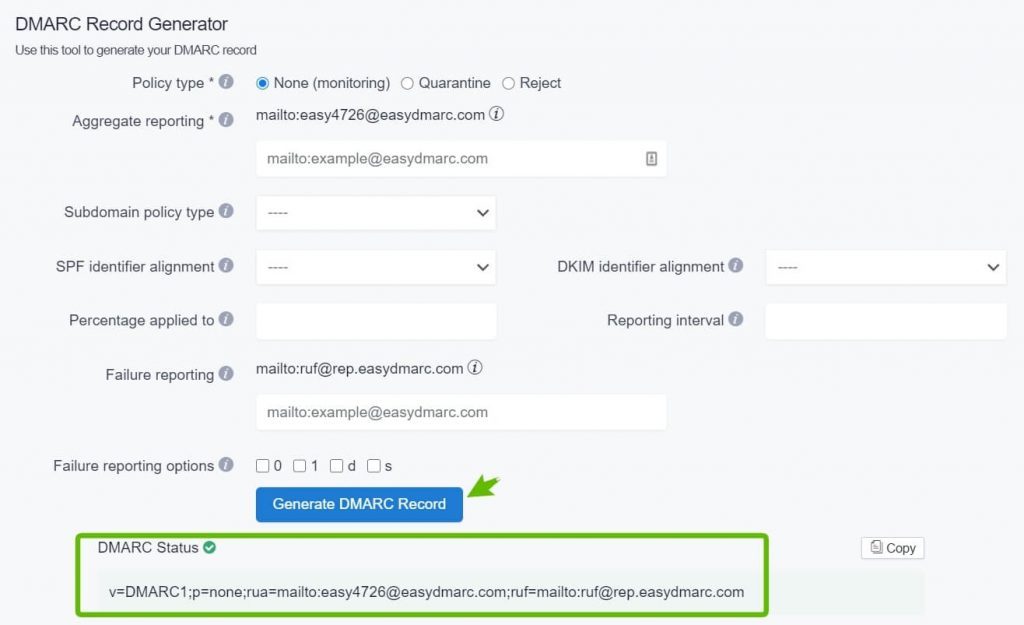
11. Once the tags are customized, click on the button that says “Generate DMARC Record” on the bottom.
12. Your DMARC record is created!
For a more detailed explanation about each DMARC tags, read this article on our website.
How to add the DMARC record in DNS
Here is an example of a published record in the Cloudflare DNS
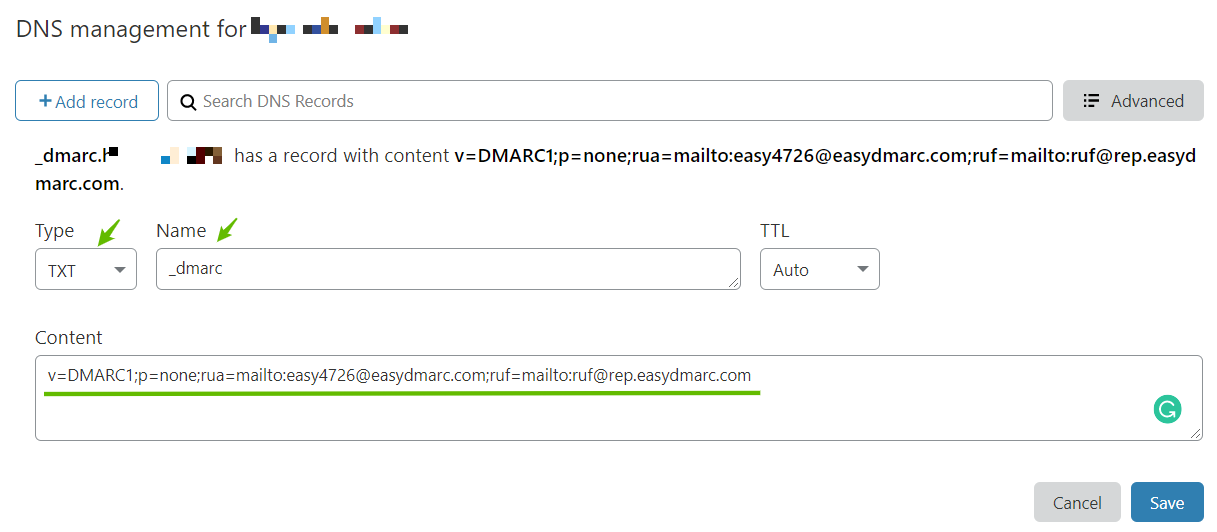
Note that the Name section of the TXT record should be _dmarc
Once the TXT record is saved in the DNS, use the DMARC record lookup tool on the EasyDMARC website to ensure the record is set up correctly.
You have set up DMARC: what to do next?
Once your DMARC Record is present, you will start receiving DMARC Reports. The reports are usually generated every 24 hours. Through EasyDMARC’s reporting engine, you will monitor all the outgoing mail streams that are being generated from your domain name. This will help further with tracking and identifying both your legitimate sources and cybercriminals who are attempting to forge your domain name for fraudulent activity.
Thus, the ultimate goal is to make sure all your legitimate sources are properly authenticated with SPF and DKIM, which can lead you to achieve DMARC enforcement (p=reject) to block any further fraudulent attempts your brand may encounter.